
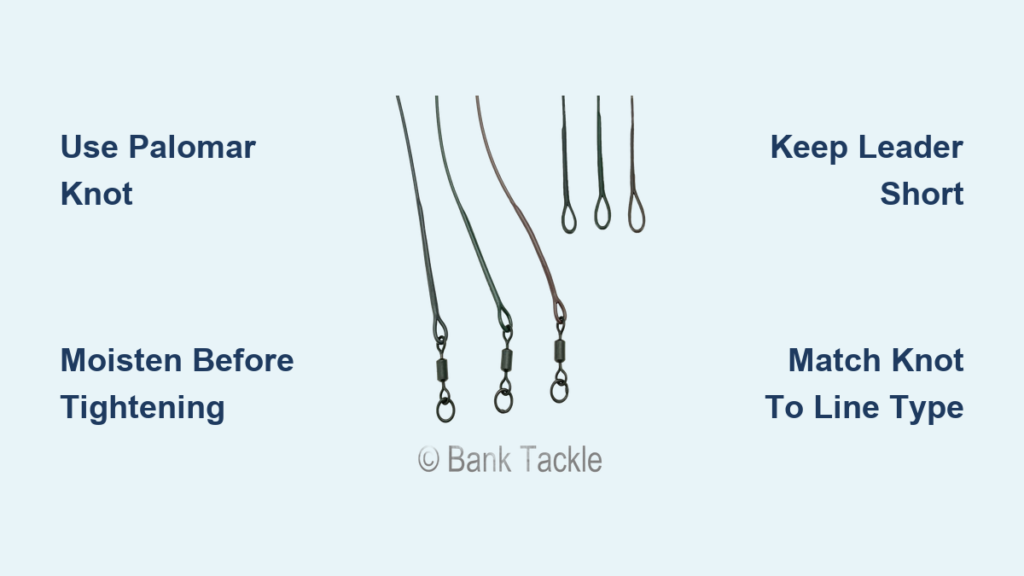
If you’ve ever reeled in your line only to find a tangled mess after casting a spinner or spoon, you’ve experienced line twist—one of the most common frustrations in fishing. The solution is a simple but powerful tool: the swivel leader. Tying a swivel leader to your fishing line protects your line, improves lure action, and increases your chances of landing fish. This guide covers exactly how to tie a swivel leader to fishing line using the best knots for every line type.
Whether you’re using monofilament, fluorocarbon, or braided line, knowing how to tie a swivel leader to fishing line correctly ensures your rig performs under pressure. You’ll learn which knot to use, when to use it, and pro tips to avoid common mistakes like guide damage, knot slippage, and line burn.
Why Swivels Matter in Your Fishing Rig
A swivel is a small rotating metal ring that allows two sections of line to spin independently. The primary benefit is line twist prevention. When using lures that rotate naturally in the water, such as spinners, spoons, crankbaits, and streamers, the line can twist repeatedly during retrieval. Without a swivel, this rotation transfers up the line to your reel, causing tangles, line memory issues, and potential structural weakening of monofilament or fluorocarbon.
Swivels also provide a secure connection point between your main line and leader. They allow quick leader changes without retying your entire rig, which saves time on the water. In specific setups like Carolina rigs, swivels separate the sliding weight from the leader, letting bait move naturally while the weight slides freely.
Choose the Right Swivel for Your Target
Swivels come in different sizes, and matching size to your line and target species is critical. Using a bulky swivel on light trout tackle can spook fish, while a tiny swivel on a saltwater setup may fail under load.
Micro swivels (size 10-6) work best for trout, panfish, or finesse bass fishing with 2-8 lb test line. Medium swivels (size 4-1/0) suit freshwater bass, walleye, or inshore saltwater with 10-20 lb test. Heavy-duty swivels (2/0 plus) are required for offshore trolling, muskie, or tarpon using 30-plus lb test braid.
Always check the breaking strength rating on the swivel packaging and ensure it exceeds your line’s test strength. Cheap swivels often seize up, rust quickly, or break under stress. Brands like SPRO and Mustad are trusted by pros for smooth rotation and durability.
How to Tie an Improved Clinch Knot for Mono and Fluoro
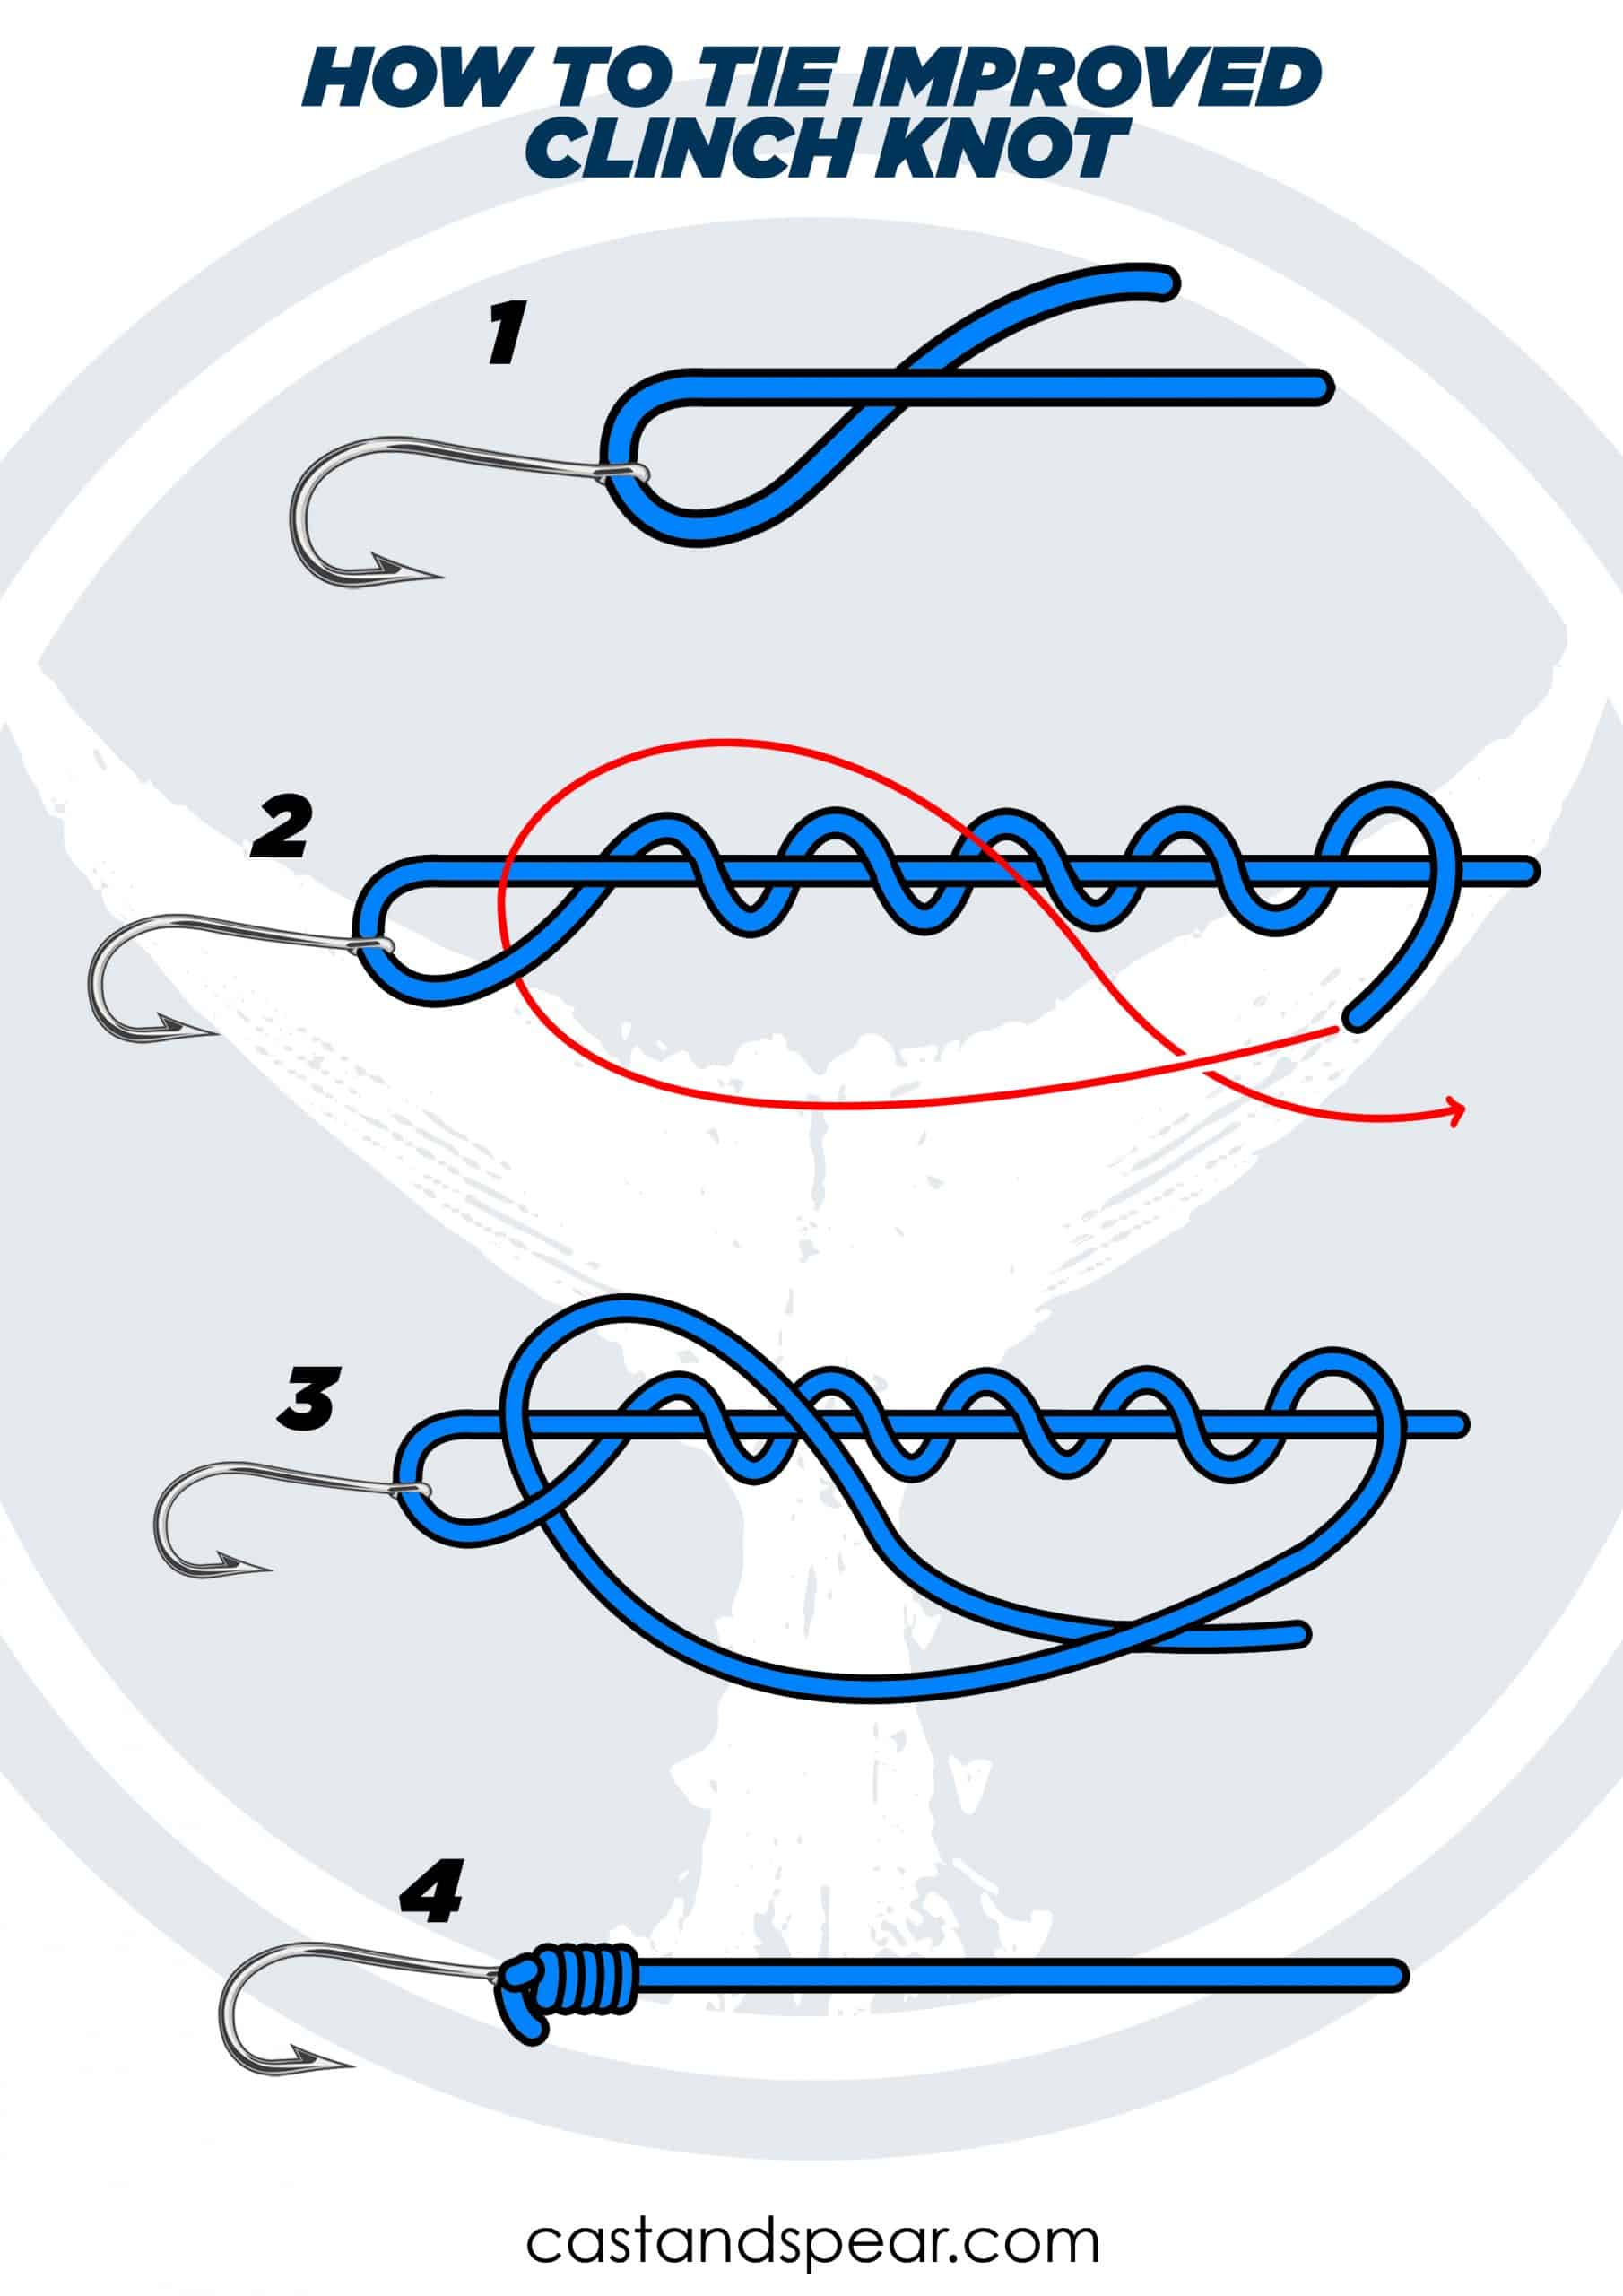
The Improved Clinch Knot is the go-to choice for monofilament and fluorocarbon lines. It’s simple, strong, and reliable when tied correctly. This knot creates a secure, low-profile connection that holds up to 95% of line strength when moistened and tied properly.
Thread the line through the swivel eye, leaving 6 inches of tag end. Wrap the tag end around the standing line 5 times for thick line or 7-9 times for thin line. Pass the tag end through the small loop near the swivel eye, then back through the large loop you just created.
Moisten the knot with saliva or water before tightening. This reduces friction heat that can weaken the line. Pull both the standing line and tag end to tighten evenly, then trim excess close to the knot.
On thin fluorocarbon, use 8 wraps and pull slowly to prevent slippage.
How to Tie a Palomar Knot for Braided Line

Braided line is slick and doesn’t grip friction-based knots well. The Palomar Knot solves this by doubling the line through the swivel eye, creating a stronger mechanical lock. This knot holds over 98% of braid’s breaking strength and is less prone to slipping than Clinch or Blood Knots.
Double 6 inches of line to form a loop. Pass the loop through the swivel eye. Tie an overhand knot with the doubled line, but don’t tighten it yet. Pull the swivel through the overhand knot loop.
Moisten the knot thoroughly with water or saliva. Friction heat can melt braid during tightening if skipped. Pull both ends to cinch down firmly, then trim the tag end.
Never use the Improved Clinch or Half Blood Knot with braid—they will slip under load.
How to Tie a Half Blood Knot for Mono and Fluoro
The Half Blood Knot, also called Fisherman’s Knot, works well with monofilament and fluorocarbon, especially thick lines. It’s a time-tested, reliable knot for securing swivels, hooks, and lures. However, never use this knot with braided line—the slippery nature of braid causes significant strength reduction and potential failure.
Thread the line through the swivel eye. Wrap the tag end around the standing line 5-9 times, using more wraps for thinner line. Pass the tag end through the loop adjacent to the swivel eye.
Moisten and pull both ends to tighten the coils snugly against the eye. Trim excess tag end close to the knot.
This knot is ideal for monofilament leaders over 10 lb test and fluorocarbon in clear water setups where maximum knot strength is needed without doubling the line.
The Offshore Swivel Knot for Tagless Finishes
This advanced knot creates a clean, tagless finish ideal for rigs where snagging is a concern. There’s no excess tag end to trim, and it’s extremely secure with heavy lines. This knot is popular in offshore trolling and deep-sea rigs.
Thread the line through the swivel eye twice, creating a loop extending from the swivel. Twist the loop once directly above the swivel. Fold the twisted loop back over the standing line and hold the intersection firmly.
Rotate the swivel through the opening of the loop 3-6 times. This creates tight coils around the standing part. Pull the standing line to cinch coils tight.
The result is a self-locking knot with zero protruding ends.
Loop Knots for Maximum Lure Action

For lures like streamers, soft plastics, or topwaters, a loop knot allows free movement, enhancing action and triggering more strikes. This creates a flexible connection so the lure wobbles naturally without torque transfer, even without full swivel rotation.
Form an overhand knot in the line, leaving a 3-inch loop. Pass the tag end through the swivel eye and back through the overhand knot. Wrap the tag end around the standing line 2-3 times, then pass it through the loop again.
Moisten and pull to tighten.
This technique works best for topwater frogs, streamer flies, and jerkbaits where natural movement is essential for triggering strikes.
Common Mistakes to Avoid When Tying Swivel Knots
Don’t skip moistening the knot. Friction generates heat as you tighten, especially with fluorocarbon and braid. This heat can weaken or melt the line. Always wet the knot before pulling it tight. Additionally, tightening dry knots can burn your fingers—keep skin clear during cinching.
Use the correct number of wraps. Too few wraps cause slippage, while too many create bulk and potential jamming. For lines over 15 lb test, use 5 wraps. For 10-15 lb test, use 6-7 wraps. For lines under 10 lb test, use 8-9 wraps.
Avoid overlapping coils. Allow wraps to lie parallel rather than crossing over each other haphazardly. This reduces knot strength significantly.
Preventing Guide Damage When Using Swivels
Swivels cannot pass through rod guides, especially the tip-top guide. If you reel one in, it can crack the guide ring or fray your line. This is particularly dangerous at night when visibility is low.
Keep your leader shorter than rod length so the swivel never reaches the guides. On a 7-foot rod, use leaders under 6 feet. This prevents the swivel from lodging in the guide during retrieval.
Alternatively, slide an 8-10 mm plastic bead onto the main line before the swivel. The bead stops the swivel from reaching the guide. However, this adds complexity to your setup.
Swivel vs. Direct Line-to-Line Connections
The decision between using a swivel or a direct line-to-line knot involves trade-offs. Swivels provide excellent line twist prevention but limit casting distance due to leader length constraints. They add two knots and hardware as potential failure points, though high-quality knots on both sides can exceed single line-to-line knot strength.
Direct line-to-line knots like the FG or Alberto offer unlimited casting distance and better stealth but require more practice to master. They also provide no line twist prevention on their own.
Use swivels for spinners, spoons, and Carolina rigs where twist prevention is critical. Avoid swivels in clear water when targeting wary fish, or when fishing at night where guide damage risk is higher.
Testing and Maintaining Your Swivel Connections
Always pre-test every knot before casting. Pull hard on both the swivel and standing line to seat the knot. Check for slippage, uneven coils, or gaps near the swivel eye. If it slips or feels loose, retie immediately.
Inspect swivels regularly. Saltwater anglers should rinse swivels after every trip. Freshwater anglers should check monthly. Look for corrosion, rough rotation, or bent arms. Replace any swivel that doesn’t spin freely.
Carry sharp scissors—dull tools crush line ends and weaken knots. Practice tying knots at home so muscle memory saves time on the water.
Final Tips for Tying Swivel Leaders Successfully
Match your knot to your line type. Use Improved Clinch or Half Blood for monofilament and fluorocarbon. Use Palomar for braided line. Never use friction-dependent knots on braid.
Keep swivels far from lures in clear water. Place the swivel 3-4 feet from the lure to reduce visibility and avoid spooking fish with metallic flash.
Learn line-to-line knots like the FG or Alberto knot. Mastering these reduces swivel dependence, boosts casting distance, and eliminates guide damage concerns.
Frequently Asked Questions About Tying Swivel Leaders
What is the strongest knot for attaching a swivel to monofilament?
The Improved Clinch Knot is the strongest and most reliable knot for monofilament. It holds up to 95% of line strength when tied correctly and moistened before tightening. The Half Blood Knot is also a strong alternative for thicker mono lines.
Can I use a swivel with braided line?
Yes, but you must use the Palomar Knot. Never use friction-based knots like the Improved Clinch or Half Blood with braid—they will slip due to braid’s slippery nature. The Palomar’s doubled-line design provides excellent grip and holds over 98% of braid’s breaking strength.
How long should my swivel leader be?
Keep the leader shorter than your rod length so the swivel doesn’t reach the guides during retrieval. On a 7-foot rod, use leaders under 6 feet. In clear water, place the swivel 3-4 feet from the lure to reduce visibility and avoid spooking fish.
Why does my swivel keep twisting and causing tangles?
A seized swivel defeats its purpose. Cheap swivels often seize up from rust or debris. Test every swivel by spinning it between your fingers before tying. If it doesn’t spin freely, replace it with a quality brand like SPRO.
Can I use a swivel for fly fishing?
Yes, swivels work well in fly fishing for managing line twist, especially with streamers and nymphs. Position the swivel where the leader transitions to the tippet, keeping it several feet from the fly to maintain stealth in clear water.
Should I moisten the knot before tightening?
Always moisten the knot. Friction heat generated during tightening can weaken or melt fluorocarbon and braid. Saliva or water helps coils seat tightly and preserves line integrity. Skipping this step is one of the most common mistakes anglers make.
Key Takeaways for Tying Swivel Leaders to Fishing Line

Knowing how to tie a swivel leader to fishing line is a fundamental skill that protects your gear and improves your fishing success. The right knot depends on your line type: use Improved Clinch or Half Blood for monofilament and fluorocarbon, and use Palomar for braided line. Always moisten knots before tightening to prevent heat damage, and keep leaders short enough to avoid guide damage. Practice these knots at home, test every connection before casting, and invest in quality swivels that spin freely. Whether you’re chasing bass with spinners or trolling offshore, a properly tied swivel keeps your line twist-free and your rig ready for the fight.





