
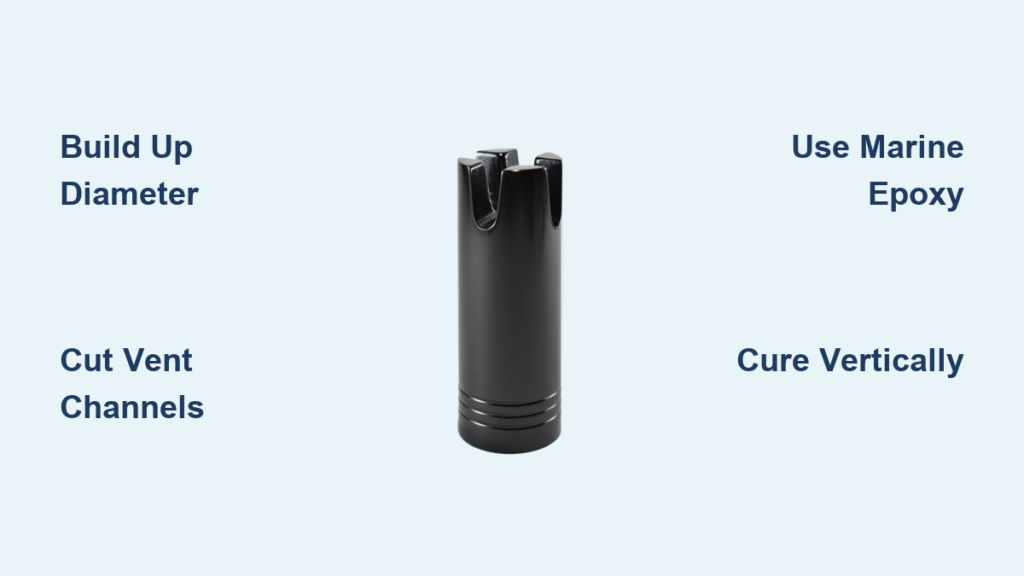
If you’re targeting big game like tuna, marlin, or swordfish, knowing how to install a gimbal on a fishing rod is essential. A properly installed gimbal transforms your heavy-duty rod into a powerful offshore weapon by enabling seamless integration with fighting belts and rod holders. It allows smooth pivoting under extreme pressure, reduces fatigue, and gives you superior control during long battles. Without one, even the strongest angler can be overpowered by a hard-pulling fish.
This guide walks you through every step of installing a gimbal whether you’re retrofitting an older rod or building a custom offshore setup. You’ll learn how to prepare the blank, choose the right materials, apply marine epoxy correctly, and ensure perfect alignment. We’ll also cover modern innovations like the Hidden T Gimbal System and highlight expert tips that prevent common mistakes.
Choose the Right Gimbal Type

Standard vs. Hidden T Gimbals
Two main types dominate offshore setups: standard gimbals and the Hidden T Gimbal System. Standard models are fixed, cup-style fittings made from plastic, aluminum, or stainless steel. They’re permanently bonded to the rod butt and work seamlessly with fighting belts and boat rod holders. These are ideal for custom builds or replacing worn-out ends on heavy trolling rods.
The Hidden T Gimbal is a deployable alternative designed for versatility. When stowed, it lies flush with the rod for easy storage and rod holder use. With a quick snap, it extends into an inverted T-shape that locks against your hip or belt, distributing pressure over a larger area. Its ambidextrous design and textured tread base improve grip on waders or clothing, making it a favorite among charter captains and DIY anglers.
Match Gimbal to Rod Specifications
Not all rods can accept a gimbal. Only use them on heavy (H) to extra-heavy (XH) rods, typically 7 feet or longer, built for offshore trolling or chunking. The rod blank must be robust enough to handle high leverage forces without cracking.
For the Hidden T system, verify compatibility. The internal diameter must be 0.94 inches, and the external diameter should be 1.25 inches to match standard cork or EVA grips. If your blank is undersized, you can build it up with tape or fiberglass thread. Never force a loose fit because proper diameter ensures long-term durability.
Prepare the Rod Butt Correctly
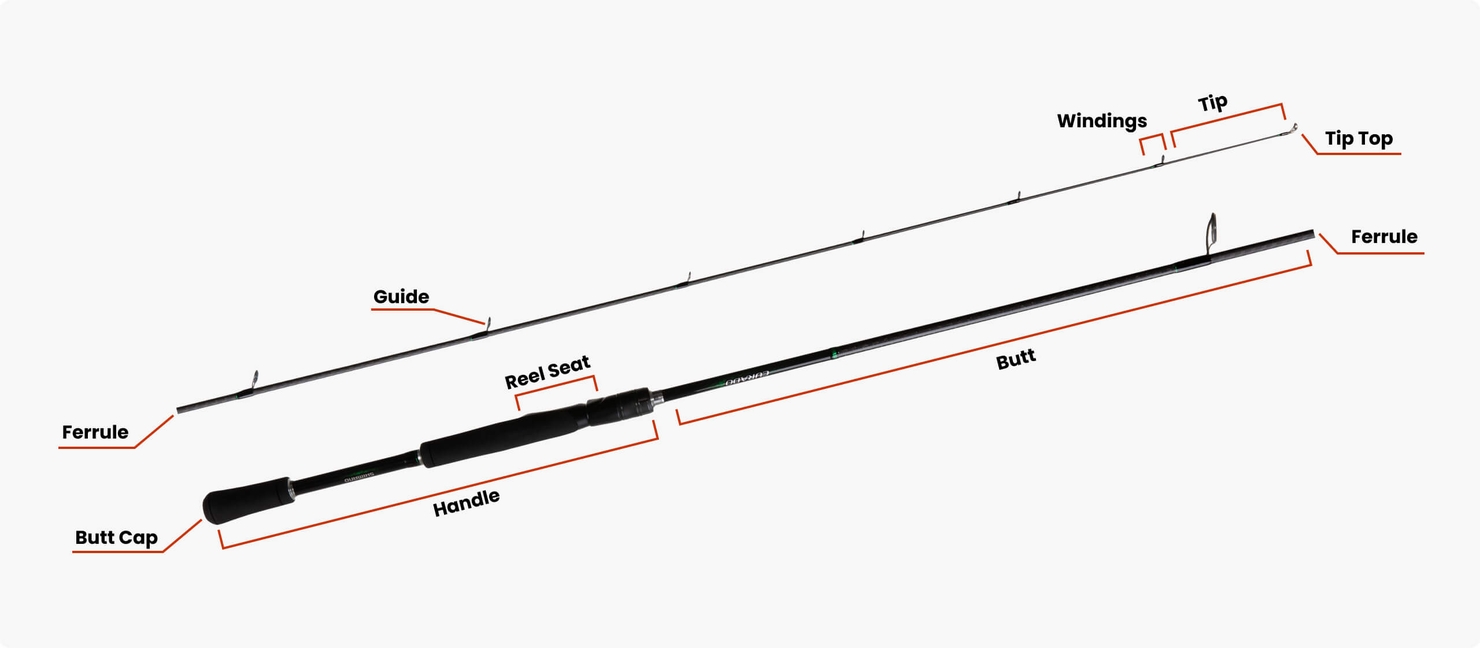
Remove Old Butt Cap or Grip
Start by removing the existing end cap, cork, or foam butt section. Use a utility knife or fine saw to carefully cut away material without damaging the exposed blank. Inspect the base of the rod for cracks, delamination, or soft spots. If damage is present, reinforce or replace the blank before proceeding.
Once clean, wipe the exposed blank with alcohol or acetone to remove oils, dirt, and residue. A pristine surface ensures maximum epoxy adhesion.
Build Up Diameter with Tape
Most gimbals require a snug friction fit over the rod blank. Since blanks taper toward the end, the diameter is often too small. Wrap masking tape tightly around the exposed butt in even layers until the gimbal slides on with resistance but does not bind.
For larger gaps, use drywall tape or fiberglass thread as a stronger buildup material. Apply it wet with epoxy for added strength. Avoid over-wrapping because measuring frequently with calipers keeps you within tolerance.
Cut Vent Channels for Stronger Bond
This step is critical. Cut two to three longitudinal grooves (vents) through the tape using a sharp razor blade. These channels should run parallel to the rod axis and expose the bare blank beneath.
Vent channels allow epoxy to contact the blank directly, creating a mechanical bond. They also let air escape during installation, preventing bubbles, and enable capillary action to draw epoxy deep into the joint. On heavy rods, use at least three vents spaced evenly around the circumference for maximum strength.
Apply Marine-Grade Epoxy Properly
Mix Epoxy in the Gimbal Cup
Use a two-part marine-grade epoxy rated for high-stress, saltwater environments. Mix in a 1:1 ratio according to manufacturer instructions. For convenience, mix directly inside the gimbal’s base cup if it is large enough because this minimizes waste and doubles as a mixing container.
Stir thoroughly for at least 60 seconds to ensure complete curing. Incomplete mixing leads to weak joints and premature failure under the extreme loads encountered when fighting large fish.
Coat Interior and Pre-Wet Vents
Use a stir stick to frost the entire inner surface of the gimbal, including walls, bottom, and edges, just like icing a cake. Then, run the epoxy-coated stick along the edges of the vent channels to pre-wet the exposed blank. This primes the surface for capillary action, pulling epoxy into the grooves as the gimbal is seated.
Do not skimp on glue, but avoid overfilling. Aim for about one-third full in the base.
Install the Gimbal with Twisting Motion
Perform a Dry Fit First
Before applying epoxy, do a dry fit to check alignment. Slide the gimbal over the taped section and verify it seats fully. Check that the reel seat remains straight when the rod is placed in a holder. Confirm there is no rotation that misaligns the guides. Mark the correct orientation with a pencil if needed.
Seat the Gimbal with Rotation
Now apply the epoxy-coated gimbal. Align it properly and begin sliding it on. As you push forward, twist slightly and rotate the gimbal back and forth. This motion distributes epoxy evenly, prevents air pockets, and helps the unit seat fully without binding.
Continue pushing and twisting until the gimbal is flush with or slightly overhanging the end of the blank. Never hammer or force it because if it will not slide on, the diameter is too large and you need to sand down excess tape.
Cure Vertically for Maximum Strength
Stand Rod Upright During Cure
Once seated, stand the rod vertically with the butt end down. Use a rod rack or clamp to hold it steady. Let gravity apply constant pressure, ensuring the gimbal stays fully seated as the epoxy cures.
Place in a dust-free, temperature-stable area between 70 and 80 degrees Fahrenheit. Avoid moving or handling during the cure period.
Follow Recommended Cure Times
Five-minute epoxy requires at least 30 minutes before light handling. Thirty-minute epoxy needs 2 to 4 hours. For full strength, cure overnight (12 to 24 hours) before use. Even if the surface feels dry, internal strength develops slowly, and rushing leads to joint failure under load.
Align for Optimal Performance
Match Gimbal to Rod’s Flex Plane
If your rod has a spine or preferred bending axis, align the gimbal so it does not interfere with natural flex. While not always critical, consistent alignment improves balance and feel during extended fights.
For rods with guides, ensure the gimbal does not rotate the reel seat out of line with the guide path because misalignment affects casting, line management, and stress distribution.
Verify Reel Seat Position
During dry fit and final install, place the rod in a boat-mounted holder. Check that the reel sits level and the handle is ergonomically positioned. Adjust the gimbal’s rotation if needed before the epoxy sets.
Use and Maintain the Installed Gimbal
Deploy the Hidden T System Correctly
If using a Hidden T Gimbal, understand its two positions. In the stowed position, it lies flat, which is ideal for storage and rod holders. In the deployed position, snap out into an inverted T that rests against your hip or belt. For locking, push inward and use two fingers to snap closed securely.
The treaded base grips waders, pants, or fighting belts, while the removable foam sleeve adds comfort during long fights. The golf-ball-textured surface can be adjusted or removed if too tight or loose.
Clean After Saltwater Use
Rinse the gimbal thoroughly with fresh water after every saltwater trip. Salt buildup accelerates corrosion, especially on aluminum parts. Dry completely to prevent moisture retention.
Inspect the epoxy joint regularly for cracks, discoloration, or separation. Address issues early to avoid catastrophic failure during a fight.
Troubleshoot Common Installation Issues
Loose or Rotating Gimbal
This issue stems from inadequate tape buildup or poor epoxy coverage. To fix it, remove and reinstall with proper shimming and full glue application. Always use vent channels for maximum bond strength.
Misaligned Reel Seat
This problem occurs when there is no twisting during installation or uneven tape wrap. To fix it, mark alignment before disassembly and reinstall slowly with rotation to maintain orientation.
Air Bubbles in Joint
This defect results from no vent channels or rushed seating. To fix it, always cut grooves and seat slowly with twisting motion to allow air escape.
Excess Epoxy Squeeze-Out
This issue comes from too much glue applied. To fix it, wipe excess immediately with an alcohol-soaked cloth. If cured, carefully trim with a razor blade.
Corrosion Over Time
This problem stems from low-quality metal or lack of rinsing. To fix it, use stainless steel or anodized aluminum gimbals for saltwater and rinse after every use.
Upgrade with Expert Tips

Use a rubber gimbal cap when not using a fighting belt because it protects the fitting and cushions your body during handheld use. Since these caps are easily lost, attach a lanyard or store in a dedicated tackle box compartment.
A gimbal’s full potential is unlocked only when used with a fighting belt or harness. This combo transfers load to your core, letting you fight fish for hours with less fatigue.
Buy from trusted suppliers. Mudhole.com is a top source for standard gimbals, epoxy, and rod-building tools. John Ru’s Custom Rods is the exclusive retailer for the Hidden T Gimbal System at $39.95. Look for seasonal discounts or mailing list offers.
Frequently Asked Questions About Installing a Gimbal on a Fishing Rod
What type of rod is compatible with a gimbal?
Gimbals are designed for heavy (H) to extra-heavy (XH) rods that are at least 7 feet long. These rods must be built for offshore trolling, chunking, or big-game fishing to handle the extreme leverage forces without cracking.
Can I install a gimbal on any fishing rod?
No. Only robust rods with thick-walled blanks can accept a gimbal. Light and medium-action rods lack the structural strength needed to withstand the forces applied through the gimbal during fights with large fish.
How long does it take for the epoxy to cure fully?
While surface drying may occur in 30 minutes to 4 hours depending on epoxy type, full structural strength develops over 12 to 24 hours. Always cure overnight before using the rod.
What is the Hidden T Gimbal System?
The Hidden T Gimbal is a deployable, flush-fitting gimbal that snaps out into an inverted T-shape for use with fighting belts. It lies flat when stowed, making it ideal for storage and rod holders. It features a treaded base for grip and a removable foam sleeve for comfort.
Why are vent channels necessary in the tape buildup?
Vent channels expose the bare blank beneath the tape, allowing epoxy to create a direct mechanical bond. They also provide paths for air to escape during installation, preventing bubbles that weaken the joint.
Key Takeaways for Installing Your Gimbal
Installing a gimbal on a fishing rod requires careful preparation, quality materials, and patience. The most critical steps are building up the blank diameter with tape, cutting vent channels for proper epoxy bonding, and allowing full cure time before use. Always perform a dry fit to verify alignment, and use a twisting motion while seating the gimbal to distribute epoxy evenly and eliminate air pockets.
Choose marine-grade epoxy and corrosion-resistant gimbals (stainless steel or anodized aluminum) for saltwater use. Pair your installed gimbal with a fighting belt to unlock its full ergonomic potential. With proper installation, your gimbal will provide decades of reliable service during offshore battles with trophy fish.





