Sand and fishing reels are a dangerous mix. If you have ever reeled in a big catch only to hear a gritty grinding sound, you know the damage sand can cause. Learning how to clean sand out of a fishing reel is a crucial skill for any angler who fishes near beaches, shorelines, or surf zones. Sand is highly abrasive, especially when mixed with saltwater, and can destroy gears, bearings, and drag systems over time. Even microscopic particles left inside can wear down components with every cast. The good news is that with prompt action and the right steps, you can save your reel and restore it to smooth operation.
This guide walks you through immediate rinsing, deep cleaning, lubrication, and prevention using expert-backed methods to protect your gear. Whether you are using a budget-friendly Shimano Sahara or a high-end Daiwa Saltiga, you will learn how to clean, maintain, and extend the life of your reel.
Immediate Rinse After Sand Exposure
Sand begins damaging internal parts the moment it enters your reel, and saltwater turns it into a grinding paste. The faster you rinse, the better your chances of preventing permanent damage.
Flush With Fresh Water Immediately
As soon as you leave the beach, rinse your reel with fresh, lukewarm water. Use a gentle stream, never high pressure, to avoid forcing sand deeper into seals. Focus the flow on these areas.
The spool needs thorough rinsing to remove sand from the spindle and interior.
The bail arm and its pivot points collect sand in the hinge mechanism.
The line roller accumulates sand in the bearing and housing.
The rotor cavity traps sand where it meets the body.
The drag mechanism is especially vulnerable to sand infiltration.
Keep the reel attached to the rod if possible. This mimics its natural position and helps water drain properly.
Protect the Drag and Line
Before rinsing, tighten the drag knob slightly. This expands internal seals and reduces water entry. After rinsing, loosen it completely to prevent stress on the drag washers during drying. If you are using braided line, cover it with a cloth or plastic bag. Braid absorbs water, which weakens it and affects drag performance.
Avoid Soap and Detergents
Never use dish soap or household cleaners. These strip away factory lubricants and dry out felt drag washers, leading to poor drag function. One angler reported that using detergent was possibly one of the worst things you can do. Stick to plain water unless doing a full solvent soak later.
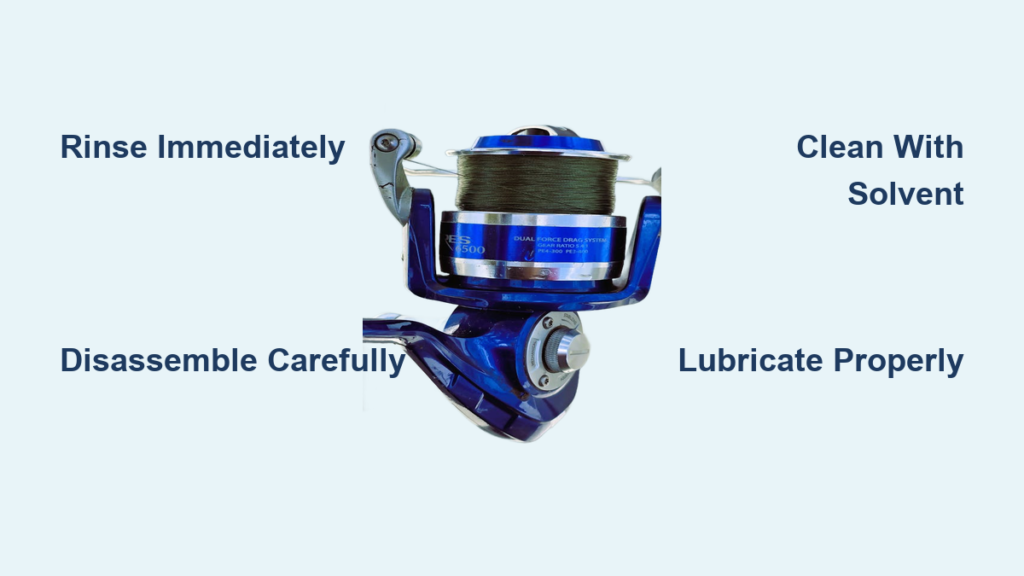
Initial Cleaning and Inspection
After the initial rinse, you need to assess whether sand penetrated the internal mechanisms. This step determines if you can skip full disassembly or must proceed to a complete teardown.
Remove the Spool and Dry Externally
After rinsing, take off the spool by loosening the drag knob and sliding it off the main shaft. Wipe down all accessible parts with a microfiber or lint-free cloth. Use dry cotton swabs to clean tight spots like the interior of the spool, bail roller mechanism, gear housing lip, and anti-reverse bearing area. Avoid pushing debris inward. Lift it out gently with a soft brush or swab.
Test for Internal Sand
Rotate the handle slowly. If it turns smoothly and silently, sand likely did not penetrate the gear box. But if you feel grinding, resistance, or noise, it is time for full disassembly. Do not ignore these signs. Continued use will cause irreversible wear.
Full Reel Disassembly Steps

When external cleaning is not enough, you must disassemble the reel to reach internal components. This process requires patience and the right approach.
Gather Tools and Reference Guides
Before taking anything apart, find a model-specific exploded-view diagram or YouTube tutorial. Reels like the Shimano Sahara 3000FE, Daiwa BG, or Abu Garcia Revo have unique configurations. Use a reel cleaning kit with precision screwdrivers, cleaning brushes, small containers, and a magnetic mat to hold screws. Work on a clean, well-lit surface. Losing a tiny washer or spring can ruin reassembly.
Disassemble in Correct Order
Never turn the handle during disassembly. As expert alantani warns, you will damage the gears. Follow this sequence.
Remove the drag knob and spool.
Take off the bail and rotor.
Unscrew side plates to access gears and bearings.
Remove the main gear and pinion gear.
Remove bearings including side plate, pinion, and anti-reverse bearings.
Remove the oscillation cam and follower.
Carefully disassemble the drag stack, noting the exact order of felt washers, carbon fiber washers, metal washers, and rubber seals.
Some reels use specialty screws. Keep them separated and labeled.
Deep Cleaning of Internal Components
Once the reel is disassembled, you can properly clean each part. This is where you remove embedded sand and old, contaminated grease.
Blow Out Moisture and Loose Sand
After disassembly, dry all parts thoroughly. Use a hair dryer on high heat and speed or low-pressure compressed air. Do this away from your workbench to avoid spreading sand. Let parts air dry for at least 24 hours in a warm, dry place before lubricating.
Use Solvents for Stubborn Grime
When sand is trapped in old grease, soaking helps. Choose a solvent based on your needs.
WD-40 works well for loosening sand in grease. Allow 1 to 2 days to evaporate.
Kerosene dissolves thick grease effectively. Allow 24 to 48 hours drying time.
Mineral spirits are safer on finishes. Allow 1 to 2 days to dry.
Denatured alcohol at 90 percent or higher serves as a final rinse and evaporates in hours.
Bryan Young notes, I soak the parts in WD40. All the sand will end up at the bottom of the pan. Let it sit, then let evaporate fully.
Avoid solvents on soft parts. Septon paddles, line guides, and painted surfaces can be ruined. One user said, I have ruined 2 sets of grip paddles before I figured it out.
Bearing Inspection and Replacement

Bearings fail fast after sand exposure. They are often the first component to show damage from abrasive particles.
Test Each Bearing by Hand
Spin each bearing between your fingers. Smooth, silent spin means the bearing is good. Gritty, rough, or sticky feel indicates contamination or damage. Look for blackened grease, which is a sign of oxidation. Look for metal shavings on shafts, which indicates internal grinding.
Replace Damaged Bearings
If a bearing feels off, replace it. Match the original specs including ABEC rating and shield type. Never spin a dry bearing. Residual sand can embed and cause failure.
Lubricate Every Component Properly
Proper lubrication protects cleaned parts and ensures smooth operation. Using the wrong type or amount can attract more sand.
Apply Grease to Shafts and Gears
Use marine-grade grease on the main shaft by applying a small amount above and below rotor contact points. Coat all teeth and contact surfaces on the main and pinion gears. Grease lasts longer than oil and protects against abrasion.
Oil Bearings and Pivot Points
Use light reel oil for bearings if they are not sealed. One drop per bearing is sufficient. Apply one drop at each end of bail roller and pivot screws. Move the bail back and forth after oiling to distribute evenly.
Re-Oil Drag Washers If Needed
If the drag was exposed to water or detergent, re-oil felt washers with reel-specific oil. Never use grease. Reassemble in exact original order. Drag performance depends on correct stacking.
Use only a tiny amount of lubricant. Excess attracts sand and dust.
Reassemble and Test Your Reel
Reassembly requires precision. Every component must go back in the correct position and orientation.
Follow the Exploded Diagram
Reassemble in reverse order. Install bearings first, then gears, then rotor, then drag stack in correct sequence, then spool, then drag knob. Ensure the drag cap is fully tightened to prevent leaks and maintain pressure.
Test All Functions
After reassembly, check handle rotation. It should be smooth and silent. Check the bail arm. It should snap shut and open easily. Check the drag system. Pull the line. It should offer consistent resistance. Check the anti-reverse mechanism. It should engage and disengage cleanly. Check bait feeder operation if present. It should operate without binding.
The reel should feel like new. Smooth, quiet, and responsive.
When to Get Professional Reel Service
Some situations call for expert help. Knowing when to seek professional service saves money long-term.
Seek Expert Help for High-End Reels
If you own a 300 dollar or more reel, consider professional servicing. Factory-authorized shops charge 20 to 40 dollars for a full clean, lube, and inspection. One user reported Shimano servicing a submerged Sustain reel for just 20 dollars.
Get Help If You Are Unsure
If you are not confident in disassembly or see persistent grinding, do not risk damaging the reel. Contact experts or visit a local pro shop. Professional service saves money long-term by preventing costly repairs.
Prevent Sand Damage With Smart Habits
Prevention is always better than cure. These habits keep sand from damaging your reel in the first place.
Rinse After Every Trip
Make freshwater rinsing a non-negotiable habit. Even 5 minutes of exposure to sand and salt demands a rinse. Keep a bucket of fresh water in your car or truck bed.
Store Reels Properly
After cleaning, loosen the drag to extend washer life. Store in a protective case to prevent dust and moisture. Keep in a dry, temperature-stable place.
Upgrade for Sandy Conditions
Choose reels built for harsh environments. Alvey reels are legendary for durability in surf. Other solid choices include Shimano Sahara, Shimano Twin Power, Daiwa BG, Daiwa Saltiga, and Abu Garcia Revo. Opt for models with sealed bearings to block sand and water.
Maintenance Schedule for Longevity
Regular maintenance keeps your reel performing at its best. Follow this schedule based on your use level.
Clean Based on Use Frequency
For all reels, perform a freshwater rinse after every outing.
For moderate use, perform a light clean and re-lube every 20 trips or monthly.
For heavy use, perform a full disassembly annually or after major exposure.
Inspect Drag Washers Regularly
Check for glazing, which appears as a shiny, hardened surface. Check for compression, which shows as reduced thickness. Check for contamination from sand or debris. Replace washers if worn. Keep spares on hand for common models.
Frequently Asked Questions About Cleaning Sand From a Fishing Reel
Can I use soap to clean sand out of my fishing reel?
Never use dish soap, detergent, or household cleaners on a fishing reel. These products strip factory lubricants and dry out felt drag washers, compromising drag performance. Stick to fresh water for rinsing unless you are performing a full solvent deep clean.
How do I know if sand got inside my fishing reel?
Signs of sand contamination include grinding or gritty sensation when rotating the handle, resistance or stiffness in bail arm movement, irregular drag performance, noisy gear operation during retrieval, and reduced smoothness in handle rotation. If these symptoms persist after rinsing, you need to disassemble the reel.
How long should I let my reel dry before reassembling it?
Allow all parts to air dry completely for at least 24 hours in a warm, dry environment before re-lubricating and reassembling. Rushing this step traps moisture, which leads to rust and corrosion.
Should I replace bearings after sand exposure?
Yes, replace any bearing that feels gritty, rough, or sticky when spun between your fingers. Sand and salt destroy bearing integrity quickly. Always replace with bearings matching the original specs including ABEC rating and shield type.
Can I use WD-40 to clean my fishing reel?
WD-40 works well for soaking parts to loosen sand embedded in old grease. Let parts dry for 1 to 2 days after soaking to allow the solvent to evaporate completely. Do not use WD-40 on soft components like Septon grip paddles or painted surfaces.
How often should I deep clean my fishing reel?
Deep clean and lubricate every 20 trips or monthly for moderate use. Perform a full disassembly annually or after major sand or saltwater exposure. Always rinse with fresh water after every beach or surf fishing trip.
Key Takeaways for Cleaning Sand From Your Fishing Reel
Acting fast after sand exposure is critical. Rinse with fresh water immediately, never use soap or detergents, and work gently to avoid forcing sand deeper into seals. If grinding persists, disassemble the reel following model-specific guides. Clean all components thoroughly, replace damaged bearings, and apply the correct lubricants. Marine-grade grease goes on gears and shafts. Light reel oil goes on bearings and pivot points. Use only tiny amounts to avoid attracting more sand.
Professional servicing is worth considering for expensive reels. Shimano and other manufacturers offer full service for 20 to 40 dollars, which is often cheaper than replacing damaged components. Adopt a routine of rinsing after every trip, deep cleaning monthly, and full servicing annually. These habits extend reel life, save money, and improve fishing performance. Whether your reel cost 30 dollars or 300 dollars, proper cleaning ensures smooth casts, reliable drags, and years of service.