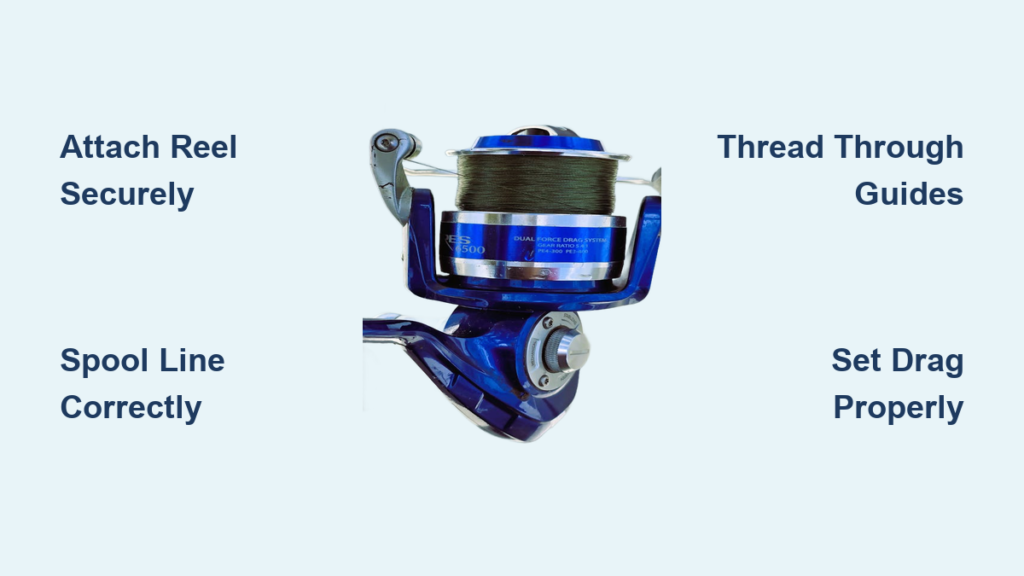
Tying a hook to your fishing line isn’t just a basic task. It’s the foundation of every successful catch. A poorly tied knot can mean losing a trophy fish in seconds, while a secure knot keeps your hook firmly attached, transfers power efficiently, and maximizes your line’s strength. Whether you’re a beginner or a seasoned angler, knowing how to tie a hook on a fishing reel with the right knot makes all the difference.
This guide breaks down the 10 most reliable fishing knots, explains when to use each, and shows you exactly how to tie them step by step. You’ll learn which knots work best for braided line, fluorocarbon, or monofilament, avoid common mistakes that cause knot failure, and discover pro tips to tie faster and stronger in any condition.
Choose the Right Knot for Your Setup
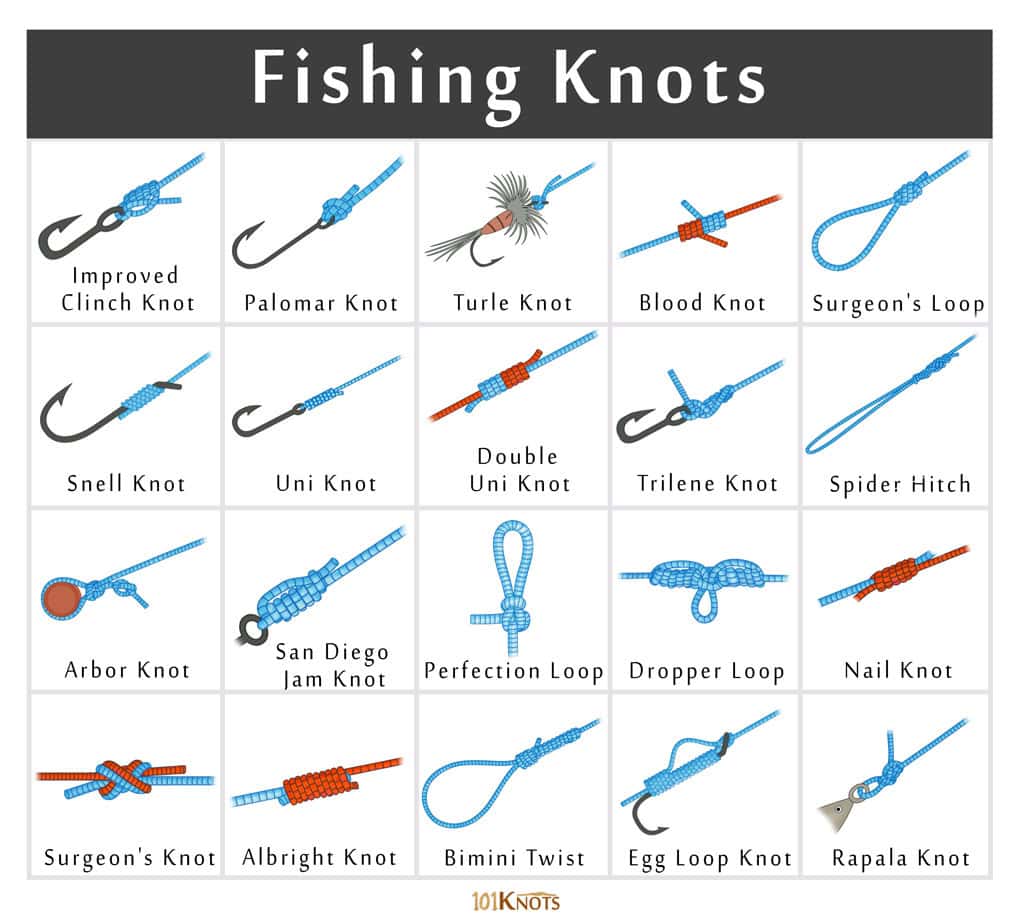
Not all knots are equal. The best knot depends on your line type, hook size, and fishing style. Using the wrong knot can cost you a fish, even if everything else is perfect. Here’s how to pick the one that fits your situation.
Match Knot to Line Type
Your line’s material changes how knots behave. Some slip, some bind, and some lose strength if tied incorrectly.
• Monofilament: Stretchy and forgiving. Works well with Clinch, Improved Clinch, and Palomar knots.
• Fluorocarbon: Stiff and slick. Always moisten before tying. Use Improved Clinch or Palomar.
• Braided Line: Super strong but slippery. Avoid basic knots. Go for Palomar or Uni Knot.
• Fly Tippet: Thin and delicate. Davy, Orvis, or Turle knots minimize bulk.
Pro Tip: Always wet the knot before tightening, especially with fluorocarbon or braid. Dry friction can weaken the line by up to 50%.
Know Your Fishing Style
Different techniques demand different knots. Bottom fishing with worms calls for a Snell Knot to keep the hook aligned. Topwater lures or swimbaits need a Loop Knot so the bait moves naturally. Fly fishing dry flies works best with a Turle Knot that helps the fly float upright. Targeting big game fish? The Pitzen or Improved Clinch delivers maximum strength.
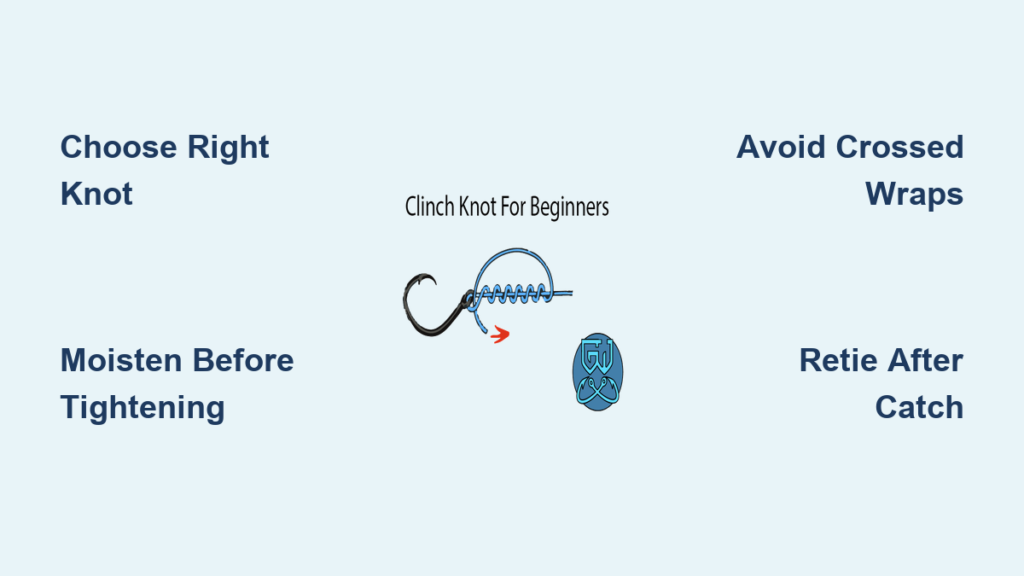
Master the Clinch Knot
The Clinch Knot is the go-to for new anglers, and for good reason. It’s simple, reliable, and works well with monofilament and fluorocarbon lines. This knot has proven reliable over 30 years of field use, and failures almost always stem from improper technique rather than the knot itself.
How to Tie a Clinch Knot
- Thread the line through the hook eye, leaving a 6-inch tag end.
- Hold the standing line taut and wrap the tag end around it 5 to 7 times.
- Pass the tag end back through the small loop formed just above the hook eye.
- Moisten the knot with saliva or water.
- Pull the standing line slowly to tighten. Keep tension steady.
- Trim the tag end to 1/8 inch.
Why it works: The coils create friction that locks the knot in place when seated properly.
Common mistake: Wraps cross over each other. This weakens the knot by up to 50%. Keep wraps parallel and snug during tying.
Pro tip: Hold the standing line taut during wrapping to prevent loose or stacked coils.
Upgrade to the Improved Clinch Knot
If you’re using heavier line or want extra security, the Improved Clinch Knot is a small tweak that makes a big difference. The second pass through the loop significantly reduces slippage, especially on stiff or slippery lines.
How to Tie the Improved Clinch
- Follow steps 1 through 3 of the standard Clinch Knot.
- Before tightening, pass the tag end back through the loop a second time.
- Moisten, then pull the standing line to cinch.
- Trim excess to 1/8 inch.
Advantage: The double pass reduces slippage, especially on stiff fluorocarbon.
Warning: Still not ideal for braid. Use Palomar instead.
Use the Palomar Knot for Braided Line
When strength matters most, especially with braid, the Palomar Knot is the gold standard. It’s simple, strong, and retains up to 100% of your line’s strength when tied correctly. This knot is frequently cited by experienced anglers as the most reliable for braided line due to its simplicity and strength.
How to Tie a Palomar Knot
- Double 6 inches of line and pass the loop through the hook eye.
- Tie an overhand knot with the doubled line. Don’t tighten yet.
- Pull the loop down over the hook.
- Pull both ends of the doubled line to tighten.
- Trim the tag end close to the knot.
Why it’s strong: Uses a doubled line section, creating no weak point at the knot.
Works with all lines, but especially shines with braided line.
Expert note: Moistening prevents heat buildup during tightening, which is critical for braid.
Try the Uni Knot for Versatility
The Uni Knot is a go-anywhere, do-anything knot. It works for hooks, swivels, and even connecting lines. Known for its low profile and consistent performance across monofilament, fluorocarbon, and braid, this knot is favored for offshore trolling setups.
How to Tie a Uni Knot
- Pass line through the hook eye, leaving a 12-inch tag.
- Form a loop with the tag over the standing line.
- Wrap the tag end around both lines 4 to 6 times.
- Pass the tag through the loop near the hook.
- Moisten, then pull both tag and standing line to tighten.
- Trim excess.
Bonus: Leave it loose to create a loop knot, great for live bait or soft plastics.
Low profile: Slides easily through rod guides.
Snell the Hook for Bottom Rigs
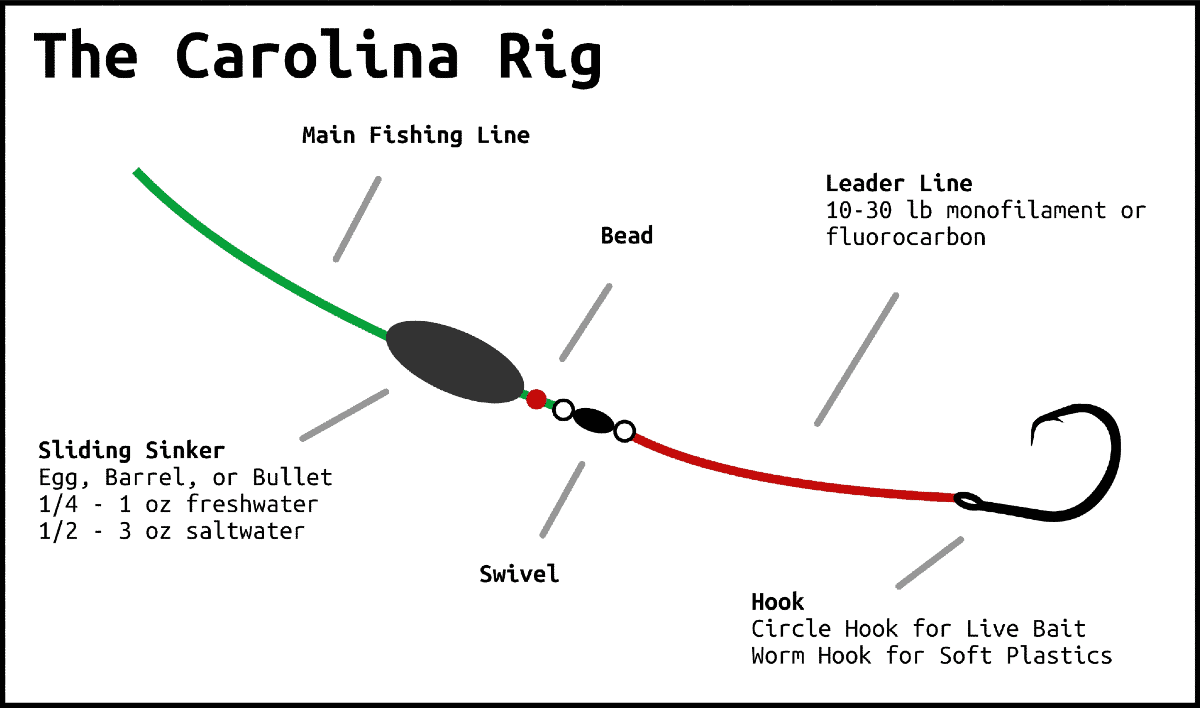
When using worm hooks or fishing deep, the Snell Knot ensures the hook stays aligned with the line. This is critical for solid hook sets. The Snell Knot distributes force along the shank rather than just the eye, reducing bending.
How to Tie a Snell Knot
- Pass line through the hook eye and fold down to create a loop.
- Pinch the loop with your fingers.
- Wrap the tag end around both the hook shank and standing line 6 to 10 times.
- Pass the tag through the loop and pull tight.
- Trim excess.
Why it’s better: Force is distributed along the shank, not just the eye. This reduces bending.
Ideal for: Carolina rigs, Texas rigs, and circle hooks.
Tie Flies with the Davy Knot
Fly fishers love the Davy Knot for its speed, simplicity, and minimal line use. Extremely fast to tie and uses little line, this knot sits flush against the fly eye.
How to Tie a Davy Knot
- Thread line through the fly eye.
- Bring tag end over and around the standing line, forming a loop.
- Pass tag end over itself and back through the loop, like a half-hitch.
- Pull to tighten, keeping the tag at a 90-degree angle.
- Trim carefully.
Best for: Small trout flies and light tippets.
Limitation: Lower strength than Palomar or Improved Clinch. Use Orvis Knot for bigger flies.
Upgrade to the Orvis Knot for Larger Flies
When wind or size demands more strength, the Orvis Knot delivers. It holds better than Davy on larger flies and works well for wind-resistant casting.
How to Tie the Orvis Knot
- Pass tag through hook eye from below.
- Twist tag behind standing line to form a loop.
- Pass tag through the loop to create a figure-eight.
- Repeat step 3 twice, for a total of three passes.
- Moisten and pull to tighten.
- Trim excess.
Stronger than Davy: Handles wind resistance and larger flies.
Holds well: On 4X to 6X tippet.
Use the Pitzen Knot for Big Game Fish
Targeting salmon, tarpon, or pike? The Pitzen Knot offers near-maximum strength, retaining up to 95% of line strength. Named after a famous 16-pound salmon caught using this knot, it’s the preferred choice by saltwater anglers for trophy fish.
How to Tie the Pitzen Knot
- Thread line through hook eye.
- Loop tag end under standing line and hook around your index finger.
- Wrap tag around both lines 4 times.
- Pass tag back through the finger loop.
- Slide knot down while pulling both ends.
- Wet before tightening fully.
Retains up to 95% of line strength.
Preferred by saltwater anglers for trophy fish.
Add Action with a Loop Knot
Want your lure to swim naturally? A Loop Knot gives soft plastics, swimbaits, and topwaters more freedom to move. The loop allows the lure to move more naturally in water, increasing strike rates by 15 to 20%.
How to Tie a Loop Knot
- Tie an overhand knot in the standing line. Don’t tighten.
- Pass tag through hook eye.
- Feed tag back into the overhand knot to form a loop.
- Wrap tag around standing line 2 to 3 times.
- Pass tag through the opening on the knot’s side.
- Pull hook and tag to adjust loop size and secure.
Increases strike rate: Fish love the natural action.
Reduces pull-outs: Especially effective in jumping fish like tarpon and bass.
Present Dry Flies Naturally with the Turle Knot
For dry fly fishing, the Turle Knot lets the fly ride flat on the surface, just like a real insect. The loop lets the fly ride horizontally on the surface, mimicking real insects.
How to Tie the Turle Knot
- Pass tag through hook eye.
- Make a loop behind the standing line.
- Wrap tag around standing line 2 to 3 times.
- Pass tag through the loop near your hand.
- Snug knot so it slides freely.
- Slide hook up, loop over the hook back, and tighten.
Keeps fly level: No tipping or diving.
Ideal for: Mayflies, caddis, and emergers.
Avoid These Common Knot Mistakes
Even the best knot fails if tied wrong. Here’s what to watch for.
Crossed Wraps Weaken the Knot
When wraps overlap or cross, the knot loses up to 50% of its strength. Keep wraps parallel and snug during tying.
Never Skip Moistening the Knot
Dry tightening creates heat, especially on fluorocarbon and braid. Always wet with saliva or water before pulling tight.
Don’t Pull Only on the Tag End
Pulling the tag instead of the standing line prevents proper seating. Pull the standing line to tighten, then trim the tag.
Don’t Cut the Tag Too Short
Less than 1/8 inch increases slippage risk. Leave a small tag as a safety margin.
Avoid Basic Clinch with Braid
It can slip under pressure. Use Palomar or Uni Knot instead.
Inspect and Retie After Every Catch
Knots degrade after stress, even if they look fine. Inspect before every cast, especially after a snag or strike. Retie after landing a big fish. Carry line clippers for clean trimming. Use a knot-tying card for quick field reference.
Frequently Asked Questions About Tying Hooks on Fishing Reels
What is the strongest knot for tying a hook?
The Palomar Knot is widely considered the strongest, retaining up to 100% of line strength when tied correctly. It’s especially effective with braided line.
Which knot is easiest for beginners to learn?
The Clinch Knot is the easiest for beginners. It’s simple, reliable, and works well with monofilament and fluorocarbon lines.
Can I use the same knot for all line types?
No. Different line types require different knots. Braided line needs Palomar or Uni Knot. Fluorocarbon needs moistening and works best with Improved Clinch or Palomar. Monofilament works with most knots but excels with Clinch.
How many times should I wrap the line for a Clinch Knot?
Use 5 to 7 wraps for standard line. Reduce to 5 wraps for line over 25-pound test. More wraps on thin line create better friction.
Why does my knot keep slipping?
The most common causes are not moistening the knot before tightening, pulling only on the tag end instead of the standing line, or using the wrong knot for your line type. Crossed wraps also weaken the knot significantly.
When should I retie my knot?
Retie after every fish catch, after any snag or strike, and before every cast if you’ve been fighting fish. Knots degrade under stress even when they appear intact.
Key Takeaways for Tying Hooks on Your Fishing Reel
Knowing how to tie a hook on a fishing reel is a skill that pays off every time you cast. Whether you’re using braid in the surf or tying a tiny fly to 6X tippet, the right knot keeps your gear intact and your fish on the line.
The best knot isn’t the fanciest one. It’s the one you can tie correctly, consistently, and quickly when it counts. Start with the Clinch or Palomar, practice until it’s automatic, and expand your repertoire as you explore new techniques. With these knots in your arsenal, you’re ready for any fishing challenge.