

There’s nothing quite like landing a 60-pound tuna or a thrashing wahoo, especially when you do it with a fishing gaff you built yourself. A fishing gaff isn’t just a hook on a stick, it’s a precision tool that can mean the difference between a trophy photo and a heartbreak loss. While commercial gaffs can cost $200 to $500, you can build a high-performance custom fishing gaff for under $30 using repurposed materials and simple tools.
From selecting the right hook and shaft to choosing the best attachment method and adding safety features, this guide shows you exactly how to make a fishing gaff that’s strong, reliable, and tailored to your needs. Whether you’re a kayak angler needing a compact microgaff or an offshore fisherman targeting pelagics, you’ll learn how to modify hooks, bond them securely, and finish your gaff with professional-grade durability.
Choose the Right Gaff Type for Your Target Species
Your gaff should be sized for the fish you’re catching. Using the wrong size means either losing your catch or causing unnecessary injury to the fish.
Gaff Size Recommendations
Microgaffs with a 1 to 2 inch gap work ideal for snapper, mackerel, and small reef fish. They’re perfect for catch-and-release lip gaffing with minimal damage. Standard gaffs with 2 to 4 inch gaps are built for tuna, wahoo, cobia, and shark. Use 3 to 4 inch hooks for fish over 40 pounds. For heavy-duty builds targeting 60 plus pound fish, pair a 34007 9/0 or 14/0 hook with a stainless steel or graphite shaft.
Pro Tip: Microgaffs are rarely sold commercially, so DIY is often the only way to get one.
Select the Best Shaft Material

The shaft is the structural backbone of your gaff and must balance strength, weight, flexibility, and reach. Several materials work well depending on your fishing style.
Bamboo for Lightweight Flex
Bamboo offers natural shock absorption and works perfectly for kayak or inshore use. Use ¼ inch to 1 inch diameter sections, 3 to 5 feet long. Avoid green or cracked pieces, only use dry, treated bamboo. Sand smooth with 80 to 220 grit paper, then seal with 2 to 3 coats of marine varnish. Let dry 24 to 48 hours between coats.
Why it works: Bamboo flexes under load, reducing stress on the hook bond.
Graphite Golf Shafts for Strength
Repurpose an old graphite or steel golf club shaft for a durable, lightweight gaff. Inspect for cracks by gently flexing. Cut with a pipe cutter for the cleanest cut, or use a hacksaw and file edges smooth. Seal the open end with hot glue to prevent epoxy leakage.
Best for: Anglers who want a strong, corrosion-resistant build without welding.
Stainless Steel Rod for Heavy Offshore Use
For heavy offshore use, 8mm 304 stainless steel is unbeatable. Do not heat it because this can anneal and weaken the metal. Bend cold using a 3/8 inch tubing bender. Sharpen the tip before bending for better penetration. Epoxy-bond the hook for maximum strength.
Ideal for: Tuna, shark, and wahoo, fish that fight hard and demand a rigid shaft.
Pick and Modify the Hook

The hook is the business end of your gaff, and proper modification ensures secure attachment and safe handling.
Best Hook Options for DIY Gaffs
Mustad 34007 hooks in 9/0 to 14/0 sizes are stainless steel with a wide gap, making them ideal for DIY builds. Shark hooks work well, though you should grind off the barb for safer handling. O’Shaughnessy 14/0 or 5/0 Round Bend hooks offer strong shanks and work well for large fish.
Expert Choice: Use a 9/0 Mustad 34007 for microgaffs. It offers the perfect balance of size and strength.
How to Modify the Hook Shank
Remove the eye for the insertion method by cutting off the looped end with a hacksaw or grinder. This allows full shank insertion into the shaft. Roughen the shank by filing or notching the first ¾ inch to improve epoxy adhesion. Smooth metal won’t bond well, so texture is critical. Grind the barb and tip slightly to reduce accidental injury. For catch-and-release fishing, remove the barb entirely.
Safety First: Always wear gloves and eye protection when grinding or heating metal.
Secure the Hook: 5 Proven Methods
There are five reliable ways to attach your hook to the shaft. Choose the method that matches your materials and strength needs.
Epoxy Insertion for Graphite or Golf Shafts
This method works best for hollow, non-wood shafts. Seal the base with hot glue to prevent leaks. Mix two-part epoxy with a 30 to 45 minute set time. Pour about ½ cup epoxy into the shaft. Insert the hook 1 inch deep, aligned straight. Angle slightly outward to improve the hooking angle. Add a hot glue bead at the base for temporary hold. Hang upside down with zip ties to prevent sagging during cure. The gaff becomes handleable after 2 hours but reaches full strength after 24 hours.
Pro Upgrade: Apply 3 brushed epoxy coats after cure. Add glitter for a custom look.
Drilled Hole Plus Paracord Wrap for Bamboo or Dowel
This method requires no curing time, so the gaff is ready to use immediately. Drill a hole where the hook elbow will sit. Insert the hook so the elbow protrudes slightly. Wrap the shank inside with Gorilla Tape to build thickness. Use the paracord loop-lock wrap technique: tie a figure-eight knot leaving a small loop, wrap down the shaft, then thread the end through the loop and pull tight. Trim the excess. Optional: seal with epoxy for long-term durability.
Why it works: The mechanical lock combined with friction creates instant strength.
Channel and Epoxy Plus Wire Wrap for Solid Shafts
This method provides maximum durability for wood or hockey stick shafts. Mark where the barb and shank sit. Drill a hole for the barb. Chisel a shallow channel for the shank. Coat the barb and shank with epoxy. Insert the hook and wrap tightly with wire. Cover the wire and metal with more epoxy. Cure for 24 hours.
Tip: Spray paint lightly before the final wrap to prevent rust forming under the epoxy.
90-Degree Bend Plus Hole Insert for Microgaffs
This method is perfect for rod blanks or metal shafts. Heat the last 3/16 inch of the shank with a butane torch. Bend 90 degrees opposite the hook point. Drill a 1/8-inch hole 1.25 inches from the bottom. Insert the bent tip. Wrap with rod thread or nylon twine. Epoxy the wrap for permanence. Optional: fill the last 1.5 inches with epoxy.
Best for: Compact, precise gaffs for small boats or kayaks.
Screw-Through-Eye or Pin Method
Use this when keeping the hook’s eye intact. Drill a hole through the shaft to align with the eye. Insert a 1/8 inch screw through the eye. Wrap twine or thread from the eye down. Cover everything with epoxy. For the pin method, use copper or nickel silver pin for oversized eyes. Plug with foam to block epoxy flow, then pour.
Note: Grind down oversized pin edges for a smooth finish.
Build a Secure Slip-Resistant Handle

A good grip is critical because wet, slippery conditions can turn a perfect gaff into a dangerous liability.
Paracord Wrap for Universal Grip
Wrap in a tight, overlapping staircase pattern. Seal the ends with epoxy or a lighter flame to prevent fraying. Add a lanyard loop at the base.
Bonus: Use colored paracord for visibility or personal style.
EVA Foam or Cork Grips
EVA foam offers excellent grip. Lubricate with shaving gel, slide over the shaft, then shape on a lathe. Cork rings glue together with Titebond wood glue, ream to fit, and shape on a lathe. Both options provide comfort and grip in wet conditions.
Hockey Tape for Familiar Feel
Hockey tape provides the same grip used by hockey players. It’s slip-resistant and saltwater-proof. Apply in overlapping layers and seal with epoxy for long-term hold.
Pro Tip: Combine tape with a heat shrink butt cap for a finished professional look.
Install a Lanyard to Prevent Loss
A gaff lost overboard is a gaff you cannot use. Always add a lanyard.
Through-Grip Hole Method
Drill a small hole through the handle. Run paracord through and tie a double overhand knot. Test the pull strength before use.
Internal Shaft Method for Hollow Shafts
Feed paracord ends into the hollow shaft. Insert a closed-cell foam plug to block epoxy. Pour epoxy to secure the ends. Let cure for 24 hours.
Finish and Protect Your Gaff
Proper finishing prevents water absorption, UV damage, and extends the life of your gaff.
Paint and Seal for Longevity
Apply a white spray primer for even coverage as the base coat. Add color coats in light layers, choosing blue, red-white-blue, or your custom design. Finish with a clear epoxy topcoat for UV resistance, waterproofing, and shine. Optional: mix glitter into the final epoxy coat.
Note: Painting bamboo or wood prevents water absorption and UV damage.
Custom Touches
Wrap metallic thread around the handle for decoration. Inscribe your boat name with wrapped thread. Add a flag or reflective tape for visibility in low light.
Rotating finish trick: Spin the gaff at 8 to 10 rpm while applying epoxy for a smooth, even coat. Use a BIC lighter to pop bubbles.
Add Essential Safety Features
Safety matters both during build and during use.
Hook Protector
This is a must-have accessory. Cut rubber or vinyl surgical tubing to length, measuring from hook tip to handle base plus ½ inch clearance. Slit it lengthwise and slide over the hook when not in use.
Prevents: Accidental punctures, gear snags, and injuries.
Safety During Build
Wear gloves and eye protection. Work in a well-ventilated area with epoxy and solvents. Clean epoxy off skin immediately with acetone or alcohol. Keep rags and towels nearby.
Safety During Use
Aim for the shoulder or upper body, never the gut or head. Avoid gaffing near gills if releasing the fish. Never point the gaff at people or yourself. Use textured grips to prevent slips.
Test and Maintain Your Gaff
DIY gaffs have proven their worth on the water, landing fish from 40 pounds to over 60 pounds.
Field-Tested Performance
Bamboo and paracord builds have successfully landed 40 to 50 pound grouper. Epoxy-bonded graphite or stainless steel builds handle 60 plus pound tuna, wahoo, and shark.
Even imperfect strikes hold thanks to strong shafts and secure bonds.
After-Use Maintenance
Rinse with fresh water, especially after saltwater exposure. Dry completely before storage. Inspect paracord or tape for fraying, epoxy joints for cracks, and the hook for bending or dullness.
Long-Term Storage
Store in a dry, shaded location like a rod holder, cabin, or garage. Avoid prolonged UV exposure because it degrades bamboo and plastics. Indoor storage is recommended for wooden or bamboo shafts.
Final Build Recommendations
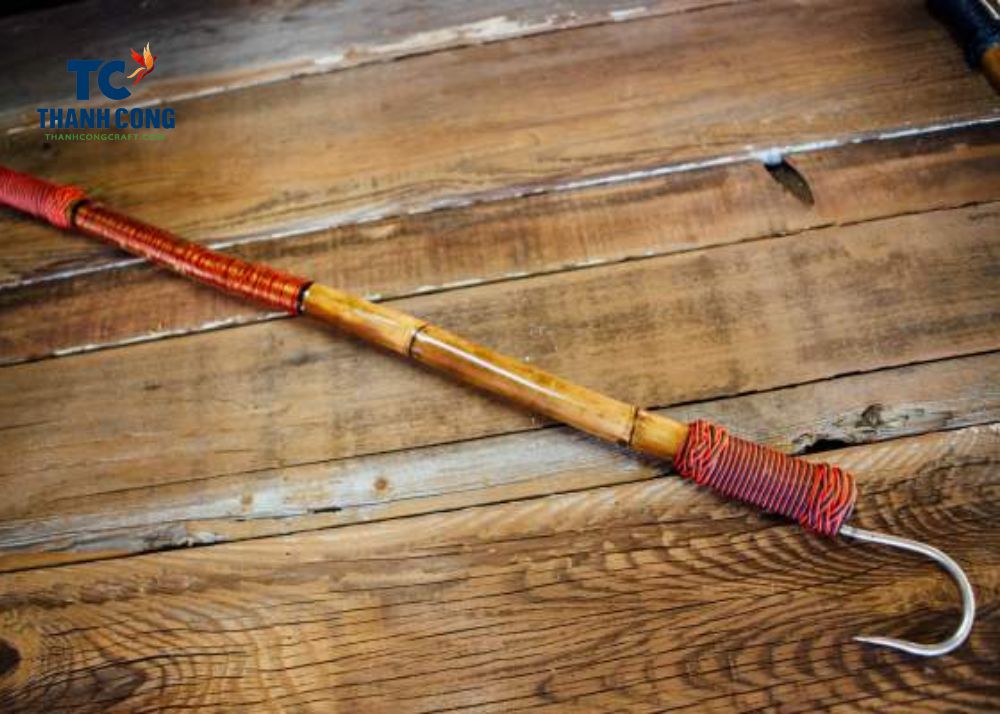
Choose the build that matches your experience level and fishing needs.
Beginner Fast Build
Bamboo with duct tape and paracord wrap offers no curing time, low cost, and is ready in minutes. Best for kayak anglers and shore fishing.
Maximum Strength Build
Graphite golf shaft with epoxy bond provides lightweight construction with high tensile strength. Best for offshore pelagics.
Full Customization Build
Hockey stick with routed channel, wire, and epoxy gives complete control over design and durability. Best for craftsmen who want a one-of-a-kind tool.
Microgaff Build for Inshore or Kayak
Rod blank with 90-degree bend and epoxy creates a compact, precise gaff that’s easy to store. Best for small fish and catch-and-release.
Heavy Offshore Build
Stainless steel rod with epoxy and wire wrap is corrosion-resistant and handles 60 plus pound fish. Best for tuna, shark, and wahoo.
Frequently Asked Questions About Making a Fishing Gaff
What is the best hook for a DIY fishing gaff?
The Mustad 34007 in 9/0 to 14/0 sizes is widely considered the best hook for DIY gaffs. It’s stainless steel, has a wide gap, and comes in sizes suitable for everything from microgaffs to heavy offshore builds.
How much does it cost to build a fishing gaff?
Most DIY gaffs cost between $15 and $30 in materials. This is significantly less than commercial gaffs, which typically range from $200 to $500.
What is the strongest method for attaching the hook?
The epoxy insertion method combined with wire wrapping provides the strongest bond. For hollow shafts, pour epoxy and insert the hook. For solid shafts, create a channel, apply epoxy, and wrap with wire for maximum durability.
Can I use a bamboo pole for a fishing gaff?
Yes, bamboo works well for kayak and inshore fishing. It’s lightweight, offers natural flex for shock absorption, and costs nearly nothing. Just make sure to seal it with marine varnish to prevent water damage.
How long does it take to make a fishing gaff?
The actual build time is about 1.5 hours. However, you need to account for 24 to 48 hours of curing time for epoxy and sealants before the gaff is ready for use.
Key Takeaways for Building Your Own Fishing Gaff
Building your own fishing gaff saves significant money, with most builds costing under $30 compared to $200 to $500 for commercial models. The key to success lies in matching your materials to your target species: bamboo and graphite work best for smaller fish and kayak use, while stainless steel handles the heaviest offshore pelagics. No matter which method you choose, always add a lanyard to prevent losing your gaff overboard, and always include safety features like hook protectors and textured grips.
With common materials and basic tools, any angler can build a professional-grade fishing gaff. Whether you’re using a bamboo pole from your backyard or a graphite rod blank from a broken fishing rod, the result is a rugged, functional tool that performs as well as or better than store-bought models. Start with a simple build, then upgrade your techniques and materials as you gain confidence.
Happy building, and tight lines!





