
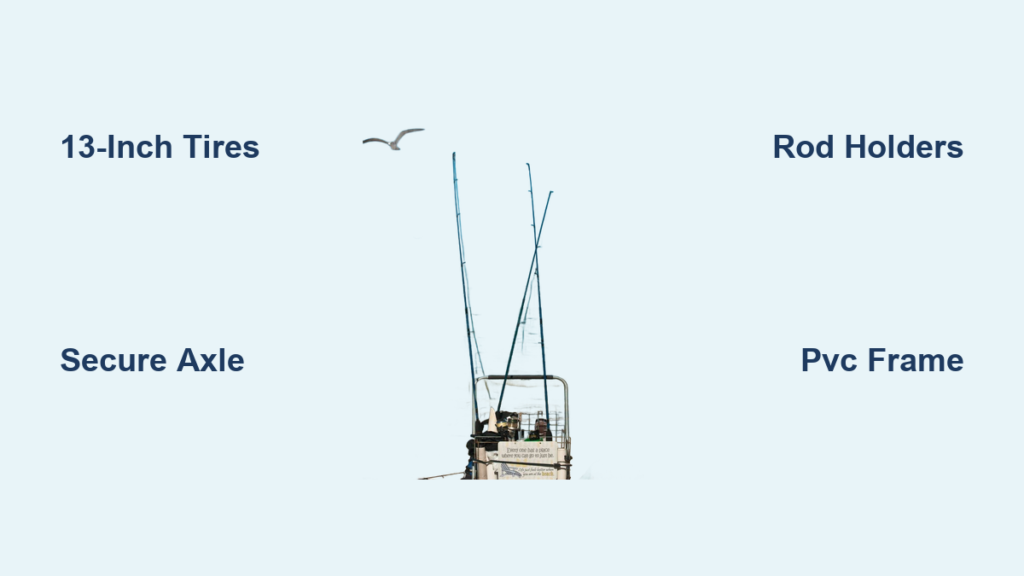
Hauling coolers, rods, bait, and chairs across sand can turn a relaxing fishing trip into a back-breaking chore. A fishing cart solves this problem by letting you roll hundreds of pounds of gear over soft terrain with ease. Whether you’re a surf fisherman trekking down the beach or a pier angler needing mobile storage, building your own fishing cart is a smart, customizable, and cost-effective solution. This guide shows you how to make a fishing cart from scratch using PVC or by modifying a utility cart, step by step. You’ll learn frame designs, wheel choices, load capacity tips, and pro customization tricks used by experienced anglers.
From selecting the right 13-inch all-terrain tires to installing rod holders that double as structural braces, every detail matters. We’ll cover both DIY PVC builds and Gorilla Cart retrofits, so you can choose based on your tools, budget, and fishing needs. By the end, you’ll have everything needed to build a durable, sand-ready fishing cart that outperforms store-bought models.
Choose Your Build Type

Before cutting pipes or buying wheels, decide which construction method fits your skills and goals. Two proven approaches dominate the DIY fishing cart world: custom PVC frames and modified utility carts.
PVC Frame: Lightweight and Corrosion-Proof
A fully custom PVC pipe fishing cart is ideal for saltwater environments. It’s lightweight (under 25 lbs), won’t rust, and can be disassembled for compact storage. Schedule 40 PVC handles heavy loads when braced properly, especially with rod holders reinforcing the frame.
Best uses for this build include beach surf fishing, e-bike towing, and anglers who want full customization. The skill level required is intermediate, as it requires precise cutting and assembly. Material costs range from $140 to $205 depending on materials selected.
Modified Utility Cart: Durable and Fast Build
Start with a Gorilla Cart or similar steel utility model and retrofit it for fishing use. This approach saves time and offers a rugged base. Add PVC rod tubes, drill drainage holes, and upgrade wheels for sand performance.
Best uses include quick builds, anglers without PVC tools, and mixed terrain use. The skill level ranges from beginner to intermediate. Total cost runs about $150 ($99 cart plus $50 in modifications).
Pro Tip: If you already own a utility cart, retrofitting is the fastest way to get fishing-ready.
Design a Strong PVC Frame

A well-designed PVC frame supports 100+ lbs while rolling smoothly over wet sand. The key is symmetry, bracing, and smart joint placement.
Rectangular Basket Style (Most Popular)
This design uses a top and bottom rectangular frame connected by vertical supports. It creates an open cage perfect for coolers, rods, and tackle boxes.
Key dimensions for this build include:
- Top frame: 24″ x 16″ (fits standard 50 to 70 qt coolers)
- Bottom frame: Same size, aligned directly below
- Vertical supports: Four 8.5″ PVC pieces
- Side rails: Two 35″ horizontal pipes for lateral strength
Fitting requirements include:
- Tees: 14 to 20 units (connect verticals and horizontals)
- 90° elbows: 10 to 12 (corners and handle joints)
- 4-way crosses: 10 (optional, for extra bracing)
- Slip Tees: 2 to 4 (for folding handle functionality)
Use 1-inch or 1-1/4-inch Schedule 40 PVC for strength and UV resistance. Avoid thin-walled irrigation pipe.
Cut and Assemble the Frame
Precision matters. Misaligned cuts lead to wobbly wheels and stress points.
Step 1: Cut PVC Pipes
Use a band saw or fine-tooth hacksaw for clean cuts. Measure twice, cut once.
Common lengths needed include:
- 8.5″ (x4) for vertical supports
- 35″ (x2) for side rails
- 24″ (x2) and 16″ (x2) for top and bottom frame sides
- 18 to 24″ (x2) for front handle extensions
Deburr inside edges with a file or deburring tool to prevent snags.
Step 2: Build Top and Bottom Frames
Assemble rectangles using tees and 90° elbows. At each corner, use one tee facing up/down and one elbow for the side rail. Leave open ends on upward-facing tees, which become rod holders. Clamp frames during assembly to ensure squareness.
Step 3: Connect Top and Bottom
Slide 8.5″ vertical pipes into the tees to link both frames. Then install 35″ side rails through side tees for rigidity.
Pro Tip: Install rod holders with self-tapping screws through side rails. They act as braces, eliminating the need for extra joints.
Install the Axle and Wheels
Wheels make or break a fishing cart’s performance, especially on sand.
Choose the Right Tires
Tire selection dramatically affects sand performance. Consider these options:
- 13″ All-Terrain Pneumatic: Best for sand, dunes, and wet surf zones. Provides best flotation. Check pressure monthly.
- 8 to 12″ Pneumatic: Good for budget builds and mixed terrain. Cheaper but less stable on soft sand.
- Solid Rubber: Best for pavement and dry gravel. Puncture-proof but bounces on sand.
- Wide “Monster” Wheels: Ideal for heavy loads and deep sand. May require custom axle.
User Feedback: 13-inch mower tires provide excellent sand flotation and cost under $30 per pair.
Build the Axle System
Materials needed for the axle include:
- Axle: 5/8″ steel drop-axle or 1/2″ aluminum rod
- Axle caps: PVC end caps with 5/8″ holes drilled
- Spacers/washers: 5/8″ inner diameter (6 total)
- Cotter pins or spring clips: 2 units to lock axle
- Step bit: Required to drill 5/8″ hole (regular bits max at 1/2″)
Assembly steps:
- Drill 5/8″ holes in two PVC end caps using a step bit.
- Insert axle through caps.
- Slide wheels onto each end.
- Add washers to center wheels and reduce friction.
- Secure axle ends with cotter pins.
Safety Note: Never skip cotter pins. Wheel detachment on sand can damage the cart or injure someone.
Mounting the Axle
Attach axle caps between front vertical supports and bottom crossbar. Ensure axle rotates freely without rubbing against frame. Minimum ground clearance should be 6 inches to clear tidal ridges and shell beds.
Add the Handle and Kickstand
A good handle improves control. A kickstand keeps the cart upright when parked.
Fixed or Folding Handle
- Fixed handle: Cemented joints, strongest option
- Folding handle: Use Slip Tees at front joints so handle pivots flat for storage
Pro Tip: Extend the front bottom pipe forward. It becomes part of the handle and reduces joint count.
Simple Kickstand Design
Use a front-mounted tee on the bottom frame. When the cart is upright, the tee contacts the ground and stabilizes it. This design has no moving parts, adds zero weight, and works on sand and gravel.
Customize for Fishing Performance
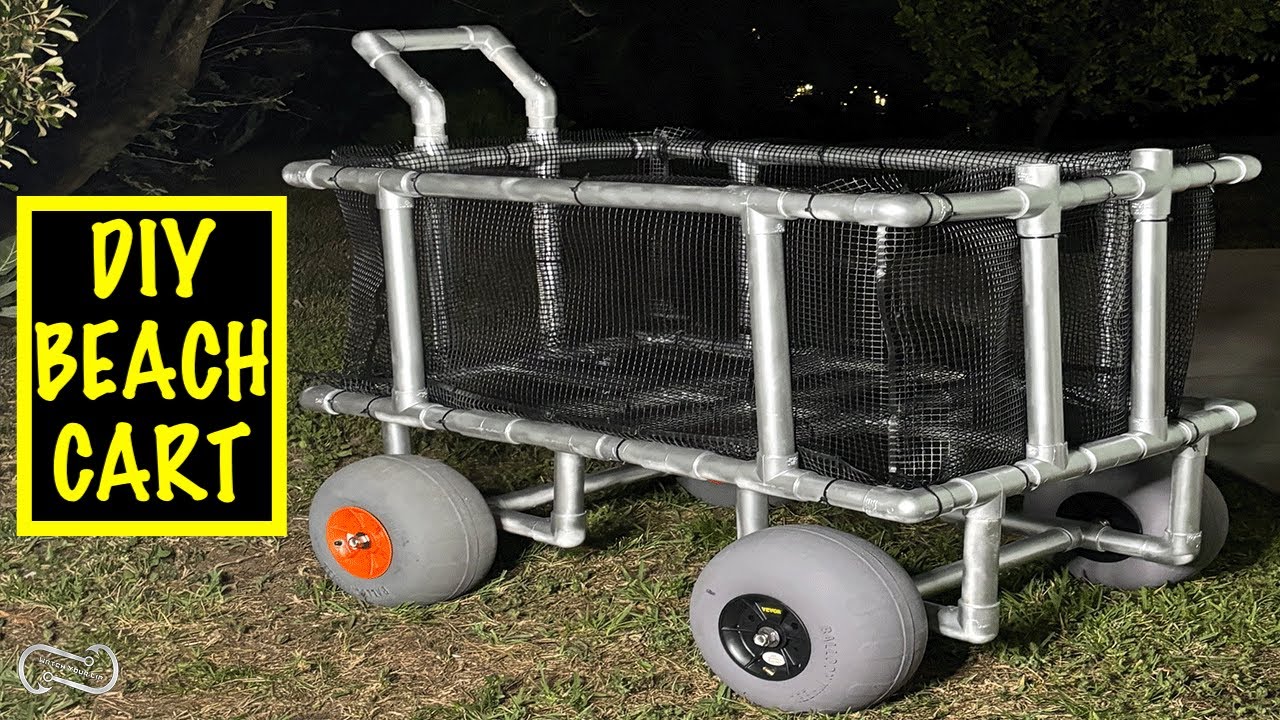
Turn your basic cart into a full-featured fishing station with smart add-ons.
Rod Holders That Double as Braces
Cut 24″ lengths of 2-inch PVC pipe. Drill through side rails and attach with self-tapping screws. Position vertically or at a slight angle. Store rods tip-up to protect guides. These pipes connect top and bottom frames, significantly increasing structural integrity.
Removable Tabletop for Bait Prep
Create a plug-in work surface using table caps from FORMUFIT or similar. Attach to vertical PVC posts. Add a plywood or thrift-store cutting board (12″x18″). Use it for cutting bait, cleaning fish, and staging gear. Remove when not in use.
Plug-In Accessories
Use modular PVC fittings to add:
- Cup holders
- Umbrella stand (for shade)
- Dry bag clips
- Tackle tray mounts
FORMUFIT offers furniture-grade fittings in colors and styles for a polished look.
Upgrade Your Bait and Cooler Setup
Keep bait alive and drinks cold without the mess.
Live Bait Aeration System
Place a battery-powered air pump inside your cooler. Connect to air stone via airline tubing. Run on rechargeable or solar-charged battery. This maintains oxygen for 8 to 12 hours. Drill overflow holes in cooler base to prevent water buildup.
Ice Alternative: Freeze Water Bottles
Instead of loose ice, freeze plastic water bottles. Use as coolant and drinking supply. No meltwater mess. Reusable daily. Place around cooler perimeter for even cooling.
Modify a Gorilla Cart (Alternative Build)

Don’t want to build from scratch? Retrofit a Gorilla Cart in under an hour.
Step-by-Step Modifications
-
Drill Drainage Holes: Use 1/2″ drill bit. Add 6 to 8 holes in metal bed. Prevents rust and reduces weight.
-
Install Rod Holders: Use 2-inch PVC pipes. Secure with metal brackets and 1/4″ bolts. Add lock washers to prevent loosening.
-
Upgrade Wheels: Replace stock tires with 13″ pneumatic all-terrain. Improves sand performance dramatically.
-
Add Towing System: Use rope plus bungee cord combo. Rope handles tension. Bungee absorbs shock. Attach to center of handlebar.
User Verified: This setup has been tested on e-bikes for over 3 years with zero failures.
Optimize for E-Bike Towing
An electric bike lets you cover more water with less effort.
Towing Setup Tips
- Use 500W+ e-bike motor for soft sand
- Keep cart weight under 50 lbs (loaded)
- Connect with shock-absorbing bungee system
- Ensure hitch point is centered to prevent swaying
Real-World Data: Anglers report covering 3 to 5 miles of beach per trip using e-bike plus cart combos.
Maintain Your Cart for Long Life
Even DIY builds last years with proper care.
After Each Use
- Rinse with freshwater, especially after saltwater exposure
- Check tire pressure (20 to 30 PSI for pneumatics)
- Inspect cotter pins and screws
Long-Term Care
- Store PVC carts indoors to prevent UV degradation
- Lubricate metal axles annually with marine-grade grease
- Replace worn tires before tread fails
Dry-fit (no glue) designs let you replace parts without rebuilding the whole cart.
Cost Comparison: Build vs Buy
| Option | Cost | Pros | Cons |
|---|---|---|---|
| DIY PVC Cart (1″) | ~$141 | Rust-proof, lightweight, customizable | Requires tools and time |
| DIY PVC Cart (1-1/4″) | ~$205 | Stronger, more durable | Higher material cost |
| Modified Gorilla Cart | ~$150 | Fast build, rugged base | Heavier, potential rust |
| Pre-Built Steel Cart | $99 | Ready to use | Less customization, heavier |
Bottom Line: Build if you want customization and long-term value. Buy if you need it now.
Essential Fishing Gear Add-Ons
Your cart isn’t complete without these survival upgrades.
Footwear: Scuba Boots and Socks
Protects against shells, rocks, and stingrays. Wear thin synthetic socks to prevent blisters. Rotate two pairs. Dry in sun after use.
Weather Protection
- Frog Tog jacket: Lightweight, windproof, packable
- Bug spray: Critical at dawn and dusk near marshes
Hygiene
Carry a wet towel to clean hands after handling fish. Prevents grease transfer to rods and phones.
When to Build vs Buy
Build your own if you have PVC scraps or access to plumbing supplies, you want full customization (color, size, add-ons), or you enjoy DIY projects and have basic tools.
Buy a pre-made cart if you need it immediately, you’re on a tight budget, or you prefer a steel frame with warranty.
Final Tips for Success
- Use a step bit. It’s essential for drilling 5/8″ axle holes.
- Test fit before gluing. Dry assembly prevents costly mistakes.
- Balance the load. Keep weight centered to avoid tipping.
- Wear eye protection when cutting or drilling.
Tool Checklist:
- Saw or band saw
- Drill with step bit
- Measuring tape
- Clamps
- PVC cleaner and cement (if permanent build)
Frequently Asked Questions About Making a Fishing Cart
What materials do I need to build a PVC fishing cart?
You will need 1-inch or 1-1/4-inch Schedule 40 PVC pipes (three to five 10-foot lengths), along with 14 to 20 tee fittings, 10 to 12 90-degree elbows, 4-way cross fittings, end caps, and PVC cement. You also need a 5/8-inch steel or 1/2-inch aluminum axle, 13-inch pneumatic tires, washers, cotter pins, and hardware for mounting rod holders.
How much weight can a DIY fishing cart carry?
A well-built PVC fishing cart with proper bracing (especially when rod holders are used as structural supports) can carry 100 lbs or more. The actual capacity depends on the PVC pipe diameter used, the quality of joints, and whether the frame uses additional cross-bracing.
Can I use a regular utility cart for surf fishing?
Yes. You can modify a Gorilla Cart or similar utility cart by drilling drainage holes, upgrading to 13-inch all-terrain tires, and adding PVC rod holders. This is faster than building from scratch and provides a durable steel frame, though it may be heavier and prone to rust if not properly maintained.
What size tires are best for sand?
Thirteen-inch all-terrain pneumatic tires provide the best sand performance. They offer excellent flotation on soft terrain, good traction on wet sand, and smooth rolling. Smaller tires (8 to 12 inches) work for budget builds but may sink in deep sand.
How do I maintain my fishing cart after saltwater use?
Rinse the entire cart with fresh water after each saltwater trip to remove corrosive salt residue. Check tire pressure monthly. Inspect all cotter pins and screws for tightness. Lubricate metal axles annually with marine-grade grease. Store PVC carts indoors to prevent UV degradation.
Is it cheaper to build or buy a fishing cart?
DIY PVC builds cost approximately $141 to $205, while modified utility carts run about $150 total. Pre-made steel carts cost around $99. Building is more cost-effective if you want full customization and plan to use the cart frequently. Buying is better if you need something immediately or have a limited budget.
Key Takeaways for Building Your Own Fishing Cart
Building a fishing cart is a practical project that pays off every time you hit the beach. The two best approaches are a custom PVC frame (lightweight, corrosion-proof, fully customizable) or a modified Gorilla Cart (faster build, durable steel base). Either way, focus on three critical components: 13-inch all-terrain tires for sand flotation, a properly secured axle with cotter pins, and rod holders that double as structural braces. With smart add-ons like removable tabletops, live bait aeration systems, and frozen water bottle coolers, your DIY cart will outperform store-bought models while lasting longer and costing less. Gather your tools, choose your build type, and start building your perfect fishing companion today.





