
Nothing beats the thrill of hooking a fish on live bait, especially when that bait came from your own backyard worm farm. Growing worms for fishing isn’t just a cost-saving hack; it’s a smart, sustainable way to ensure you always have lively, high-quality worms ready for your next trip. Whether you’re targeting panfish with red wigglers or chasing bass with thick European nightcrawlers, raising your own worms gives you control over size, health, and supply.
This guide cuts through the clutter and delivers exactly what anglers need: a clear, step-by-step system for growing fishing worms at home. You’ll learn which species work best, how to set up a low-maintenance bin, what to feed them, and how to harvest without killing your colony. Plus, you’ll get pro tips on conditioning worms for better hook performance and using castings to boost your garden.
Choose the Best Fishing Worm Species
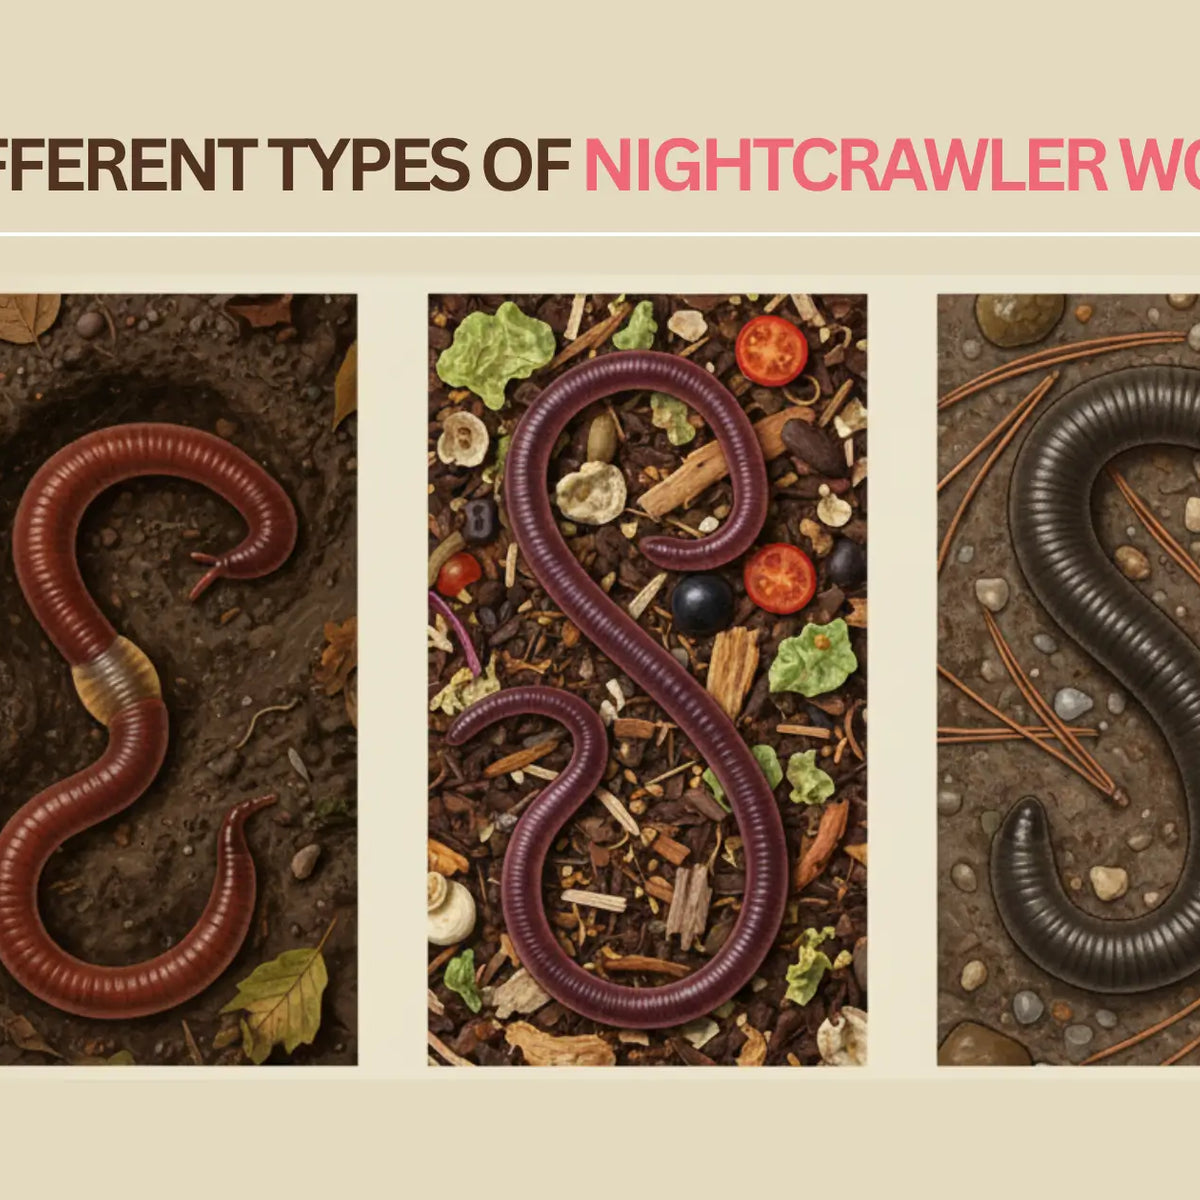
Not all worms are created equal when it comes to bait. The right species determines durability on the hook, fish appeal, and ease of farming.
Pick European Nightcrawlers for Big Fish
European nightcrawlers (Eisenia hortensis), also called “super reds,” are ideal for anglers targeting larger fish like bass, catfish, walleye, and panfish. At 4 to 5 inches long and significantly thicker than red wigglers, they stay on the hook longer and survive rocky bottoms.
They thrive in deeper bins between 68°F and 80°F and reproduce steadily under optimal conditions. A basement or garage with stable temperatures around 60°F is perfect. These worms prefer aged manure and carbon-rich bedding, making them slightly more specialized than red wigglers but still easy to manage.
Pro Tip: Start with 200 worms per bin. Low-density setups grow faster due to less competition.
Use Red Wigglers for Panfish and Kids
Red worms (Eisenia fetida) are smaller (2 to 4 inches) but highly active on the hook, perfect for bluegill, trout, and kids’ fishing trips. They’re also the most efficient composters, breaking down food scraps quickly.
Red wigglers do best in shallow, tray-based systems between 55°F and 77°F. They live near the surface, making harvesting simple. With proper care, they double every 2 to 3 months and produce one cocoon per week per worm.
Try African Nightcrawlers in Warm Climates
African nightcrawlers (Eudrilus eugeniae) can reach 8 to 10 inches, making them premium bait for big game fish. However, they require warmth between 70°F and 90°F and won’t survive cold exposure. If you live in a temperate zone, grow them indoors with a heat mat.
They’re fast-growing and voracious eaters, but not suitable for outdoor bins unless you’re in a tropical climate.
Skip Common Earthworms for Farming
Avoid trying to farm Canadian nightcrawlers (Lumbricus terrestris). These deep-burrowers tunnel vertically and reproduce slowly, making container farming nearly impossible. Stick to surface-dwelling composting worms instead.
Build a Worm Bin That Works
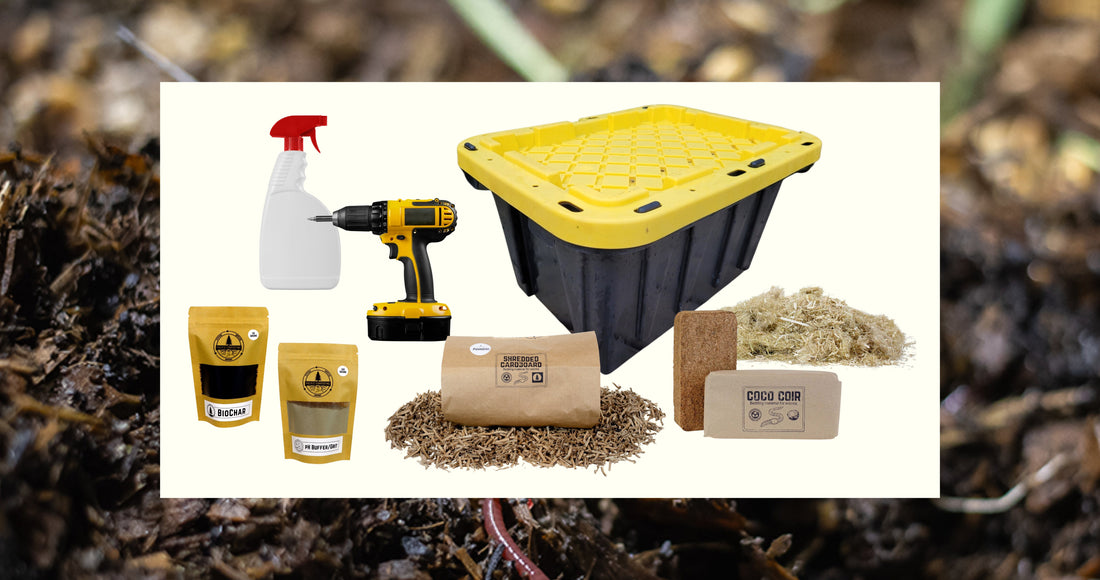
A well-designed bin keeps worms healthy, prevents odors, and supports breeding.
Select the Right Container Type
Use one of these proven options:
- Plastic totes (e.g., Rubbermaid): Affordable, durable, easy to drill.
- Foam boxes: Insulating and lightweight, often sold at bait shops.
- Wooden bins: Great for larger setups, provide natural insulation.
- Stacked tray systems: Ideal for red wigglers, simplify harvesting.
- Premade worm farms: Beginner-friendly kits from brands like Uncle Jim’s or WormBucket.com.
Avoid metal containers because they conduct heat and can rust.
Size Your Bin Correctly
Follow this rule: 1 square foot of surface area per 2 pounds of worms. A 15-quart tote (about 18″ x 16″) fits a starting colony. For bigger operations, scale up with multiple bins.
Start with two dozen worms per square foot, maxing out at 200 worms per bin initially. Low density equals faster growth.
Why it matters: Overcrowding slows reproduction and increases stress.
Modify for Airflow and Drainage
Drill quarter-inch holes every 6 to 8 inches along the upper sides and lid for oxygen exchange. Add drainage holes in the bottom and place a second bin underneath to catch leachate (“worm tea”).
Elevate the bin on bricks or feet to improve airflow from below. Use a tight-fitting, dark lid because worms hate light. On the first night, leave a room light on so they burrow down and don’t escape.
Prepare the Perfect Bedding
Bedding is both home and food source. Get it right, and your worms will thrive.
Use High-Carbon Materials
Best bedding components include:
- Shredded cardboard (non-glossy)
- Black-ink newspaper
- Coconut coir
- Peat moss
- Aged manure (horse, cow, must be dark and earthy)
- Organic potting soil (1 to 2 inches at the bottom)
Mix several types for structure and microbial diversity.
Maintain Sponge-Like Moisture
Bedding should feel like a wrung-out sponge. When squeezed, only 1 to 2 drops of water should come out. Mist weekly if dry. Add 1 cup of water when needed. Use dechlorinated water (tap water left out 24 hours) if possible.
Warning: Soggy bedding causes anaerobic decay, which is smelly and deadly for worms.
Layer for Passive Success
Try this layering method:
- Create a false bottom with bulky cardboard.
- Alternate layers of aged manure, food scraps, and bedding.
- Fill the top third with aged manure.
- Top with a thin layer of fresher manure if ventilated well.
This passive system requires minimal feeding after setup.
Source and Introduce Worms Safely
Wild worms may carry pests or diseases. Buy from trusted suppliers.
Buy from Reputable Farms
Order from Uncle Jim’s Worm Farm or similar U.S.-based suppliers. They ship healthy, species-verified worms. Avoid using random garden worms because they’re likely the wrong species.
Release Worms Properly
Place worms on top of the bedding. Let them burrow down naturally, do not bury them. Wait 2 to 3 months before harvesting, especially in passive systems. This lets populations establish and breed.
Order extra worms for immediate fishing use while your farm grows.
Feed Worms for Growth and Reproduction
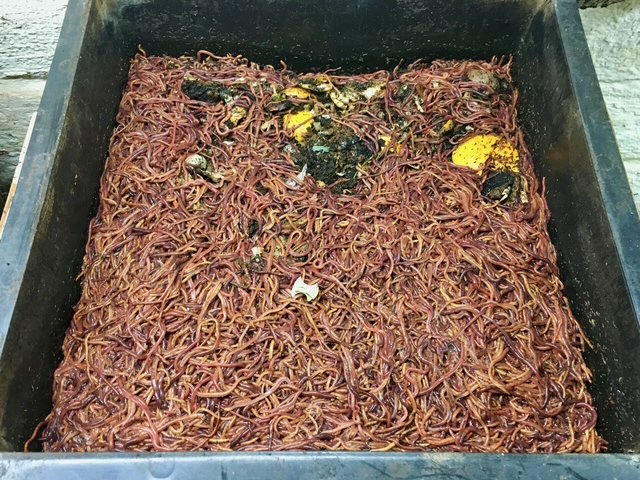
Proper feeding fuels rapid breeding and plump bait.
Feed the Right Foods
Balance “browns” (carbon) and “greens” (nitrogen):
- Fruit scraps (apple cores, banana peels, moderate amounts)
- Vegetable ends (carrots, lettuce, cucumbers)
- Coffee grounds and filters
- Crushed eggshells (adds calcium, balances pH)
- Tea bags (remove staple)
- Grains and bread (small amounts only)
- Commercial worm food (e.g., Cricut, $4 lasts 4 months)
Avoid Problematic Foods
Never feed:
- Meat, dairy, oils
- Citrus peels (too acidic)
- Onions, garlic, spicy foods
- Colored or glossy paper
- Pet waste (pathogen risk)
Follow a Smart Feeding Schedule
Feed every 2 to 3 days in active systems. Use a 2:1 ratio, 1 pound food for every 2 pounds of worms. Bury food 6 to 8 inches deep in different spots each time. Remove uneaten scraps before they rot.
Overfeeding is the number one cause of failure. It leads to foul odors and worm death.
Control Temperature and Humidity
Worms are sensitive to climate. Keep conditions stable.
Match Species to Temperature
| Species | Ideal Range | Cold Tolerance |
|---|---|---|
| Red Wigglers | 55-77°F | 40°F |
| European Nightcrawlers | 68-80°F | 40°F |
| African Nightcrawlers | 70-90°F | 45°F |
Best indoor spots include basement, utility room, and under sink. Outdoor bins must be shaded, insulated, and protected from rain and predators.
In winter, bring bins indoors or insulate heavily. In summer, elevate off hot surfaces and shade from direct sun.
Maintain High Humidity
Keep the lid closed and mist weekly. Fluff bedding every week to prevent compaction and allow airflow.
Boost Breeding and Population Growth
A thriving colony grows fast if conditions are right.
Understand Worm Reproduction
Worms are hermaphrodites, each having both male and female organs. Two worms exchange sperm, then each forms a cocoon around the clitellum. Cocoons are lemon-shaped, whitish, and contain 2 to 4 baby worms. They hatch in 2 to 6 weeks depending on temperature and moisture.
Speed Up Population Growth
Worms mature at approximately 3 months. Each produces one cocoon per week. Populations can double every 3 months under ideal conditions. Starting with 200 worms? Expect over 1,000 offspring in 6 months.
Low initial density equals faster growth. Do not overcrowd.
Harvest Worms Without Killing Your Farm
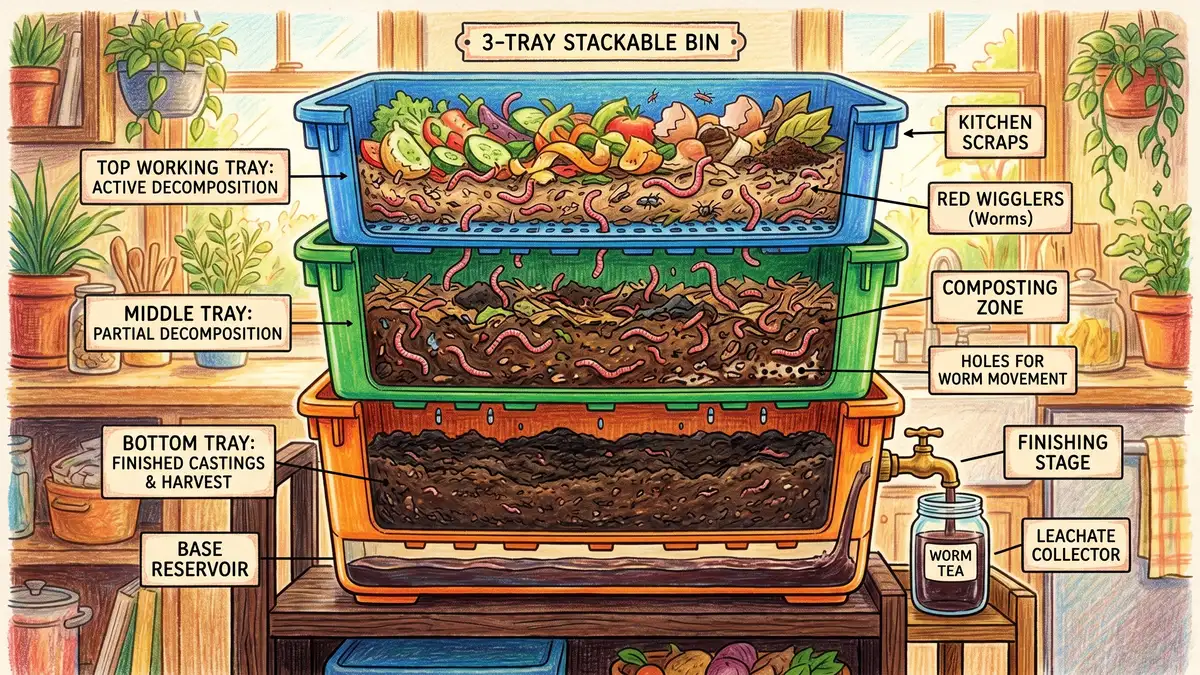
Smart harvesting ensures a continuous supply.
Wait Before First Harvest
Wait 2 to 3 months after setup. Harvest only when worms are full size.
Use Selective Harvesting
Only take large, mature worms for bait. Leave small ones and juveniles to grow and breed. This creates a self-sustaining system.
Try These Harvesting Methods
- Surface collection: Keep bin dark, worms stay near top.
- Bait attraction: Place banana peels or oatmeal in one spot, collect worms after 24 to 48 hours.
- Tray separation: In stacked bins, remove lower trays rich in castings, worms stay above.
Condition Worms for Better Fishing

Plump, lively worms catch more fish.
Fatten Worms Before Use
One month before heavy fishing:
- Move 20 to 30 large worms to a small bin.
- Add wet peat moss and chicken scratch or game bird feed.
- Replace bedding frequently.
Result: worms become plump, energetic, and hook-resistant.
Use and Store Castings and Worm Tea
Your worm farm produces free garden gold.
Harvest Vermicompost Every 3 to 6 Months
Remove castings-rich material from the bottom. Leave worms behind. Replace with fresh bedding. Castings (humus) are packed with nutrients, microbes, and plant hormones.
Brew Worm Tea Fertilizer
Steep castings in water for 24 to 48 hours. Dilute 10 to 1 with water before using on plants.
Store Excess Compost
Keep in sealed buckets or sacks. Share with neighbors or use for seedlings.
Fix Common Worm Farm Problems Fast
Catch issues early to save your colony.
Stop Foul Odors Immediately
Cause: overfeeding or poor drainage. Fix: Stop feeding, fluff bedding, add dry browns (cardboard, paper), reduce moisture.
Eliminate Fruit Flies and Gnats
Cause: exposed food. Fix: Bury scraps deeper, cover surface with cardboard, use mosquito netting over vents.
Handle Escaping Worms
Cause: too wet, too dry, wrong temperature, low oxygen. Fix: Check conditions, ensure darkness and proper airflow.
Remove White Mites
Cause: high moisture and excess food. Fix: Let bin dry slightly, reduce juicy scraps, sprinkle food-grade diatomaceous earth (safe for worms).
Try Proven Alternative Methods
Learn from real anglers who’ve made it work.
Farm Worms in Your Compost Pile
Let worms colonize naturally. Add kitchen scraps, coffee grounds, eggshells, and leaf litter.
Use a DIY Worm Bucket
A 5-gallon bucket with holes, soil, bedding, and scraps. Cover with cardboard and lid.
Stock Your Yard with Leftover Worms
Dump unused worms in moist, shaded yard spots. Over time, they’ll establish a wild population. Return after rain with a flashlight to collect.
Harvest at Night with Water or Electricity
- Water method: Soak lawn in the evening, worms surface to breathe.
- Electric worm getter: Low-voltage device to draw worms up (check local laws, banned in some areas).
Caution: Homemade versions using extension cords can be dangerous.
Store Worms for Short-Term Use
Keep bait alive and active.
Use Tupperware or Bait Boxes
Line with dirt or worm bedding. Store in the fridge (34°F to 40°F) during summer. Check weekly. Add a pinch of food and moisture.
Do not seal airtight because worms need oxygen.
Save Money and Teach Valuable Lessons
Worm farming pays for itself fast.
Startup Cost: $10 to $50
- Bin: $10 to $20
- Bedding: $5 to $10
- Worms: $15 to $30 for 500 to 1,000
You’ll recoup costs in a few fishing trips by skipping bait shop runs.
Sell Surplus Worms
- Red wigglers: $20 to $30 per pound
- European nightcrawlers: $30 to $50 per pound
Sell to bait shops, gardeners, or local anglers.
Teach Kids Responsibility and Nature
Worm farms are perfect for children. They learn about ecosystems, decomposition, and sustainability while getting excited for fishing.
Final Tips for Long-Term Success
- Use multiple bins in rotation for continuous harvest.
- Keep bins indoors for year-round production.
- Avoid direct sunlight because UV kills worms.
- Label bins with setup date and species.
- Start simple. A single bucket can yield hundreds of worms.
Frequently Asked Questions About Growing Worms for Fishing
How long does it take to grow worms for fishing?
It takes 2 to 3 months before you can harvest worms from a new bin. Worms reach sexual maturity at about 3 months, and populations can double every 3 months under ideal conditions. For best results, wait until your colony is well-established before harvesting.
What is the best worm species for beginners?
Red wigglers are the best choice for beginners. They’re easier to care for, prefer shallower bins, and tolerate a wider temperature range (55°F to 77°F). They’re also excellent composters, making them a practical dual-purpose worm for fishing and gardening.
How often should I feed my worm bin?
Feed your worms every 2 to 3 days in active systems. Use a 2:1 ratio, 1 pound of food for every 2 pounds of worms. Bury food 6 to 8 inches deep in different spots each time to prevent rot and odors.
Can I keep worm bins outdoors?
You can keep bins outdoors in shaded, protected areas, but indoor bins are more reliable for year-round production. Outdoor bins face risks from predators, rain, temperature swings, and direct sunlight. If using outdoors, insulate well and place in a shaded location.
How do I keep worms alive until fishing day?
Store worms in Tupperware or styrofoam bait boxes lined with damp bedding. Keep them in the refrigerator at 34°F to 40°F during summer. Check weekly, add a pinch of food and moisture, and ensure some airflow by not sealing the container airtight.
Do worm farms smell bad?
Properly maintained worm farms do not smell bad. Foul odors indicate overfeeding, poor drainage, or anaerobic conditions. Fix this by stopping feeding, fluffing the bedding, adding dry browns like shredded cardboard, and reducing moisture.
Key Takeaways for Growing Your Own Fishing Worms
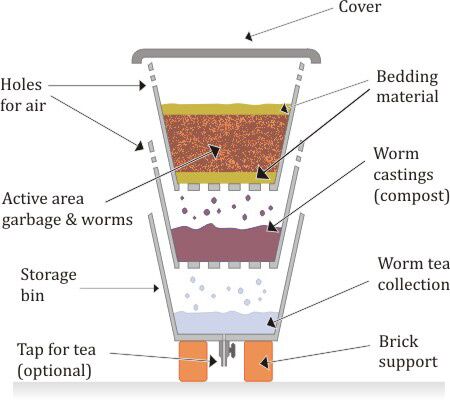
Growing worms for fishing is a sustainable, cost-effective way to ensure you always have high-quality live bait. Start by choosing the right species for your fishing goals: red wigglers for panfish and ease of farming, European nightcrawlers for larger fish and better durability. Build a proper bin with drainage, ventilation, and darkness. Maintain ideal conditions between 55°F and 80°F with moist, sponge-like bedding. Feed kitchen scraps in moderation, avoiding meat, dairy, and citrus. With patience, your colony will double every 3 months, providing a continuous supply of plump, lively worms for your fishing adventures.





