You’re standing on the riverbank, rod in hand, ready to cast. But your bait won’t sink properly or keeps getting snagged. The problem isn’t your technique. It’s how you’re tying your fishing weight. Knowing how to tie a fishing weight correctly is the difference between a productive day on the water and endless frustration. The right setup delivers your bait naturally, keeps it at the ideal depth, and maximizes your ability to feel bites.
This guide covers every major rig type, from simple split shot setups to advanced Carolina and drop shot systems. You’ll learn which knots work best for different line types, how to space your weight from the hook, and common mistakes that cost fish. By the end, you’ll rig with confidence regardless of water conditions or target species.
Choose the Right Weight Type for Your Fishing Conditions

Before tying anything, select the sinker that matches your specific situation. Each weight type serves a unique purpose and attaches differently.
Split Shot Weights for Shallow Water
Split shots are small, round pellets with a pre-cut slit. They crimp directly onto the line using pliers without requiring any knots. These are ideal for shallow water, small streams, and light tackle targeting species like trout or panfish. Typical sizes range from 1/16 to 1/8 ounce. The key advantage is quick adjustment. You can slide them up or down the line to change depth. Reusable versions can be pinched open and repositioned. Non-reusable versions require cutting the line to remove.
Egg and Bullet Sinkers for Sliding Rigs
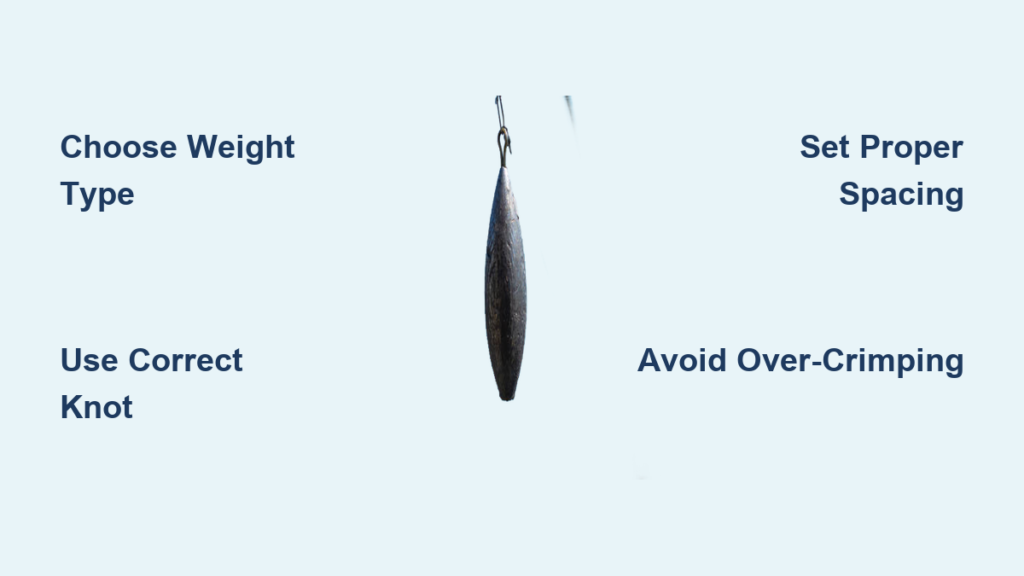
Egg sinkers feature an oval shape designed to roll over rocks and uneven bottoms. Bullet sinkers have a cone-shaped, streamlined design that slices through weeds and timber without snagging. Both thread onto the main line before tying your hook or swivel. They slide freely, allowing fish to take bait without feeling resistance. This significantly improves hook-up ratios. Weights range from 1/4 ounce to 1 ounce depending on depth and current.
Rubber Core Sinkers for Quick Adjustments
These long metal cylinders contain a rubber core with a central slit. The line inserts into the slit, and the rubber ends twist in opposite directions to lock everything in place. No crimping, cutting, or knots are necessary. They’re perfect when you need to change weight positions frequently or want to avoid damaging your line.
Pyramid and Bank Sinkers for Strong Currents
Heavy pyramid-shaped weights feature a metal ring at the top. They tie directly to the line or attach via a three-way swivel. The pyramid shape digs into sand or mud to hold position in surf fishing or river catfishing. Typical weights range from 2 to 6 ounces for strong flow situations. These are fixed weights that don’t slide.
Swivel Weights to Prevent Line Twist
These weights combine a sinker with a built-in swivel mechanism. They add casting mass while preventing line twist during retrieval. They’re especially useful when using rotating baits or making long casts with heavy weights.
Master the Essential Knots for Weight Attachment
Your rig is only as strong as the knot holding it together. Using the wrong knot for your line type causes slippage and lost fish.
Improved Clinch Knot for Monofilament Line
This is the standard knot for tying hooks and swivels when using monofilament or fluorocarbon line.
Steps to tie:
- Thread the tag end through the hook eye or swivel eye
- Pull about 6 inches of line through and wrap the tag around the standing line 5 to 7 times
- Pass the tag through the small loop formed next to the eye, then through the large outer loop
- Lubricate the knot with water or saliva
- Pull both the tag end and standing line simultaneously to tighten
- Trim the excess tag end
Important: This knot slips with braided line. Switch to the Palomar knot if using braid.
Palomar Knot for Braided Line
The Palomar is considered the strongest knot for terminal tackle. It holds up to 95% of line strength and works exceptionally well with braided line, which slips with other knots.
Steps to tie:
- Double about 6 inches of line to form a loop
- Pass the loop through the hook eye
- Tie a loose overhand knot with the loop and doubled line, letting the hook dangle inside
- Open the loop and pass the entire hook through it
- Lubricate and pull both ends to tighten against the eye
Pro Tip: This knot works on all line types and is the standard for Texas rig hooks.
Uni Knot for Versatile Connections
The Uni knot excels at connecting lines of different diameters and ties reliably to swivels and hooks.
Steps to tie:
- Run the tag end through the swivel or hook eye
- Lay the tag parallel to the main line
- Fold the tag back to form a loop over both parallel lines
- Wrap the tag around the double lines inside the loop 5 to 6 times
- Pull the tag to tighten the coils
- Pull the standing line to slide the knot down to the eye
Build a Split Shot Rig
The split shot rig is the simplest setup. It works perfectly for still water, slow streams, and shallow presentations.
Steps to build:
- Tie your hook to the end of the main line using an Improved Clinch Knot
- Slide 1 to 2 split shot weights onto the line, positioning them 12 to 18 inches above the hook
- Use needle-nose pliers to gently squeeze the weight until it closes around the line
- Pull firmly on the weight to verify it doesn’t slide
Spacing tip: In clear water, increase spacing to 24 to 36 inches to avoid spooking fish. For very shallow water, 6 to 12 inches keeps the presentation compact.
Common mistake: Over-crimping weakens the line and causes break-offs. Squeeze just enough to hold.
Build a Carolina Rig for Deep Water

The Carolina rig excels for deep water, long casts, and windy conditions. It’s the go-to setup for bass and catfish fishing on the bottom.
Steps to build:
- Slide an egg sinker onto your main line
- Add a plastic bead to protect the knot from the weight
- Tie a swivel to the end of the main line using a Uni Knot or Improved Clinch Knot
- Attach a 15 to 36 inch leader to the swivel
- Tie your hook to the leader using a Palomar or Clinch knot
How it works: The weight rests on the bottom while the line slides through it. When a fish bites, it feels no resistance from the weight, giving you time to set the hook.
Weight selection: Use 3/8 to 1 ounce in wind or deep water. Heavier weights improve casting accuracy in breezy conditions.
Build a Texas Rig for Heavy Cover
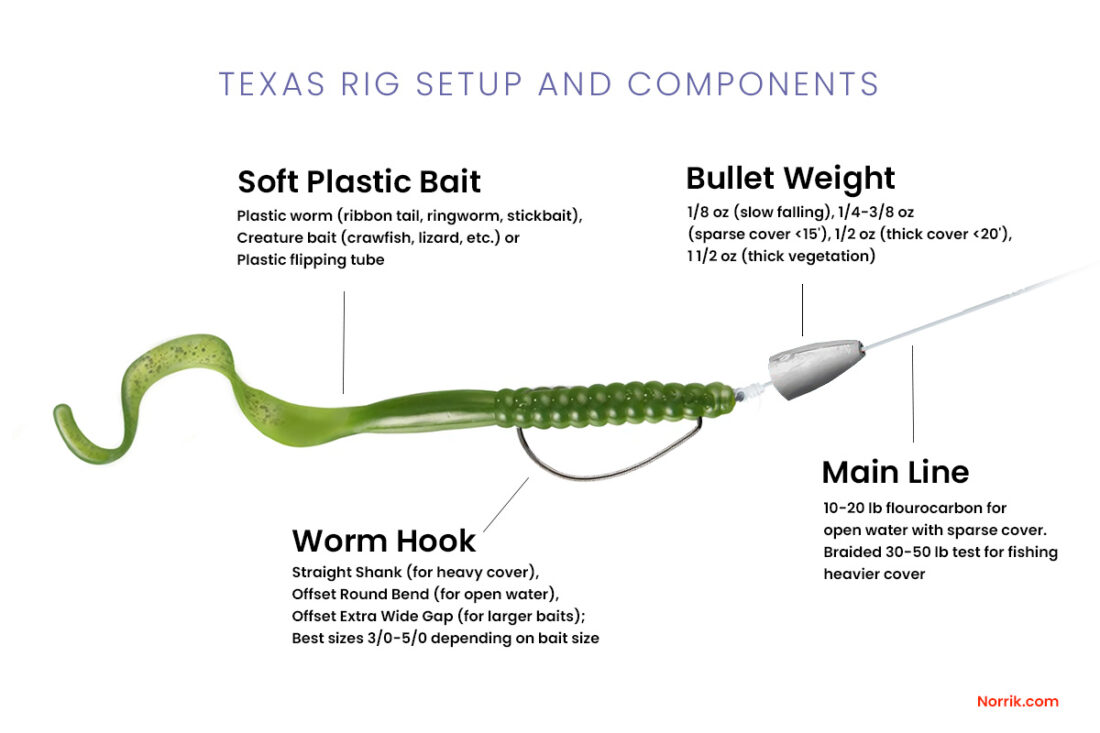
The Texas rig is the definitive choice for bass fishing in weeds, lily pads, timber, and structure. The bullet sinker slides freely, and the hidden hook point prevents snagging.
Steps to build:
- Slide a bullet sinker onto the main line with the rounded end facing toward your rod tip
- Add a bead for noise and knot protection
- Tie the hook to the end of the line using a Palomar Knot
- Thread your soft plastic bait onto the hook
- Bury the hook point back into the bait body to create a weedless presentation
Key detail: The streamlined bullet shape cuts through vegetation. Fish inhale the bait without feeling the weight, and the hook point sets when you reel.
Pro move: Use an offset worm hook to keep the point hidden but ready to penetrate on the hook set.
Build a Three-Way Swivel Rig for Current
This rig holds bottom in strong current while keeping your bait dangling naturally. It’s essential for river fishing and surf casting.
Steps to build:
- Fold the end of your leader line to create an 8 inch doubled section
- Form a loop about 4 inches from the folded end
- Tie two overhand knots through the loop to secure it
- Pass the loop through the ring on your pyramid sinker, wrap around the bottom, and pull tight
- Attach this weighted leader to one eye of a three-way swivel
- Attach your main line to the top eye of the swivel
- Attach a separate bait leader with the hook to the third eye
Result: The heavy weight anchors the rig while the bait flutters in the current at a fixed height, reducing snags and improving visibility.
Build a Drop Shot Rig for Suspicious Fish

The drop shot rig suspends your bait above the bottom, perfect for finicky fish in clear lakes or ponds that inspect bait carefully.
Steps to build:
- Tie your hook directly to the main line using a Palomar Knot, leaving a long tag end
- Position the hook 12 to 18 inches from the end of the line
- Tie your drop shot weight to the very end of the tag end using an Improved Clinch Knot
Why it works: The weight stays on the bottom while your bait hovers just above, tempting fish that won’t hit bottom-hugging presentations.
Hook choice: Use a drop shot hook with a 90-degree bend for the best presentation.
Optimize Weight Placement and Spacing
The distance between your weight and hook directly affects bait action and bite detection. Getting this right transforms your results.
Standard Spacing for Most Situations
12 to 18 inches works for most freshwater fishing scenarios. This distance balances depth control with natural bait movement. Fish feel minimal resistance while you maintain sensitivity to strikes.
Adjusting for Specific Conditions
In shallow water under 5 feet, reduce spacing to 6 to 12 inches to keep the rig compact. In fast current or very clear water, increase spacing to 24 to 36 inches. This gives your bait more freedom to drift naturally and reduces the chance of spooking wary fish.
Bottom Fishing Configurations
For Carolina rigs, the weight stays on the bottom with the bait floating above. For drop shot rigs, the weight sits below the hook with the bait suspended. The key principle remains the same. Use the lightest weight that reaches and holds your target depth. Too heavy creates a stiff, unnatural presentation and reduces sensitivity.
Avoid Common Mistakes
Small errors cost you fish. Here’s how to prevent the most frequent problems.
Over-Tightening Split Shots
Squeezing too hard deforms or severs the fishing line, causing unexpected break-offs. The fix is simple. Use pliers to crimp gently, just enough to hold. Test by giving a firm tug. If the line cuts or slides excessively, reposition and try again.
Weight Too Close to Hook
Restricting bait movement scares fish and reduces hook-up ratios. Keep at least 12 inches between weight and hook for most situations. The bait needs room to float, dart, or drift naturally.
Skipping Knot Lubrication
Dry tightening creates friction heat that weakens line strength. Always wet the knot with water or saliva before pulling it tight. This preserves breaking strength and prevents premature failure under load.
Using Wrong Knot for Line Type
Braided line slips on Improved Clinch knots. The solution is using a Palomar knot for braided lines and reserving the Clinch for monofilament or fluorocarbon.
Ignoring Line Twist
Line twist causes tangles and reduces casting distance. Add a swivel to your rig or use a swivel weight to prevent this problem, especially during retrieval.
Essential Tools and Safety
Having the right tools makes rigging faster and more reliable.
Must-Have Tools
Needle-nose pliers are essential for crimping split shot weights precisely. Line cutters trim tag ends cleanly. A hook remover keeps your fingers safe during catch and release. A tackle box with compartments organizes weights by size and type so you can grab the right one instantly.
Safety Considerations
Wear eye protection when casting. A snapping line or flying weight can cause serious eye injury. Handle hooks carefully using pliers or a dehooker. Check local regulations before fishing. Some areas ban lead sinkers due to wildlife toxicity. Use tin, tungsten, steel, or bismuth alternatives to protect wildlife and comply with local laws.
Frequently Asked Questions About Tying Fishing Weights
What is the strongest knot for tying a fishing weight?
The Palomar knot is considered the strongest for terminal tackle. It holds up to 95% of line strength and works exceptionally well with braided line, which slips with other knots.
Does the type of fishing line matter for which knot to use?
Yes. Monofilament and fluorocarbon work well with the Improved Clinch Knot. Braided line requires the Palomar knot to prevent slippage. The Uni knot works consistently across all line types.
How far should a weight be from the hook?
The standard distance is 12 to 18 inches for most situations. Increase to 24 to 36 inches in clear water or fast current. Decrease to 6 to 12 inches for shallow water presentations.
Can I reuse split shot weights?
Some split shots are reusable and can be pinched open to reposition. Non-reusable versions require cutting the line to remove. Check the packaging before purchasing if reusability matters for your fishing style.
What happens if the weight is too heavy for my line?
A weight that’s too heavy creates an unnatural bait presentation, reduces sensitivity to bites, and increases the risk of line breakage. Always use the lightest weight that reaches and holds your target depth.
Key Takeaways for Tying Fishing Weights
Mastering how to tie a fishing weight transforms your fishing success. The right weight type, knot, and rig setup deliver your bait naturally, keep it at the ideal depth, and maximize strike detection.
Choose your weight based on fishing conditions. Split shots work for shallow water. Egg and bullet sinkers excel in deep water and heavy cover. Rubber cores offer quick adjustments. Pyramids anchor in strong current.
Match your knot to your line type. Use the Palomar for braided line and the Improved Clinch for monofilament. Always lubricate before tightening.
Practice these rigs at home with paracord before hitting the water. Carry multiple weight sizes to adjust for changing conditions. Inspect your rig after every cast for loose weights or frayed line.
The difference between a frustrating day and a successful one often comes down to how you tie your fishing weight. Master these techniques, avoid the common mistakes, and you’ll spend less time retying and more time reeling in fish.