

You’re on the riverbank, fly rod in hand, and you’ve just landed a beautiful trout. Now you need a way to carry it alive, cool, and secure without slowing down your next cast. That’s where a fishing creel comes in. More than just a basket, it’s a tradition. Handwoven, ergonomic, and built to last, a creel is both functional and symbolic of the angler’s craft.
But what if you could make your own? This guide walks you through how to make a fishing creel from start to finish, using traditional reed basketry methods rooted in the Adirondack and Finger Lakes traditions. Whether you’re a fly fisher, artisan, or heritage enthusiast, you’ll learn how to weave a durable, authentic creel that can become a family heirloom.
Choose the Right Materials for Your Creel
The foundation of any fishing creel begins with selecting high-quality flat-oval reed, a flexible material made from steam-pressed rattan. It’s preferred over round reed for its smooth surface and structural stability. Before purchasing, inspect all reeds carefully and avoid any pieces that appear warped or brittle.
Recommended Reed Widths
For a standard two-fish creel, gather these flat-oval reed widths.
3/8″ flat-oval reed for the base and solid inserts
5/8″ flat-oval reed for main body weaving
7/8″ flat-oval reed for reinforcement and decorative edging
1/4″ flat-oval reed for lacing, trim, and belt loops
6 round reed for binding, rim work, and strap loops
Natural Add-Ons
Traditional creels often incorporate additional materials that enhance functionality. Moss lining keeps fish moist and cool during transport. A wooden lid provides custom fit and protection. A leather strap offers adjustable, comfortable carrying options. Waterproof exterior glue seals joints and prevents leakage.
Gather Essential Basketry Tools
You don’t need a full workshop, but having the right tools makes the job easier and more precise. Gather these essentials before starting your project.
Must-Have Equipment
Sharp scissors or shears for clean cuts without fraying
Small pliers to trim tight ends flush
An awl or bodkin for threading reeds through tight spaces
A spoke-weight ruler to measure and space base spokes evenly
A rubber mallet to pack down weave layers for tightness
A soaking tub to hydrate reeds in warm water for 2 to 4 hours
Measuring tape for consistent dimensions
Sandpaper to smooth wooden rims and lid edges
Clothespins can help in early stages but aren’t needed after the third row. Thumb pressure holds weavers in place naturally.
Build a Strong Foundation: The Base

The base sets the structure for your entire creel. A standard 11.5″ by 6″ base works well for a two-fish creel, providing enough space while maintaining portability.
Mark and Position Spokes
Start by finding the center point of your base material. Fold a test piece in half and mark the center with a dimple. Measure 5.75 inches from center along the long axis. Position radial spokes 5 inches from center to edge on the short axis. Spokes should be evenly spaced, typically about 1/2 inch apart, for balanced tension throughout the base.
Weave the Foundation
Choose between two base patterns. The radial weave has stakes radiating from center with weavers going under and over in a star pattern. The checkerboard weave creates a grid-like base for added strength. Both work well, though many artisans prefer radial for its traditional appearance.
Weave tightly with your thumb to eliminate gaps. For extra durability, add a solid base insert using 3/8″ flat reed. Slide it along the outer edge, press into place, and seal with waterproof glue. This prevents sagging and keeps fish from slipping through the weave. Let the base dry slightly to set the shape before moving to the walls.
Shape the Walls Using Traditional Techniques
The transition from flat base to three-dimensional basket is called upsetting. This is one of the trickiest steps in creel making, requiring patience and careful attention to moisture levels.
Begin Upsetting
Keep reeds moist throughout this process to prevent snapping. Mist dry sections as you work. Rotate the basket counter-clockwise if you’re right-handed for smooth workflow. Start at one end and gently lift stakes one by one, forming a concave back that fits comfortably against your body when worn.
Weave the Body
Use the under, over, under pattern, also known as standard randing, for the main walls. Start on the right side for right-handed efficiency. Pack each row tightly with your thumb. No clips are needed after the third round. Rotate the basket as you go to maintain even tension throughout.
At corners, switch to over, under, over to create smooth, rounded transitions. This technique gives the creel its signature pot-bellied shape, wider in the middle than at the top or bottom. Weave to 8 to 10 inches high depending on your design preference.
Set and Refine the Creel Shape
Once the walls are complete, proper drying and refinement ensure your creel holds its form for years of use.
Dry Overnight
Let the creel dry overnight to set the three-dimensional shape. This drying makes the reeds stiff, so you’ll need to rewet them the next day for rim work. Don’t skip this step. It locks in the form and prevents warping later.
Pack Down for Tightness
After rewetting, use your fingers or a rubber mallet to gently press down the weave. This tightens loose areas and ensures uniform density. Focus on corners and transitions for a professional finish. This step is crucial for durability, especially when the creel gets wet during fishing trips.
Finish the Rim with Double X-Lacing
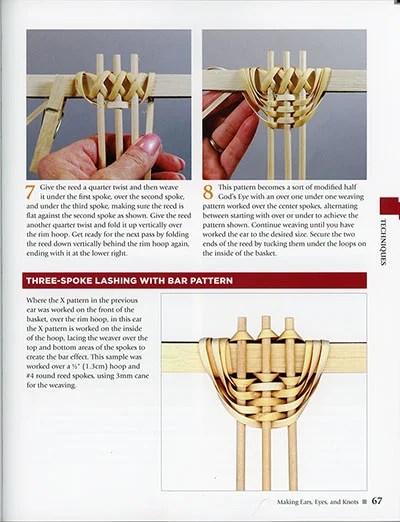
The rim is the most structurally critical part of your creel. Proper reinforcement ensures it holds up under years of use.
Trim and Secure Stakes
Cut all stakes to the same height. Choose between two rim methods. The wooden hoop method slides stakes into a pre-shaped wooden frame. The fold-over method bends stakes over a thick rim rod and lashes them in place. The fold-over method is more traditional and allows for double-rim reinforcement.
Apply Double X-Lacing
For fail-safe strength, use double X-lacing. Start the second rim on the opposite side of the first. Lace in an X-pattern from inside, pulling each strand down into the weave. Complete two full passes. Pull tightly left to right for maximum leverage. This creates redundancy. If the outer strand breaks when wet, the inner one holds. It’s a pro technique used by master weavers.
Lock the Final Edge
When returning to the starting point, pass the final strand behind the first piece to lock the weave. Cut cleanly with sharp shears. Flip the basket and repeat on the inside. No loose ends should remain. Everything should be tight and concealed.
Create a Custom-Fitting Lid

No two handwoven creels are identical, so pre-made lids won’t fit. Making a custom lid ensures a perfect match to your creation.
Trace and Cut the Lid
Place the creel upside down on a piece of wood. Trace the top opening with a pencil. Cut along the line using a jigsaw or scroll saw. Use lightweight, water-resistant wood like basswood or cedar.
Install the Lid
Sand edges smooth to prevent splinters. Add a fish slot, a narrow opening about 1 inch wide for inserting fish without opening the lid. Attach with brass or stainless steel hinges. Install a latch for secure closure during transport. Optional: line the lid with moss or felt to keep fish cool.
Attach the Strap and Belt Loop
A comfortable, secure strap transforms your creel into a practical fishing companion.
Build a Five-Wrap Belt Keeper
Use 1/4″ flat-oval reed to create a sturdy loop. Wrap the reed five times around a 1-inch dowel or form. This slight flexibility helps the loop conform to belts. Secure the joint with waterproof exterior glue. Glue the loop to the back of the creel near the top.
Install an Adjustable Strap
Use no-sew hardware for easy field adjustment. Attach buckles or clips to the sides of the creel. Use leather or heavy-duty fabric like canvas or Cordura. Position for balanced weight distribution when worn across the chest or over the shoulder.
Final Finishing and Testing
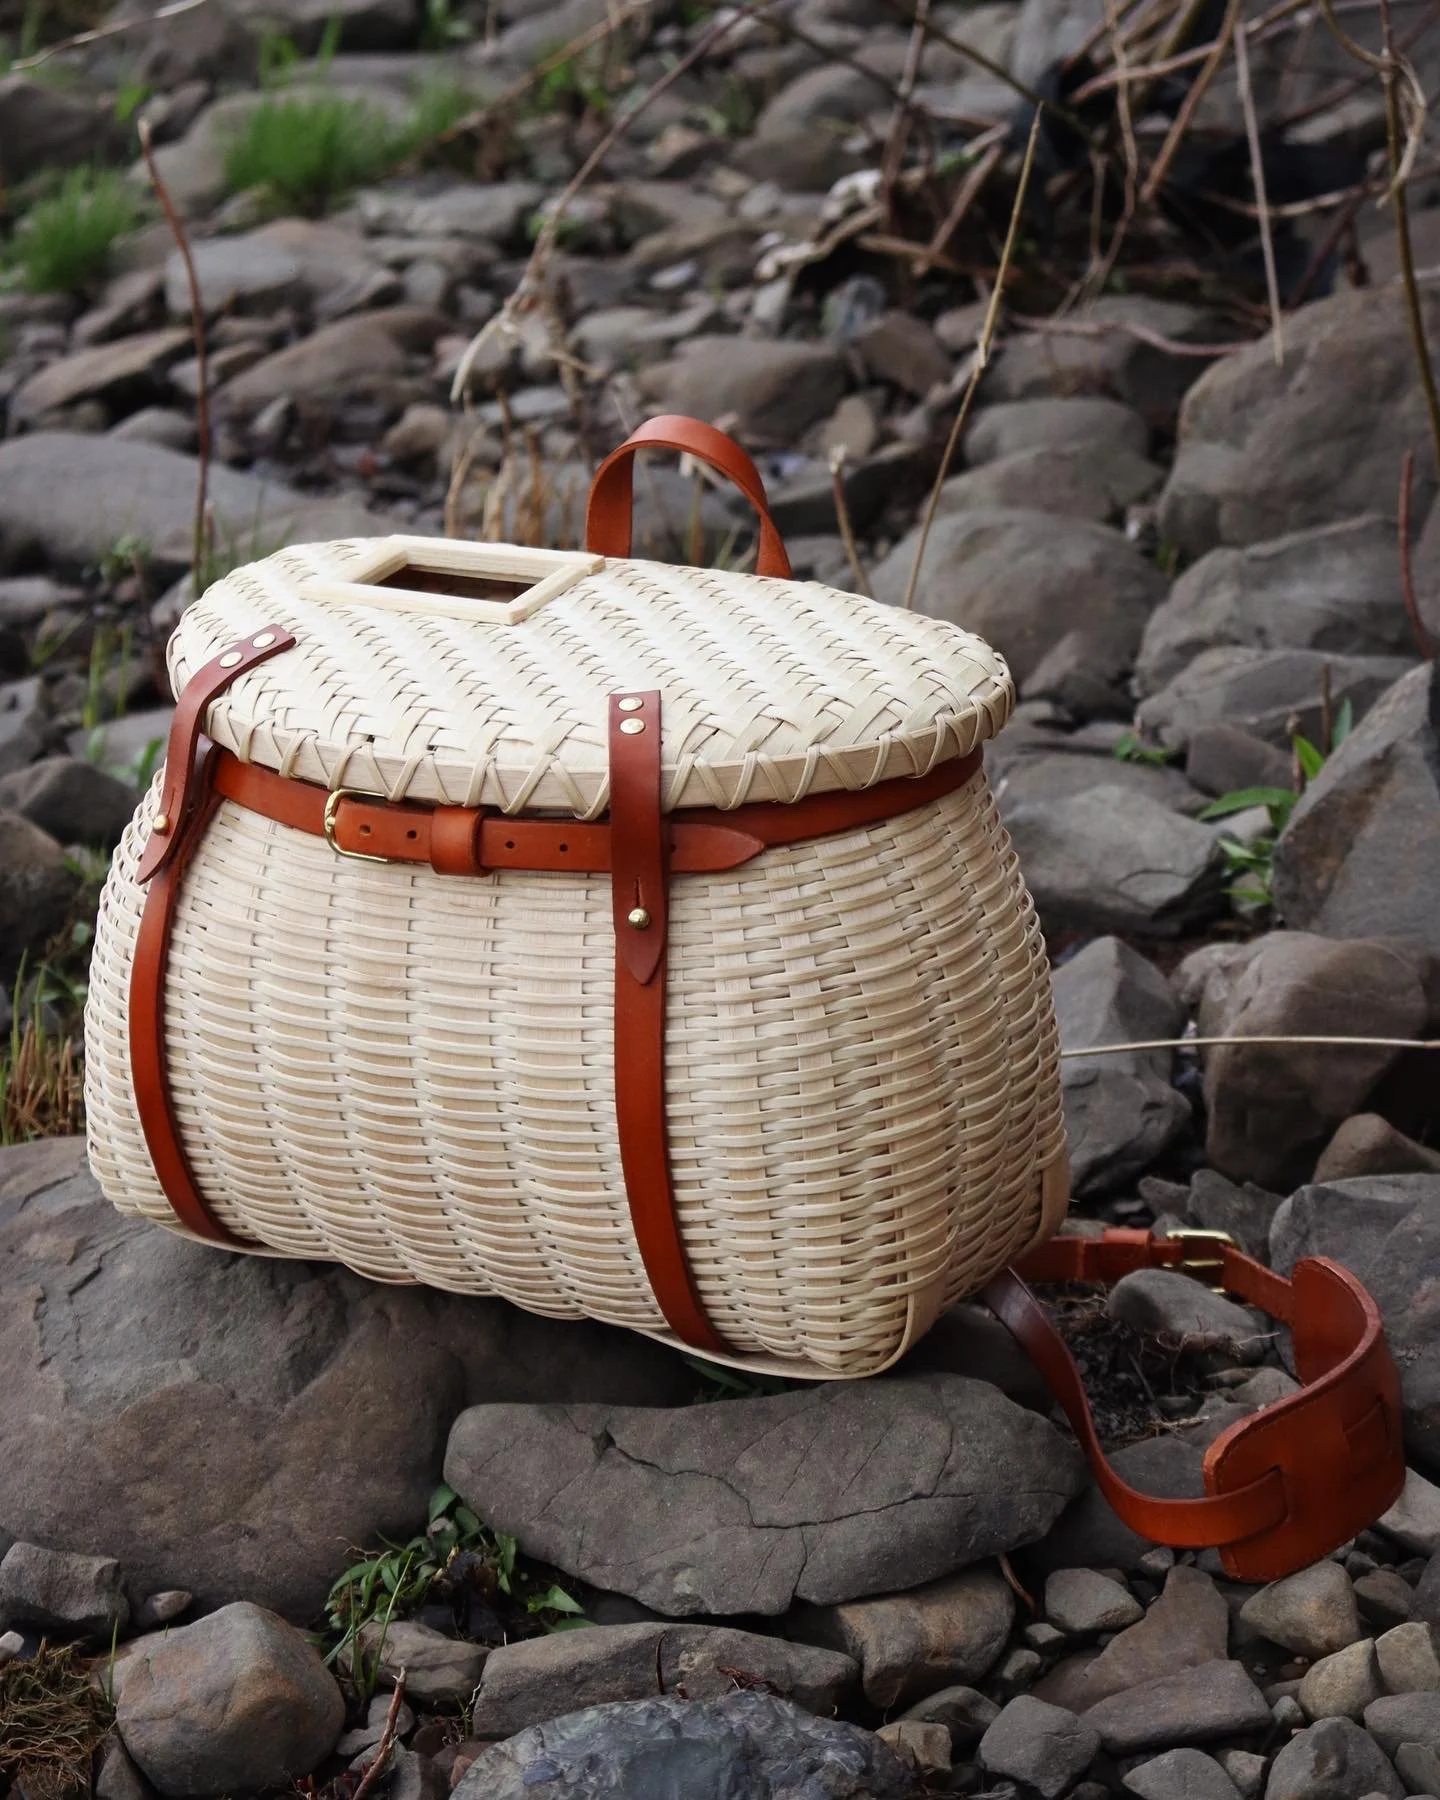
Before declaring your creel complete, take time to inspect and test every detail.
Trim and Inspect
Use pliers to cut any protruding reed ends flush. Run your fingers along the interior. No sharp points should remain. Check for gaps, loose weaves, or uneven tension. Repair minor flaws with additional reed stitching.
Test Functionality
Wear the creel and walk around to ensure it stays secure. Simulate fish insertion through the slot to confirm easy access. Check water resistance by spritzing with water. Does it bead up or soak in? If needed, apply a natural wood sealant like tung oil to the lid and rim.
Maintain Your Handmade Creel
Proper care ensures your creel lasts decades and potentially becomes a family heirloom.
Clean and Dry After Use
Rinse with fresh water if used in salt or muddy conditions. Dry thoroughly. Never store damp. Hang in a cool, dry place away from direct sunlight. Moisture leads to mold and rot.
Annual Care Routine
Re-oil wooden parts with linseed or tung oil. Inspect weaves for wear and repair early. Replace the strap if frayed. With proper care, your creel can last decades.
Frequently Asked Questions About Making a Fishing Creel
What is the best material for making a fishing creel?
Flat-oval reed is the best material for making a fishing creel. It’s made from steam-pressed rattan, offers smooth surfaces, and provides structural stability. Round reed works well for binding and rim work, but flat-oval reed is preferred for the main body and base construction.
How long does it take to make a fishing creel?
Making a fishing creel typically takes 12 to 16 hours over several days. This includes time for soaking materials, building the base, shaping walls, and finishing. Beginners should expect to spend more time, especially on challenging steps like upsetting and rim work.
Do I need prior basketry experience to make a creel?
No prior basketry experience is needed to make a fishing creel. While some steps like upsetting require patience and practice, the process is forgiving. Small mistakes can be repaired with additional reed stitching. Following a detailed pattern and taking your time leads to success.
Where can I buy a fishing creel pattern?
Lisa Nortz’s fishing creel pattern is available from The Country Seat for $4.00. It includes 4 pages of detailed instructions for an 11.5″ by 6″ by 8″ high creel. The phone number is 610-756-6124, open Monday through Friday, 10 AM to 4 PM EST.
How do I keep fish fresh in a creel?
Keep fish fresh in a creel by using moss lining, which keeps fish moist and cool. The natural breathability of reed helps maintain humidity. For best results, keep the creel shaded and wet the moss periodically during hot weather. The fish slot in the lid allows adding fish without fully opening the creel.
Key Takeaways for Building Your Own Fishing Creel
Making a fishing creel combines functionality, artistry, and cultural heritage. Start with quality flat-oval reed in multiple widths, and don’t skip the solid base insert sealed with waterproof glue. The double X-lacing technique on the rim provides essential structural redundancy. Creating a custom lid from your completed creel ensures a perfect fit. With patience and practice, you’ll create a durable, ergonomic creel that serves as both practical fishing gear and a meaningful heirloom connecting you to centuries of angling tradition.





