
A loose fishing rod handle ruins your casting accuracy and makes fighting fish frustrating. When the butt end wobbles, the reel seat feels unstable, or the grip is damaged, your performance suffers on the water. The good news? Most handle issues can be fixed at home with basic tools and materials. You do not need to buy a new rod. This guide covers every proven method for fixing a loose fishing rod handle, from structural epoxy repairs to cosmetic touch-ups, so you can get back to fishing fast.
Diagnose the Handle Problem First
Before grabbing glue or tools, identify exactly what is wrong. Different symptoms require different fixes. Taking time to diagnose properly saves you from making the wrong repair.
Check for Rod Butt Separation
If the base of the handle moves or feels loose where it meets the rod blank, the internal connection has failed. This commonly happens after hard impacts or years of stress. Gently twist and pull the handle. Any movement means the bond between the rod and handle is compromised.
Inspect Cork or EVA Foam Damage
Cracks, chips, or deep gouges in cork reduce grip and can worsen over time. Pets often chew these sections, but drops or storage damage also cause splits. If the structure remains solid but the surface is damaged, a cosmetic repair may suffice.
Test Reel Seat Stability
A loose reel seat often stems from handle degradation. Press down on the reel and wiggle it side to side. If there is play, the underlying handle material may be cracked or detached from the blank.
Look for Missing Material
Large gaps or eroded sections mean structural integrity is at risk. These require filling or reinforcement, not just surface treatment.
Fix a Broken Rod Butt with Dowel and Epoxy

This method restores strength when the rod blank has separated from the handle base. The repair creates a permanent bond that handles normal casting and fish fighting.
Insert a Wooden Dowel for Support
Use a 3/8-inch wooden dowel cut to fit inside the hollow end of the handle. Slide it into the butt section to test the fit. It should go deep into the reel seat with slight resistance. No trimming is usually needed.
Apply Five-Minute Epoxy
Squeeze Loctite 5-minute epoxy into the handle cavity and coat the dowel. Twist the dowel as you insert it to spread the glue and eliminate air pockets. Epoxy should ooze slightly. This ensures full coverage.
Clamp with Duct Tape
Wrap duct tape tightly around the handle and dowel end to hold everything in place. Apply even pressure to maximize contact. Let cure for at least 5 minutes before handling, but wait overnight for full strength.
Clean and Seal
Wipe excess epoxy with rubbing alcohol before it hardens. Once cured, inspect the joint. For long-term protection, seal any exposed wood or cork nearby with spar urethane.
Pro Tip: Carry a mini repair kit with a short dowel, epoxy packet, and tape for emergency fixes on the go.
Repair Chipped or Gouged Cork Handles

When pets chew or impacts crack the cork, use recycled material to rebuild the surface naturally. This method produces a seamless, natural appearance that matches the original handle.
Make Cork Putty from Wine Corks
Grind used wine corks into fine dust using sandpaper or a sander. Mix the powder with wood glue until it forms a thick putty. The finer the dust, the smoother the finish.
Fill Damaged Areas
Press the putty firmly into cracks or missing sections. Overfill slightly to allow for shrinkage during drying. Shape it close to the original contour by hand.
Let It Dry Overnight
Allow 8 to 12 hours for complete drying. Rushing this step causes collapse when sanded. If shrinkage occurs, apply a second thin layer.
Smooth with Scotch-Brite Pad
Use a non-abrasive scrubbing pad to level the repair flush with the surrounding cork. Avoid sandpaper. It cuts too deep and damages texture.
Seal the Entire Handle
Apply U40 or spar urethane over the whole handle. This prevents water absorption, matches the sheen, and protects against future damage.
Expert Note: Never leave cork unsealed. Moisture leads to swelling, mildew, and eventual failure.
Rebuild Missing Structure with Wood Filler
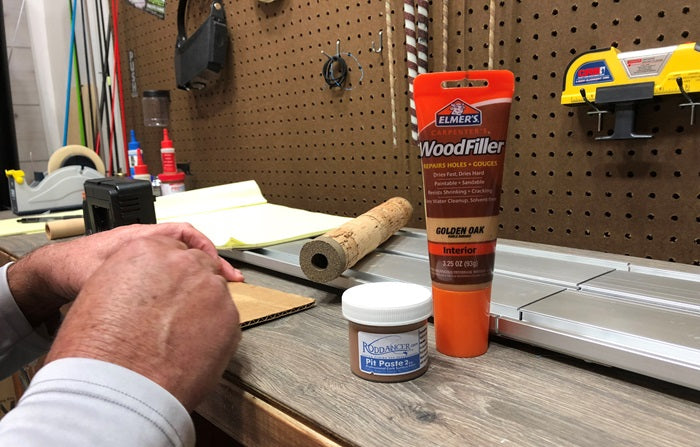
For large gaps or collapsed sections, wood filler provides strong, moldable support. This method works well for hybrid grips or rods with partial cork and foam sections.
Prepare the Surface
Clean the area with alcohol. Remove loose debris and grease. Roughen smooth surfaces slightly to help the filler adhere.
Apply Epoxy-Based Filler
Use epoxy wood filler for best durability and water resistance. Press it into voids with a putty knife, overfilling slightly. Standard drying time is 2 to 6 hours.
Sand in Stages
Start with 120-grit sandpaper to shape, then move to 220 and 400 for a smooth finish. Match the original handle profile carefully.
Finish and Protect
Stain or paint if needed to match color. Always seal with polyurethane or U40 to prevent moisture damage.
Upgrade Grip with Winn Polymer Wrap
If the structure is sound but the surface is slippery or worn, add high-traction tape. This upgrade provides superior grip, especially when wet.
Clean the Handle
Wipe with isopropyl alcohol to remove oils and dirt. Let dry completely.
Wrap with Tension
Cut Winn polymer tape to length. Start at the base or top, overlapping each wrap by 1/8 inch. Keep tension even for a smooth, professional look.
Trim and Press Edges
Use scissors or a utility knife to cut excess. Firmly press the ends to prevent lifting.
Benefits
This wrap stays grippy when wet. It is durable and UV-resistant. It is reversible, so you can replace it anytime. It comes in colors and textures to match your style.
Ideal For: Anglers who fish in rainy conditions or saltwater environments.
Refinish with Heat-Shrink Tubing
For a fast, clean cosmetic fix, heat-shrink tubing covers damage and adds protection. This method provides a waterproof, UV-resistant barrier.
Measure and Cut
Slide the tubing over the handle and mark the correct length. Cut with scissors or a knife.
Apply Heat Evenly
Use a heat gun while rotating the rod. The tube should shrink tightly without scorching. Avoid lingering in one spot.
Choose the Right Size
Select tubing with a pre-shrunk diameter that matches your handle. Too loose, and it will not conform. Too tight, and it may crack during application.
Advantages
Heat-shrink tubing is waterproof and UV-resistant. It hides cracks and discoloration. It is available in color options. It protects underlying material.
Warning: Do not use on cork if moisture is trapped underneath. This can cause rot.
Essential Tools for Handle Repairs
Having the right tools makes repairs faster and more precise. Stock these items for your workshop.
Use a Digital Caliper
Measure handle diameter, rod blank size, and repair components accurately. This is critical for selecting dowels or tubing.
Keep Sandpaper on Hand
Stock 120, 220, and 400 grit for shaping fillers and smoothing repairs.
Add a Heat Gun
Needed for shrinking tubing and softening old adhesives during removal.
Include Scotch-Brite Pads
Perfect for finishing cork without cutting too deep.
Store Glues and Epoxy Properly
Seal syringes with caps or extra tips. Keep cork dust in a sealed container for future use.
Recommended Source: mudhole.com offers repair kits, tools, and step-by-step guides for DIY rod builders.
Compare Repair Materials at a Glance

Choose the right method based on damage type, not convenience. Structural issues demand strong adhesives. Surface wear can be fixed cosmetically.
| Method | Best For | Strength | Water Resistance | Looks Natural | Skill Level |
|---|---|---|---|---|---|
| Dowel + epoxy | Broken rod butt | High | Excellent | Hidden | Easy |
| Cork putty | Gouges, chips | Medium | Good when sealed | Excellent | Easy |
| Wood filler | Large gaps | Medium-High | Good | Fair | Moderate |
| Polymer wrap | Slippery grips | Surface only | Excellent | No | Easy |
| Heat-shrink tubing | Cosmetic cover | Cover only | Excellent | Fair | Easy |
Avoid Common Repair Mistakes
Even small errors can weaken your fix or ruin the look. Learn from these common pitfalls.
Do Not Skip the Test Fit
Always dry-fit dowels or tubing before applying glue. Forcing parts can crack the handle.
Never Rush Drying Time
Premature handling causes collapse, especially with cork putty or wood filler.
Avoid Dusty Workspaces
Dust reduces epoxy adhesion. Work in a clean, dry area.
Do Not Forget to Seal
Unsealed cork absorbs water, swells, and fails. Always apply a protective coat.
Wear Gloves
Epoxy and glue stick to skin. Nitrile gloves keep hands clean and safe.
When to Seek Professional Help
Some damage goes beyond DIY repairs. Know when to call in an expert.
Signs You Need a Pro
Multiple cracks near the reel seat, a bent or split rod blank, or handle detachment combined with guide misalignment all indicate serious damage. In these cases, consider sending the rod to a professional rod builder. They can replace the entire grip or reinforce the blank properly.
Prevent Future Handle Problems
Keep your rod in top shape with simple habits. Prevention costs less than repair.
Store Rods Horizontally
Avoid leaning rods vertically for long periods. This stresses the butt end and weakens the connection.
Clean After Use
Rinse with fresh water after saltwater trips. Dry the handle before storing.
Inspect Regularly
Check for cracks, looseness, or wear every few months. Catch issues early before they worsen.
Use Rod Socks or Tubes
Protect grips during transport and storage. This prevents accidental damage from impacts.
Key Takeaways for Fixing Your Fishing Rod Handle
Fixing a loose fishing rod handle is achievable with the right approach. Match your repair method to the type of damage. Structural failures require dowel and epoxy or wood filler. Surface damage responds well to cork putty or polymer wrap. Always seal cork repairs to prevent moisture damage. Test your repair lightly before targeting big fish. With these methods, you can restore strength, comfort, and reliability to your rod without buying a new one.
Get out there. Tight lines and solid handles ahead.
Frequently Asked Questions About Fixing a Loose Fishing Rod Handle
Can I fix a loose rod handle without buying a new rod?
Yes. Most handle issues can be repaired at home with basic materials like epoxy, wooden dowels, cork dust, or polymer tape. Structural repairs using dowel and epoxy method restore full strength for casting and fighting fish.
What causes a fishing rod handle to become loose?
Common causes include hard impacts that break the bond between the rod blank and handle, repeated stress from casting, pet chewing on cork grips, and moisture damage that weakens materials over time.
How long does it take to repair a fishing rod handle?
Simple repairs like polymer wrap or heat-shrink tubing take 15 to 30 minutes. Cork putty repairs require overnight drying, so plan for 8 to 12 hours total. Dowel and epoxy repairs need at least 5 minutes cure time but benefit from overnight resting.
Should I seal my cork handle after repair?
Always seal cork repairs. Unsealed cork absorbs water, leading to swelling, mildew, and eventual failure. Apply U40 or spar urethane over the entire handle after making repairs.
When should I replace my fishing rod instead of repairing it?
Replace the rod if the blank is bent or split, if there are multiple cracks near the reel seat, or if handle detachment is combined with guide misalignment. Professional rod builders can assess whether repair is viable.





