
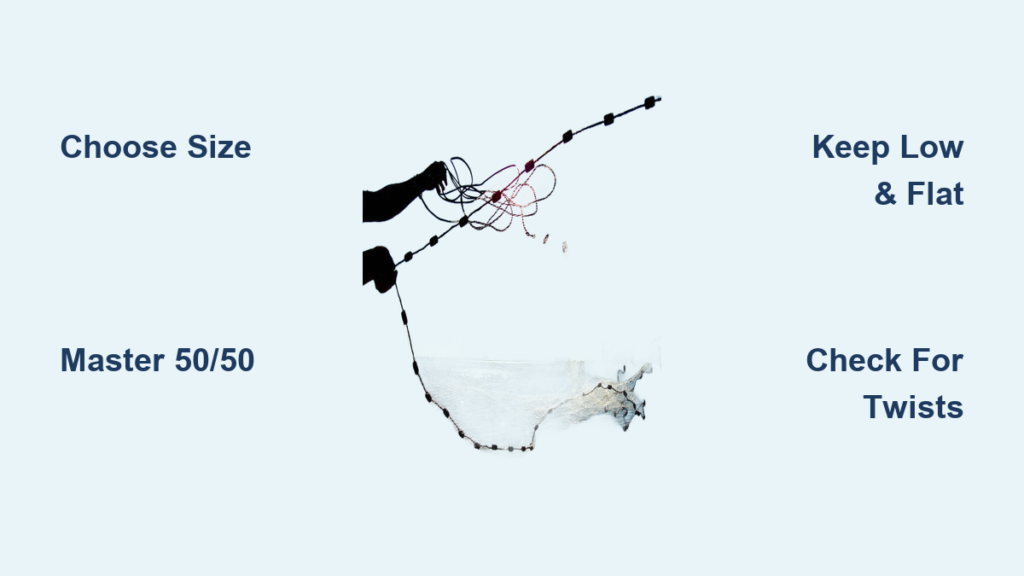
Catching your own bait with a cast net transforms your fishing game. Whether you’re targeting redfish, trout, or catfish, knowing how to cast a fishing net means fresher bait, lower costs, and more time on the water. A well-thrown cast net can cover up to 15 feet in diameter, trapping dozens of baitfish in one smooth motion. The secret lies in technique, not strength.
This guide covers every step from gear selection and setup to casting, retrieval, and maintenance. You’ll learn proven methods like the 50/50 split-and-roll, the teeth method, and the hand-over technique. With consistent practice, you’ll be throwing perfect circles like a seasoned pro.
Choose the Right Cast Net for Your Skill Level
Before you throw, you need the right tool. Picking the wrong net makes learning frustrating and wastes money.
Pick the Correct Size and Weight
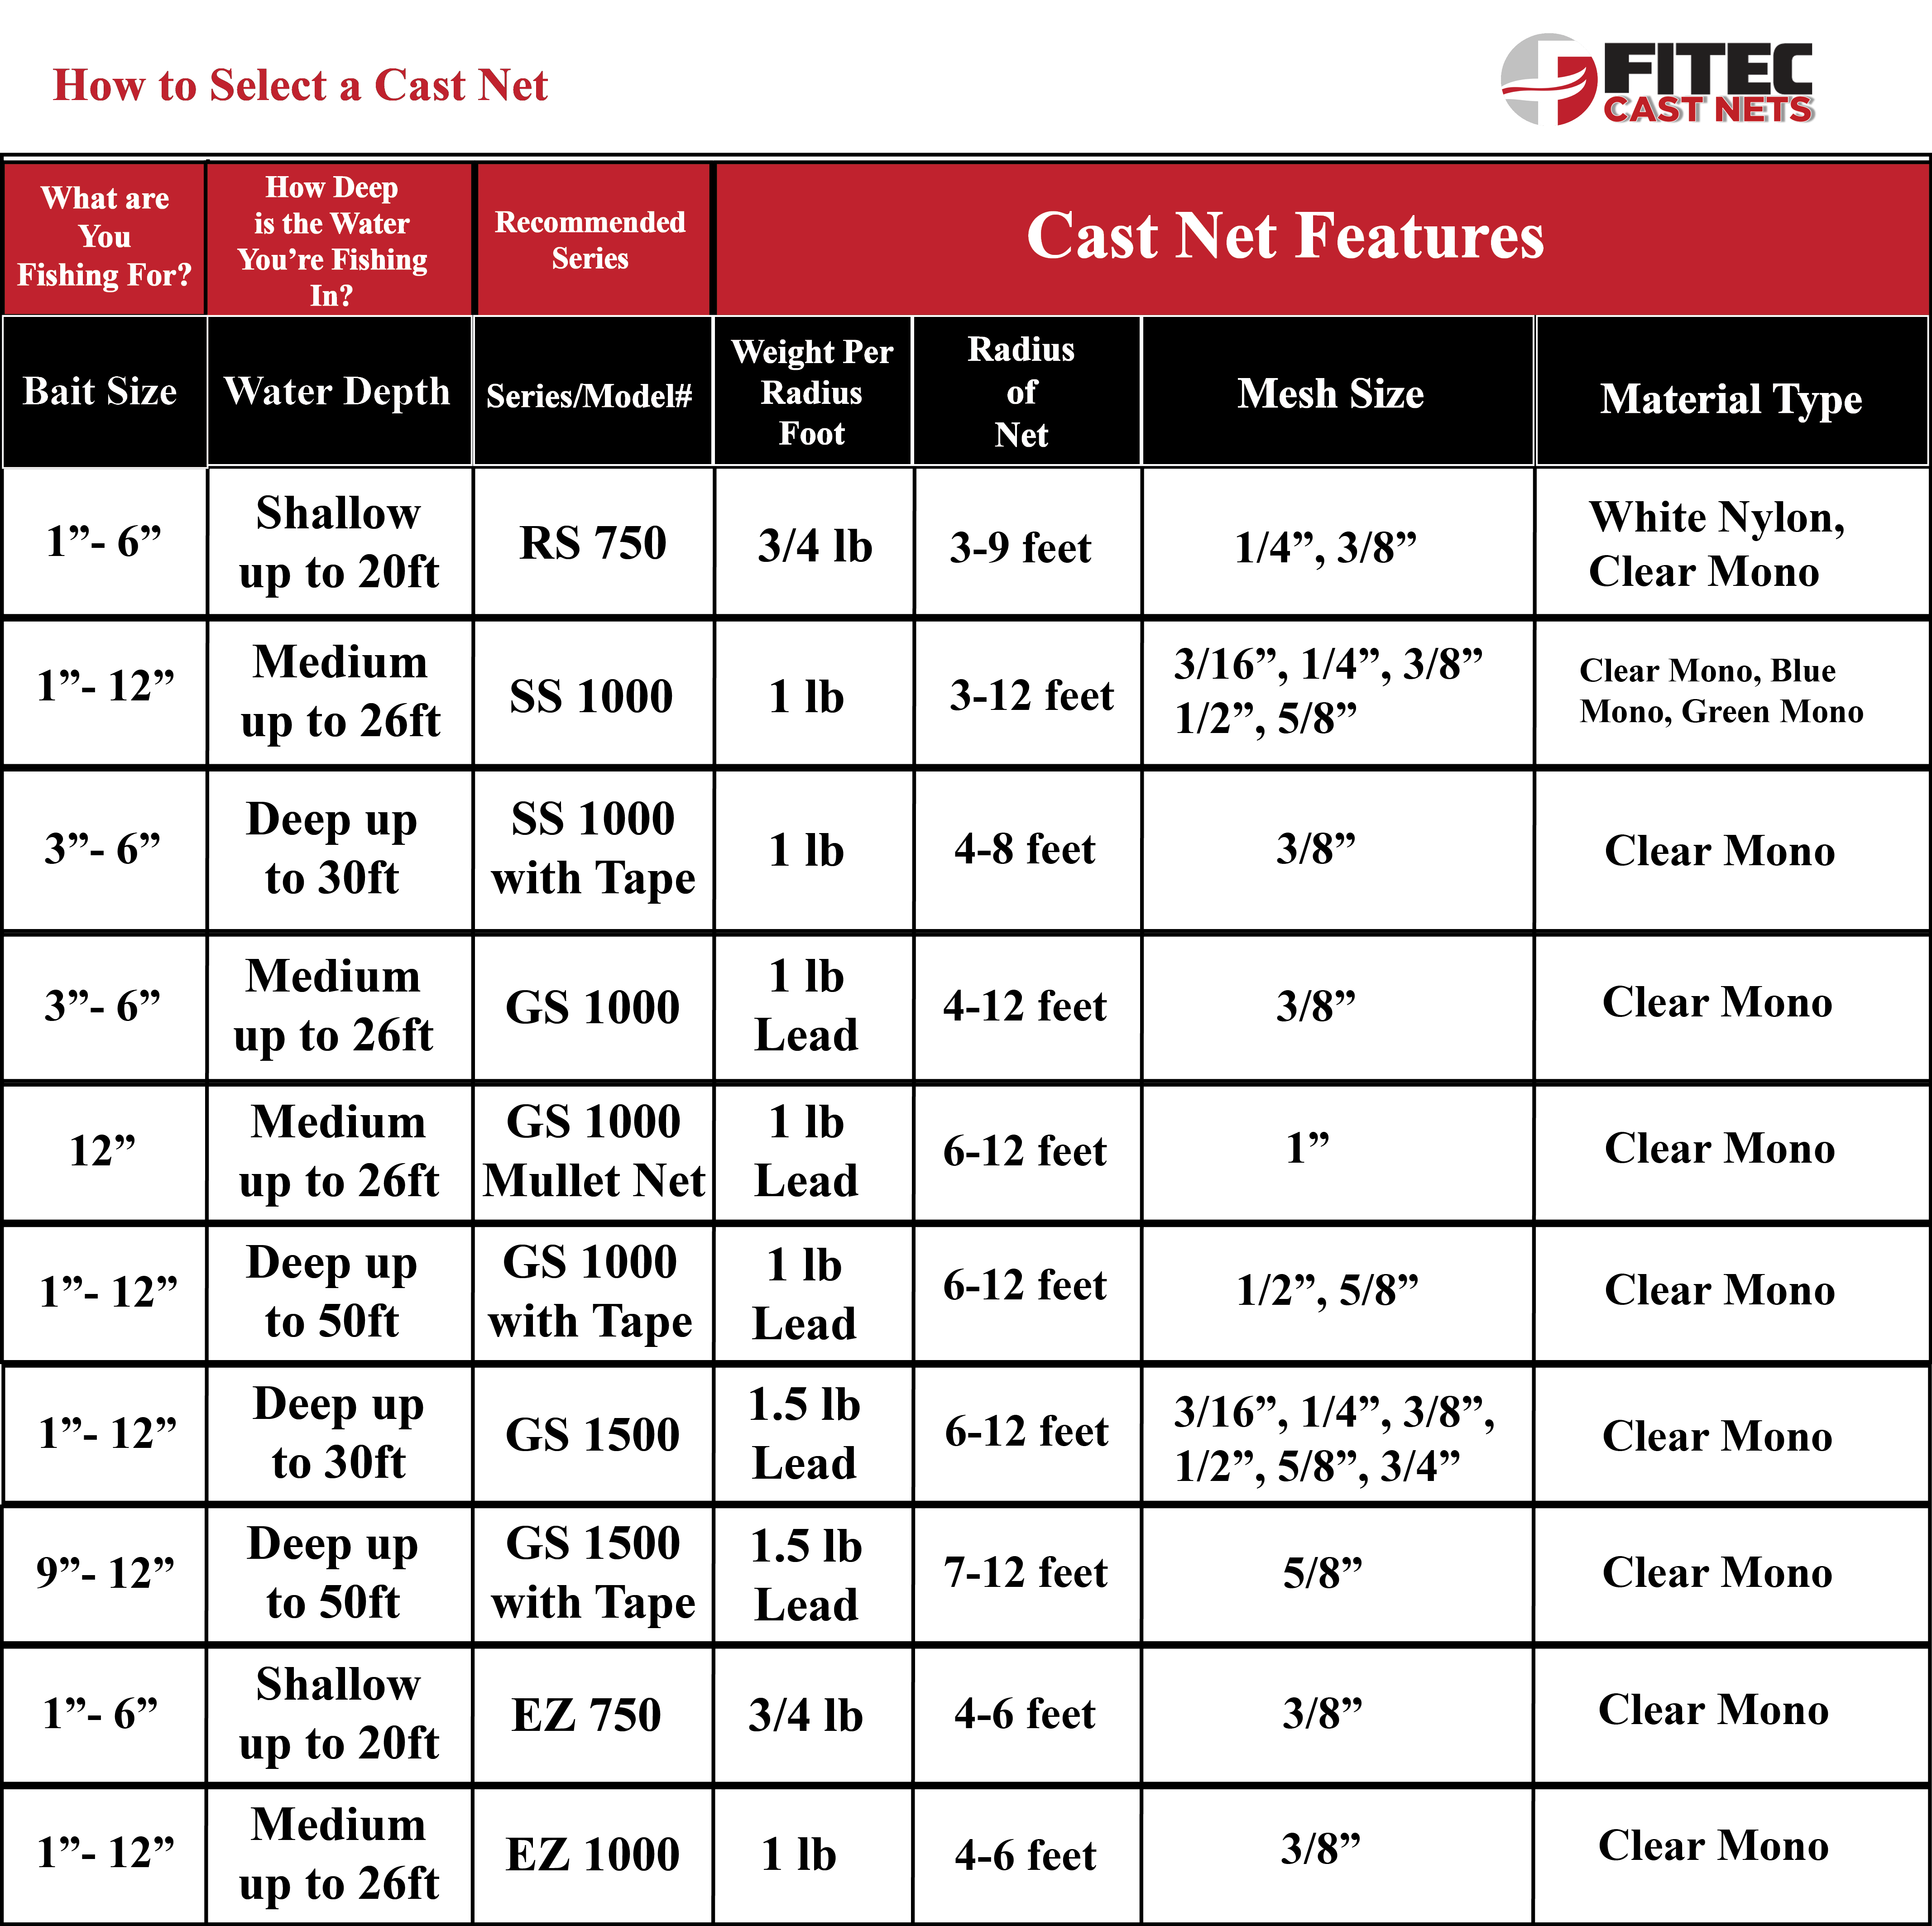
Beginners should start with a 4 to 6 foot diameter net. These smaller sizes are lighter, easier to control, and perfect for shallow banks or piers. Intermediate anglers can move to 7 to 8 foot models for greater coverage and better performance in tidal zones. Advanced users may handle 10 to 14 foot nets, but only after mastering smaller models.
Weight matters significantly. Aim for approximately 1.5 pounds per foot of diameter. A 6-foot net weighs about 9 pounds, while an 8-foot net weighs around 12 pounds. Heavier nets fly farther and sink faster, but they demand more precision.
Select the Best Mesh and Material
Mesh size of 3/8 inch captures small bait like minnows, mullet, and shad without clogging with debris. Avoid oversized mesh if you’re after live bait because it lets juveniles escape.
Material options include nylon for flexibility and affordability, polyethylene for UV resistance and durability in saltwater, and Tyvec for lightweight strength and rot resistance. Each material suits different fishing conditions and frequency of use.
Know What Your Net Should Include
Your net must come with a yoke where shroud lines meet, a leash at least 1.5 times your water depth, a lead line with evenly spaced sinkers, and untangled shroud lines. Check these parts before every use. One twist at the yoke ruins your throw.
Master the 50/50 Split-and-Roll Technique

The 50/50 split-and-roll is the gold standard for consistent, tangle-free casts. This method balances the load and enables rapid reloading in under 10 seconds.
Stand Centered in the Net
Lay the net flat on the ground. Step into the center so both sides drape evenly. This ensures equal tension and prevents lopsided throws.
Roll the Left Side Over
Grab the left half of the net at hip level. Roll it over to the right, creating two stacked layers. As you roll, the lead line becomes visible in the middle, which is your release point.
Pinch and Grip the Lead Line
Use your right hand to pinch the center of the lead line. Place it on your thumb, then grip the bottom portion with your fingers. Keep the net loose in your palm. Squeezing causes tangles.
Enter the Ready-to-Throw Position
At this stage, half the net is pre-coiled and the other half hangs ready. Your body should be balanced with arms relaxed. This position allows a smooth, rotational throw with minimal effort.
Learn the Teeth Method for Precise Control
The teeth method gives precise control over release timing, especially useful in windy conditions.
Hold the Yoke in Your Left Hand
Raise the net fully into the air. Shake gently to let the lead line hang freely. Check for twists because a single twist at the yoke prevents full opening.
Grip the Net Midway With Your Right Hand
Reach down and grab the mesh about halfway between the yoke and weights. Too high creates poor momentum. Too low restricts spread.
Roll the Net Over Your Left Hand
Roll the net under and back over your left hand, bringing it toward your chest. Then take the hanging half and roll it over the top of your hand, away from your body.
Find the Center Dip in the Lead Line
Look at the dangling weights. They should form two arcs with a clear dip in the middle. That dip is the true center where you secure the line.
Place the Rope in Your Teeth
Only the rope portion goes between your teeth, never the weights. Bite gently, just enough to hold tension. Alternative method: lay the center over the back of your left hand if you dislike the mouth approach.
Final Load With Your Right Hand
Reach down and grab the lowest part of the lead line. Roll all loose netting into your right palm, holding it firm but not tight. You’re now loaded and ready to cast.
Try the Hand-Over Method (No Teeth Required)

For those who want to avoid putting gear in their mouth, the hand-over method works effectively.
Lay the Lead Line Across Your Left Hand
After splitting and rolling, instead of using your teeth, place the center of the lead line over the back of your left hand. Let it rest there without gripping.
Load the Net Into Your Right Hand
Use your right hand to gather the rolled sections. Keep tension consistent as you coil into your palm.
Release With Coordinated Motion
During the throw, the lead line slips off the back of your left hand at the right moment. Time your right-hand release to match. No mouth contact, no hygiene issues, just a clean full spread.
Perfect Your Throwing Technique
Even the best setup fails without proper execution. Focus on form, not force.
Rotate Your Upper Body
Power comes from your torso, not your arm. Think golf swing or football pass. Fluid rotation beats brute strength. Keep feet shoulder-width apart and step slightly forward with your right foot.
Use a Low, Flat Trajectory
Throw low and hard like passing a football, not bowling or lobbing. High throws cause the net to collapse mid-air. Aim for targets 10 to 15 feet away.
Time Your Hand Release
Your left hand should hold the net slightly longer than your right. This delay imparts spin, helping the net unfurl in a circle. Release the left hand as your right follows through.
Follow Through Fully
Extend your dominant arm after release. A short chop kills momentum and causes uneven spreads. Let centrifugal force do the work. With good form, a 6-foot net opens into a 12 to 15 foot circle on calm water.
Load the Net With the Three-Zone Method

For fast, repeatable throws, use the three-zone coiling technique favored by experienced anglers.
Coil Over Your Right Hand
Start by draping the net over the back of your right hand. Form two coils, one on top of the other. Leave about one meter of net hanging below.
Rest Net on Three Fingers
Open the front face and lay it across your index, middle, and ring fingers. Gather 12 to 24 inches of netting and place it on your fingers.
Grasp One-Third on the Left Side
On the left-hanging section, grab about one-third of the net near the top. This creates four functional zones: coiled in hand, on fingers, lower hanging section, and left-side gathered portion. This balanced loading ensures even rotation and minimizes tangles.
Retrieve and Handle Your Catch
A perfect cast means nothing if you lose the fish on retrieval.
Pull to Close the Net
After the net sinks, give a firm, quick tug on the leash. This cinches the bottom closed, trapping fish inside.
Reel In Low and Slow
Use your right hand to coil the rope neatly. Pull along the bottom, not upward, to keep fish from escaping. Let them settle into the mesh pockets as you retrieve.
Lift Smoothly
Once near the surface, lift the net in one smooth motion. Jerking or tilting spills your catch.
Extract Bait Gently
Open the front face and tip contents into a bait bucket or live well. Common catches include mullet, shad, minnows, pilchards, and garfish. Use a partner to transfer fish quickly so you can recast immediately.
Troubleshoot Common Casting Problems
Even pros have off throws. Here’s how to fix them.
Net Won’t Open Fully
Cause: throwing too high or vertically. Fix: keep throw low and flat. Focus on horizontal spin, not height.
Net Bowls or Misshapes
Cause: lack of rotation or poor hand timing. Fix: spin with your left hand and release it last. Think football spiral, not cricket ball.
Uneven Spread
Cause: improper loading or twisted net. Fix: use the 50/50 method or three-zone coil. Always check for twists at the yoke.
Tangled Lead Line
Cause: poor storage or rushed setup. Fix: inspect before every cast. Store loosely, never fold tightly.
Short Casting Distance
Cause: high grip or weak rotation. Fix: grip lower between knee and hip. Engage torso rotation.
Stay Safe While Cast Netting
This sport carries real risks, especially near boats and structures.
Never Wrap Rope Tightly
A snag can pull you into the water or entangle limbs. Loop the leash loosely around your hand. It should slip off under tension.
Carry a Dive Knife
Essential for cutting free if the rope snags on a propeller or oyster bed. Wear it on your belt or calf, accessible in emergencies.
Clear the Casting Zone
Ensure no people or obstacles are within 20 feet. Shout “Net!” before throwing to warn others.
Avoid Power Lines
Never cast near overhead electrical wires. Wet nets conduct electricity.
Wear Polarized Sunglasses
Protects eyes from flying weights. Helps spot baitfish schools beneath the surface.
Know Local Laws
Some areas ban cast nets by size, location, or species. Check regulations before you go.
Maintain Your Net for Maximum Lifespan
A well-cared-for cast net lasts up to 10 years. Follow these steps.
Rinse After Every Use
Especially in saltwater, rinse thoroughly with freshwater. Removes salt, sand, and organic buildup.
Dry in the Shade
Hang loosely, never in direct sunlight. UV rays degrade nylon and weaken fibers.
Store Properly
Keep in a cool, dry place. Loosely coil or hang. Never fold tightly.
Inspect Before Each Use
Check for torn mesh, broken weights, and worn lead line. Repair small tears immediately with a net patch kit.
Avoid Creasing
Permanent folds create weak spots. Always unfold completely before use.
Pro Tips for Better Success
Take your skill to the next level with these expert strategies.
Spot Bait With Polarized Lenses
Look for shimmering patches or surface ripples. Mullet and pilchards often school in shallow flats during dawn and dusk.
Cast Into Calm, Shallow Water
Ideal depth ranges from 1 to 6 feet. Avoid currents, drop-offs, and heavy grass.
Practice on Land First
Master hand coordination before hitting the water. Use a tarp or grassy field.
Start Small, Scale Up
Begin with a 4 to 6 foot net. Move to larger models only after consistent success.
Time Your Throws With Feeding Activity
During a hop bite, baitfish move fast. Use the 50/50 method for rapid, back-to-back casts.
Frequently Asked Questions About Casting a Fishing Net
What is the easiest cast net method for beginners?
The 50/50 split-and-roll technique is easiest for beginners. It balances the load evenly and minimizes tangles. The hand-over method works well too since it avoids placing gear in your mouth.
How long does it take to learn to cast a net?
Most beginners achieve functional throws within minutes. With consistent practice over a few sessions, you can throw clean, full spreads reliably. Children as young as 9 can master basics quickly.
What size cast net should a beginner buy?
Start with a 4 to 6 foot diameter net. Smaller nets are lighter, easier to control, and perfect for learning proper technique before moving to larger sizes.
Why does my net not open fully when I throw it?
Thrown too high or vertically causes this problem. Keep your throw low and flat, focusing on horizontal spin rather than height. Check for twists at the yoke as well.
How do I prevent my cast net from tangling?
Inspect the lead line before every cast. Use the 50/50 split-and-roll method for loading. Store the net loosely, never folded tightly. Clear any debris before throwing.
Key Takeaways for Mastering Cast Netting
Learning how to cast a fishing net opens a world of self-sufficiency on the water. With the right net, proper technique, and safety habits, you’ll catch live bait efficiently, save money, and elevate your angling game. Choose a 4 to 6 foot net to start, practice the 50/50 split-and-roll method until it becomes second nature, and always inspect your gear before each throw. Focus on form over force, keep throws low and flat, and maintain your net by rinsing after saltwater use and storing loosely in shade. Whether you use the teeth method, hand-over technique, or split-and-roll, consistent repetition builds muscle memory. In no time, you’ll be throwing perfect circles like a pro and enjoying fresher bait on every fishing trip.





