Changing the handle on a fishing reel is one of the simplest yet most effective ways to personalize your gear for comfort, control, and casting efficiency. Whether you’re switching from right- to left-hand retrieve or replacing a worn or damaged handle, this process can be completed in minutes with no special tools in most cases. This guide walks you through every step, from identifying your reel type to troubleshooting common issues, so you can make the switch safely and confidently.
Confirm Your Reel Supports Handle Switching
Before attempting any handle changes, you must verify that your reel allows handle side conversion. Not all fishing reels support this modification, and trying to force it on an incompatible model can cause serious damage.
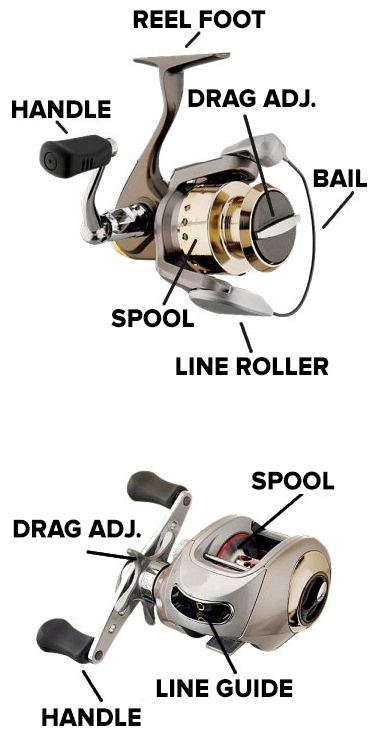
Spinning Reels: Usually Switchable
Most modern spinning reels from brands like Shimano, Daiwa, Abu Garcia, Penn, and Okuma allow handle relocation. These models feature a reversible design with a dust cap on the opposite side, indicating the handle can be moved. Look for a threaded plug on the non-handle side.
Baitcasting, Spincast, and Trolling Reels: Not Switchable
Baitcasting reels have permanently fixed handles, with left-handed versions sold as separate models. Spincast closed-face reels have sealed bodies with no internal access. Conventional and trolling reels are factory-set, with left- and right-hand models sold as distinct products.
Choose Your Retrieve Direction
The handle side directly determines your retrieve direction, which affects how you hold the rod and reel during fishing.
Right-Hand Retrieve
This is the standard configuration used by approximately 90% of anglers. The handle sits on the right side and rotates clockwise when cranking. You hold the rod in your right hand while your left hand operates the reel.
Left-Hand Retrieve
This configuration places the handle on the left side, rotating counter-clockwise when cranking. You hold the rod in your left hand while your dominant right hand turns the handle. Many anglers prefer this setup for faster reaction times when using topwater lures, jerkbaits, or making long retrieves.
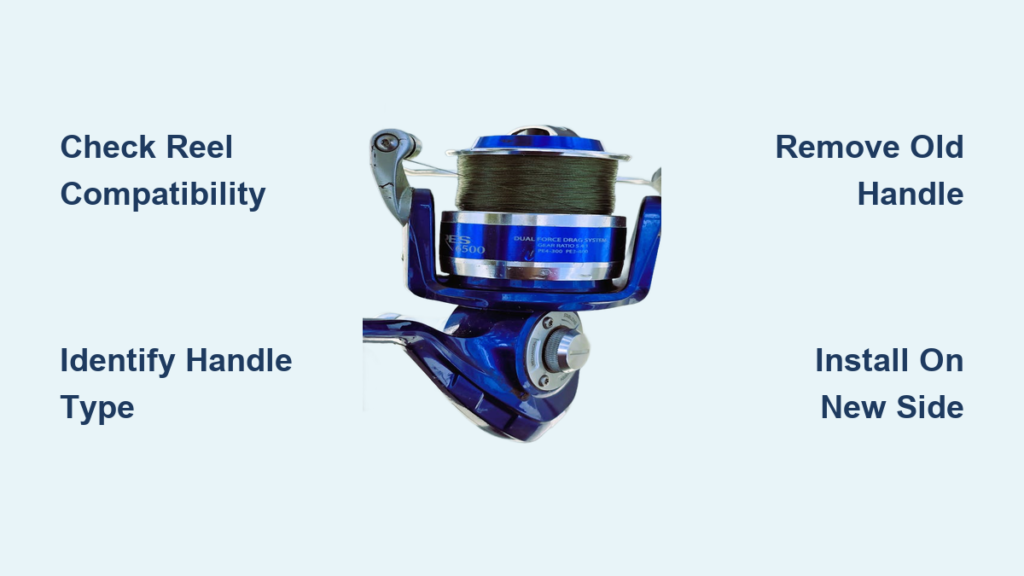
Identify Your Handle Type
Using the wrong removal method can strip threads and damage your reel. Match your reel to one of these four common systems before proceeding.
Single-Bolt System
One central bolt holds the handle in place. This system is found on Shimano Stradic, Abu Garcia Revo, and many mid-range reels. The bolt tightens clockwise when installing.
Two-Bolt System
Two bolts cross through the handle shaft in an X-pattern. This system is used on Daiwa Saltiga, Shimano Stella, and high-end saltwater reels. The bolts turn in opposite directions to engage.
Screw-End System
The handle screws directly into the drive gear. This system is common on older Shimano models like the Sahara and entry-level reels. It tightens in the direction of normal cranking.
Pin-Through System
A solid shaft passes through the reel, secured by a nut on one end. This system is found on vintage or specialized reels. The nut tightens clockwise.
Remove the Old Handle
With the correct system identified, you can now safely remove the existing handle from your reel.
Single-Bolt Reels
Hold the rotor or spool steady with one hand to prevent internal gear movement. Turn the bolt counter-clockwise to loosen and remove it. Pull the handle straight out.
Two-Bolt Reels
Remove the side cap if present. Unscrew both bolts by turning them in opposite directions. Slide the handle out carefully, keeping track of any washers or small parts. Take a photo before disassembly to remember the part order.
Screw-End Reels
Hold the rotor or bail arm to prevent rotation. Turn the handle clockwise to remove it. These are reverse-threaded to prevent loosening during use, so clockwise actually loosens when the handle is on the left side.
Pin-Through Reels
Use padded pliers or a wrench to loosen the nut. Slide the entire shaft and handle out as one unit. Remove the nut and set it aside.
Prepare the Opposite Side
Before installing the handle on the new side, you must prep the spindle to ensure smooth operation and prevent corrosion.
Remove the Dust Cap
Locate the dust cap on the opposite side of the reel. Turn it counter-clockwise by hand or with a soft tool. Set it aside in a safe place.
Clean the Spindle Hole
Wipe out any sand, salt, or debris with a microfiber cloth. Apply one drop of light reel oil or anti-corrosive spray like Boeshield T-9 to protect the metal surfaces.
Install the Handle on the New Side

Now you can mount the handle on the opposite side of your reel using the appropriate method for your system.
Single-Bolt Reels
Insert the handle shaft into the newly exposed spindle. Place the bolt through the outside and thread it clockwise. Tighten until snug without over-tightening. Replace the dust cap on the now-empty side.
Two-Bolt Reels
Insert the handle shaft into the new side. Insert both bolts and turn them in opposite directions to engage the threads. Tighten evenly, stopping if you feel resistance. Replace the side cap and test rotation.
Screw-End Reels
Insert the handle into the new spindle. Turn counter-clockwise to tighten, holding the rotor to prevent slippage. Screw the dust cap into the old side.
Pin-Through Reels
Insert the shaft and handle from the new side. Slide the nut onto the exposed end. Tighten clockwise until snug without over-torquing.
Handle Tightening Logic Explained
The handle always tightens in the direction it turns when cranking. This design prevents it from loosening during use. When the handle is on the left side, cranking clockwise means you tighten clockwise. When the handle is on the right side, cranking counter-clockwise means you tighten counter-clockwise.
Tools You Will Need
Most spinning reels require only hand tightening, but having these items on hand makes the process smoother.
A soft cloth or glove prevents scratches during handling. A microfiber cloth cleans debris from the spindle hole. Small wrenches or pliers are needed for nut-type handles, wrapped with cloth to avoid damage. Penetrating oil helps with seized saltwater reels. Anti-corrosive spray prevents future seizing. A smartphone helps you photograph the disassembly process.
Troubleshoot Common Problems
Even with proper technique, issues can arise during handle conversion. Here is how to address them.
Handle WonT Unscrew
You might be turning the wrong direction. Try turning clockwise if the handle is on the left side. Another cause is the rotor spinning, which can be prevented by holding the spool or bail arm firmly. Corroded or seized threads require spraying with penetrating oil and waiting 10 to 15 minutes before retrying.
Handle Wobbles After Install
A loose fit, worn threads, or missing spacer causes wobbling. Retighten carefully and inspect for stripped brass studs, which are common on Shimano reels. Consider the repair method below if damage is found.
Dust Cap WonT Screw In
Debris in the hole or misaligned threads prevents the cap from seating. Clean thoroughly with a cloth and start threading by hand.
Repair a Stripped Handle
If the internal stud is damaged, a DIY repair can save your reel without replacing the entire unit.
What You Will Need
You will need a bench vice, hacksaw, stainless steel screw, nylon lock nut, short roll pin less than one-quarter inch, and a replacement handle.
Repair Steps
Secure the reel in a vice. Cut the damaged brass stud flush with a hacksaw. Insert a short roll pin into the handle bore as a spacer. Thread a stainless screw through the handle and pin. Attach a nylon lock nut on the outside. Trim the screw so the nut seats fully. Mount the assembly onto the spindle, using the pin to create a compression fit. Tighten the nut until snug but free-spinning. Lubricate the spindle with light oil.
This method provides corrosion resistance and wobble-free operation at a lower cost than OEM replacement.
Maintain Your Reel for Longevity
Proper maintenance keeps handle switching smooth and trouble-free for years to come.
Prevent Corrosion
After saltwater use, rinse the reel with freshwater. Apply anti-corrosive spray to the shaft before reinsertion. Dry thoroughly before storage.
Avoid Cross-Threading
Always start threading by hand. If it binds, back out and realign rather than forcing the connection.
Do Not Over-Tighten
Snug plus one-quarter turn is sufficient. Over-tightening strips threads, cracks plastic bodies, and damages internal gears.
Lubricate Sparingly
Apply one drop of light reel oil on the spindle every 10 to 15 fishing trips. Too much lubricant attracts dirt and grit.
Test Your Work Before Fishing
Before heading to the water, verify that your handle conversion was successful.
Reinstall the dust cap on the empty side, never leaving it off. Turn the handle slowly to ensure smooth rotation without grinding. Check for wobble, re-tightening or inspecting for damage if present. Close the bail and pull line to test under load. Simulate a fight with medium resistance to ensure reliability.
Quick Switch Checklist
Confirm your reel supports handle swapping. Identify your handle type. Choose your preferred retrieve side. Remove the dust cap from the target side. Hold the rotor while removing the handle. Transfer the handle to the new side. Start threads by hand without forcing. Tighten in the cranking direction. Apply light oil or anti-corrosive treatment. Replace the dust cap on the unused side. Test rotation and check for wobble.
Final Thoughts on Changing Your Reel Handle
Mastering how to change handle on a fishing reel gives you full control over your setup, whether adapting to a new technique, switching hands, or repairing damage. The process takes 1 to 5 minutes once you know your reel system, and it does not void your warranty when performed correctly. Always consult your manual if unsure, and when in doubt, stop and reassess rather than forcing parts. With the right knowledge, handle switching is a fast, safe upgrade that keeps your reel performing like new.
Frequently Asked Questions About Changing Fishing Reel Handles
Can I change the handle side on any type of fishing reel?
No, only spinning reels support handle side conversion. Baitcasting, spincast, and conventional trolling reels have permanently fixed handles that cannot be switched.
How do I know if my spinning reel supports handle switching?
Look for a dust cap on the opposite side of the handle. If present, your reel supports handle relocation. Most modern spinning reels from major manufacturers include this feature.
Why does the handle tighten clockwise on one side and counter-clockwise on the other?
This reverse threading prevents the handle from loosening during normal cranking. The handle always tightens in the direction it turns when retrieving line.
What happens if I over-tighten the handle bolt?
Over-tightening can strip the internal threads, crack plastic reel bodies, or damage internal gears. Tighten until snug plus one-quarter turn maximum.
Can I switch handles on my Shimano reel?
Yes, most Shimano spinning reels support handle conversion. The process varies slightly between models, so consult your specific manual.
Do I need special tools to change my reel handle?
Most spinning reels require only hand tightening with no special tools. Having a soft cloth, microfiber cloth, and basic wrenches for nut-type handles is helpful but not mandatory.