
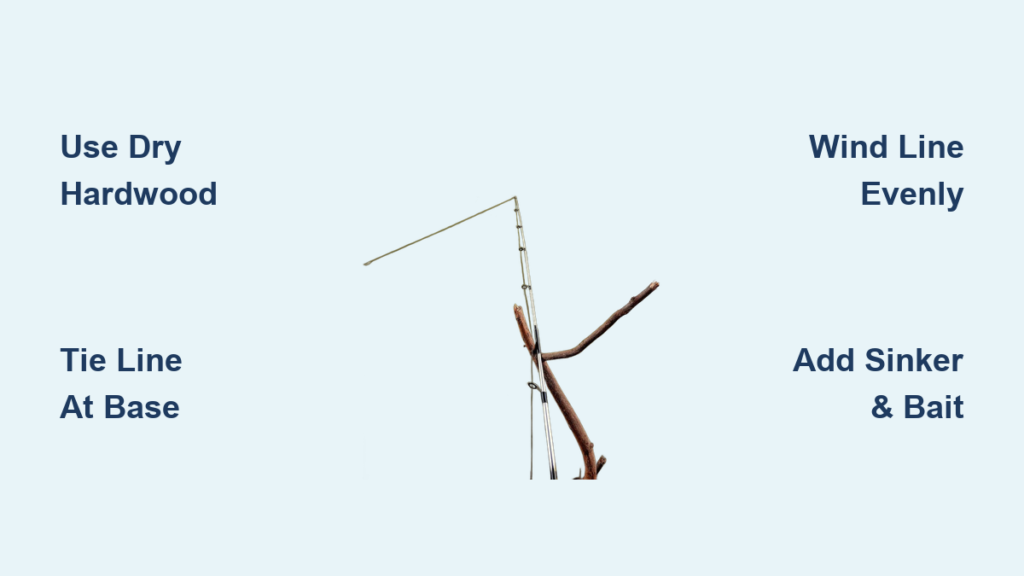
Imagine you’re camping near a creek with no fishing gear, but you spot fish swimming in the clear water. You could walk away, or you could build your own rod in minutes using nothing but a stick and some string. Making a fishing rod from a stick is a practical survival skill that turns ordinary materials into a working fishing tool. This method is perfect for campers, survivalists, kids learning to fish, or anyone who wants to fish without buying expensive equipment. With a sturdy branch, the right line, and a few simple tackle items, you can create a functional rod that actually catches fish. This guide walks you through every step, from selecting the best stick to adding your bait, so you can start fishing quickly and successfully.
Choose the Right Stick for Your Fishing Rod
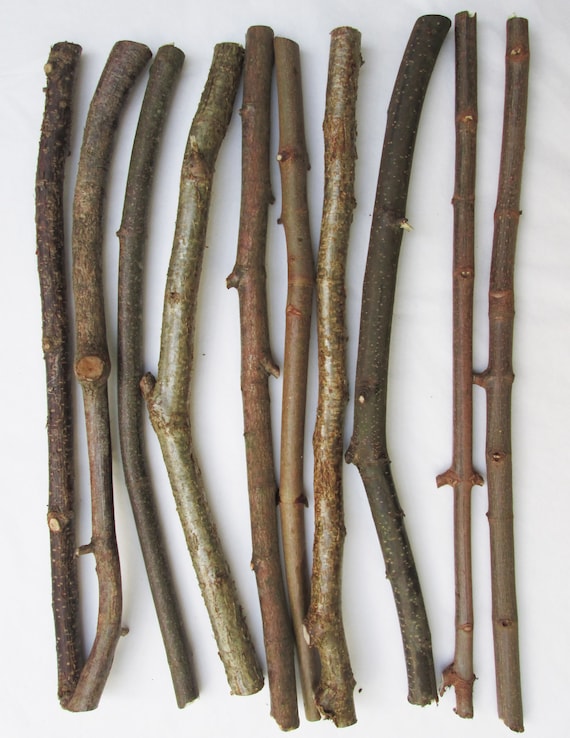
The foundation of a good stick rod is selecting the proper branch. Your choice of wood directly impacts how well the rod performs and how long it lasts under the stress of catching fish.
Pick a Strong, Straight Branch
Look for a straight stick between 6 and 10 feet long and about as thick as your thumb, which is roughly 1 to 2 inches in diameter. Hardwood trees like oak, hickory, or maple produce the most durable rods because they resist snapping under pressure. Avoid softwoods like pine, which are more likely to break when a fish fights against the line. The ideal length depends on your fishing environment. Shorter rods around 6 to 7 feet work well for small streams or when teaching children. Longer rods of 8 to 10 feet give you better casting distance and more control in ponds or rivers.
Remove Branches and Smooth the Shaft
Use a knife to trim off all side twigs, leaves, and small shoots from the branch. Then, sand down any rough spots, knots, or burls along the shaft using sandpaper or a rough rock. This step is essential because rough surfaces can fray your fishing line during casting and retrieval, leading to breaks and lost fish. A smooth, clean shaft also feels more comfortable in your hands during extended fishing sessions.
Use Dry Wood Only
Never use green or wet wood for your rod. Moist branches lack the strength and stiffness needed to handle the tension from a fighting fish. Dry wood is significantly stronger and more reliable. If you must use a freshly cut branch, let it air-dry for at least a day before using it as a fishing rod.
Secure the Fishing Line at the Base
One of the most critical decisions in building a stick rod is where to attach the fishing line. Many beginners make a mistake that costs them their catch.
Never Tie Line to the Tip
Tying the line directly to the tip of the stick is a common error that leads to disaster. When a fish pulls hard, the tip can snap off, leaving you with no rod and no fish. Instead, always tie the line near the base of the stick, where you will grip it while fishing. This way, even if the stick breaks, you still have the line and can reel in the fish by hand using the remaining length.
Use a Strong, Reliable Knot
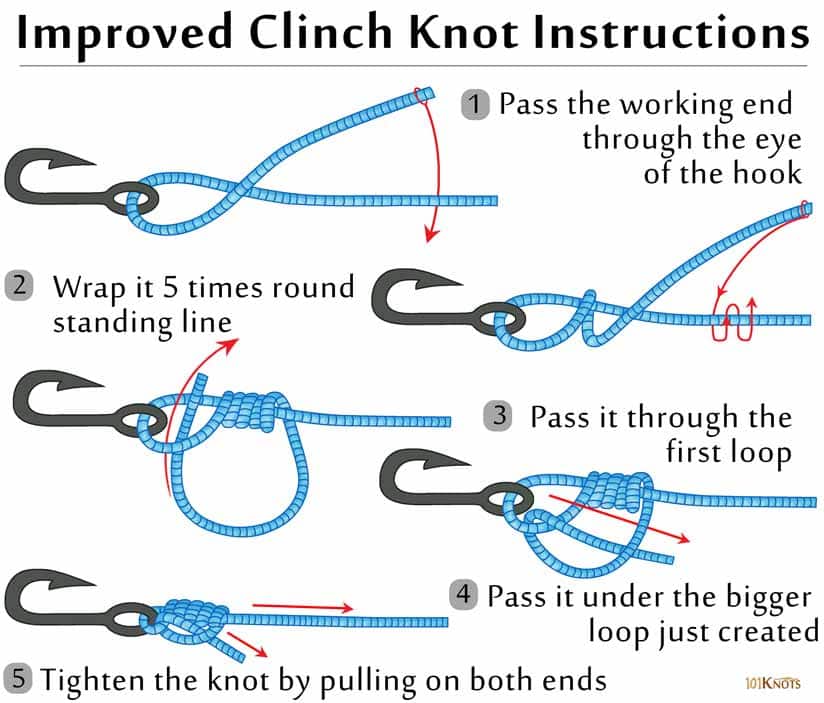
Attach the line using a proven fishing knot such as a fisherman’s knot, improved clinch knot, or Palomar knot. These knots are designed to hold under tension and have been tested by anglers for generations. Wet the knot with water before tightening to reduce friction and create a secure hold. Pull it tight and test it with a firm tug to ensure it will not slip. Trim any excess line with scissors or a knife after tying.
Wind Line Along the Stick Shaft

After securing the base knot, you need to manage the line properly along the length of the stick to prevent tangles and ensure smooth casting.
Wrap Line Evenly Up the Shaft
Wind the fishing line smoothly from the bottom of the stick toward the tip, keeping consistent tension throughout. Uneven winding creates loose loops that tangle easily when you cast or retrieve. This winding acts as a makeshift guide system, helping control the line during casting and retrieval just like the eyelets on a commercial rod.
Tie Off at the Tip and Extend Line
When you reach the end of the stick, tie a second knot at the very tip to anchor the line securely. Then, leave 3 to 6 feet of extra line extending beyond the tip. This gives you flexibility to adjust your fishing depth without retying the entire setup. The longer the extension, the deeper you can fish, which is ideal for targeting bottom-dwelling species in deeper water.
Add Hook, Sinker, and Bait
Now that your rod and line are ready, you need to add the terminal tackle that actually catches fish.
Attach a Fishing Hook
Tie a small to medium-sized fishing hook to the free end of the line using a clinch knot or Palomar knot. Pass the line through the hook’s eye 2 to 3 times, moisten the knot, tighten it firmly, and trim the tag end. A secure hook connection is essential because a loose hook means a lost fish. Test every connection by pulling hard before you start fishing.
Add a Sinker 6 to 12 Inches Above Hook
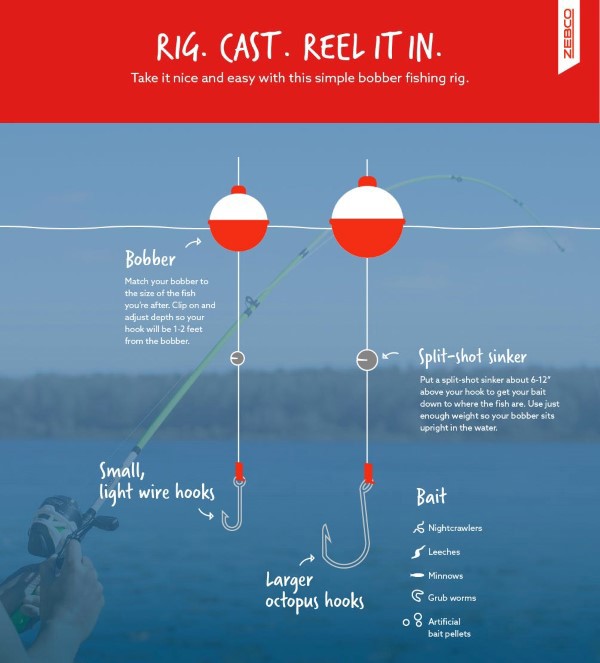
Place a split-shot sinker on the line 6 to 12 inches above the hook. This weight helps your bait sink quickly to the desired depth and stay in place, especially in moving water. Simply pinch the sinker closed onto the line with your fingers or use pliers for a tighter grip. In deeper water, you can use multiple sinkers to reach the bottom faster.
Use a Bobber in Still Water
In calm bodies of water like ponds or lakes, add a bobber above the sinker to float your bait at a specific depth. The bobber serves as a visual bite indicator. When it dips, jerks, or disappears underwater, you know a fish is biting. Bobbers are especially helpful for beginners and children who are learning to recognize when to set the hook.
Bait the Hook Effectively
Choose natural bait that attracts local fish in your area. Earthworms are the most effective all-around bait and work for nearly every freshwater species. Raw bacon or hot dog pieces provide a strong scent that draws fish from a distance. Insects or grubs work well for catching small panfish. Thread the bait securely onto the hook so it will not fall off during your cast. Replace the bait every 10 to 15 minutes or after a missed bite to keep it fresh and attractive.
Tips for Better Performance and Durability

A few simple upgrades can significantly improve your stick rod’s performance and extend its useful life.
Reinforce the Tip to Prevent Wear
Wrap heavy-duty wire around the tip end of the stick and twist it into a small loop. This acts as an improvised guide eyelet and reduces friction when the line passes through the tip. You can use a paperclip, safety pin, or stripped electrical wire for this purpose. This reinforcement prevents the line from wearing through the wood over time.
Choose Camouflage-Colored Line
Use clear, green, or brown fishing line instead of bright colors. Camouflage-colored line is less visible underwater, which increases your chances of getting a bite, especially in clear water conditions. Braided line in natural colors works particularly well for stick rods because it is strong and durable.
Adjust Line Length to Water Depth
A good rule of thumb is to use line length equal to roughly 1.5 times the depth of the water you are fishing. For example, in 4 feet of water, use about 6 feet of line beyond the tip. This keeps your bait in the strike zone without dragging along the bottom where it might get snagged.
Understand the Limitations of a Stick Rod
Being realistic about what your stick rod can and cannot do helps you have better fishing experiences and avoids disappointment.
Best for Small Fish Only
A stick rod works well for catching panfish like bluegill, sunfish, or small trout that are typically 3 to 5 inches long. This setup is not designed for large, powerful fish. Without a reel or drag system, you will lose control quickly when a big fish runs. Stick to calm, shallow waters where small fish are abundant for the best results.
Manual Line Control Increases Risk
Without a reel, you must hand-feed and retrieve all the line, which raises the chance of tangles or breakage. Keep the line taut but not overly tight. If a fish makes a sudden run, let some line slip through your fingers rather than holding firm. Forcing the line when a fish pulls can cause it to snap.
Perfect Uses for Stick Fishing Rods
A stick rod shines in specific situations where modern equipment is unnecessary or unavailable.
Survival Fishing Tool
In wilderness survival situations, this rod can become a lifeline for obtaining food. All materials can be found in nature, including vine or plant fiber for line, thorns or bone for hooks, and stones for weights. Even dental floss makes an excellent thin but strong fishing line. Knowing how to build this tool could mean the difference between eating and going hungry in an emergency.
Great for Kids and Teaching
A stick rod is perfect for introducing children to fishing. It is simple, safe, and teaches fundamental angling skills like knot tying, baiting a hook, and recognizing bites. Let kids pick their own stick, help them tie the knots, and watch their excitement grow when they catch their first fish.
Budget-Friendly Alternative
This rod costs absolutely nothing to make and can be constructed in under 10 minutes. It is ideal for casual fishing in local creeks, backyard ponds, or situations where investing in proper gear does not make sense. You get all the fun of fishing without spending a single dollar.
Maintain and Store Properly
Proper care extends the life of your stick rod and ensures it works reliably every time you use it.
Dry the Stick After Use
Moisture causes wood to warp, rot, and weaken over time. After fishing, wipe the stick completely dry with a cloth and store it in a sheltered location. Allow it to air-dry fully before your next outing to prevent damage.
Inspect Line and Knots Before Each Use
Check the line for frays, weak spots, or signs of wear. Examine all knots to make sure they are still tight and secure. A broken line at the wrong moment means a lost fish, so never skip this inspection step. Retie or replace any questionable components before heading out.
Store Disassembled for Portability
Cut the line at the base knot when you are done fishing so you can reuse the stick later. Carry spare line and hooks in your pocket so you can rebuild the rod on the spot whenever you find water. This makes your stick rod highly portable and reusable.
Alternative Hook Options When You Have None
Sometimes you need to improvise when standard tackle is not available.
Make a Hook from a Soda Can Tab
If you have no fishing hook, bend a soda can tab using pliers into a U-shape, then sharpen one end to a point on a stone or rough surface. Pass your line through the hole in the tab to attach it. This improvised hook is not perfect, but it can catch small fish in a survival situation.
Other Improvised Hooks
Thorns from hawthorn or blackberry bushes can be shaped into serviceable hooks with a little knife work. Bone shards from small animals can be carved into curved hook shapes. Metal scraps found around campsites can be bent into hook shapes with pliers. These alternatives require creativity and testing, but they work when you have no other options.
Frequently Asked Questions About Making a Fishing Rod from a Stick
What type of wood is best for a stick fishing rod?
Hardwood trees like oak, hickory, or maple produce the strongest and most durable stick rods. These woods resist breaking under pressure and provide the flexibility needed to absorb shock from fighting fish. Avoid softwoods like pine, which are more likely to snap.
How long should the stick be for a beginner?
For beginners and children, a stick between 6 and 7 feet long is ideal because it is easier to handle and cast. Longer rods of 8 to 10 feet work better for adults fishing in larger bodies of water where you need more casting distance and control.
Should I tie the line to the tip or the base of the stick?
Always tie the line near the base of the stick, never at the tip. Tying at the base allows you to continue reeling in or hand-lining the fish even if the stick breaks during a struggle. Tying at the tip risks losing both the fish and the entire line setup when the tip snaps.
Can I catch big fish with a stick rod?
Stick rods are designed for small fish like bluegill, sunfish, and small trout. They lack the reel, drag system, and rod strength needed to handle large, powerful fish. Attempting to catch big fish will likely result in broken line or a snapped stick.
How do I make a fishing line if I have none?
In survival situations, you can use vine, plant fiber, or even unwaxed dental floss as a fishing line. These materials are surprisingly strong and can hold small to medium fish. Simply tie them to your stick using the same knots described in this guide.
Key Takeaways for Building a Stick Fishing Rod
Making a fishing rod from a stick is more than a fun DIY project, it is a practical survival skill that connects you with traditional angling methods. Choose a straight, dry hardwood stick between 6 and 10 feet long, and always tie your fishing line at the base of the rod rather than at the tip to prevent total loss if the stick breaks. Wind the line smoothly up the shaft and leave 3 to 6 feet of line extending past the tip for depth adjustment. Add a hook, sinker, and appropriate bait, then fish for small panfish in calm waters. With practice, your stick rod can provide hours of enjoyment and even serve as a food source in emergency situations. Start with a simple build, practice your knots, and enjoy the satisfaction of catching fish with a tool you made yourself.





