If you’re tired of fishing rods leaning in corners, getting tangled, or damaged from improper storage, making a fishing pole rack is a smart, affordable solution. Whether you have three rods or thirty, a custom-built rack keeps gear organized, protected, and ready for your next trip. Unlike expensive commercial units that lack durability or flexibility, a DIY fishing pole rack lets you control size, style, and strength—saving up to 90% while building something that lasts.
This guide walks you through the best designs, materials, and step-by-step builds for wall, floor, and ceiling-mounted racks. You’ll learn how to match your rack to your rod collection, environment, and skill level. No guesswork. Just proven methods from real builds, tested by anglers and optimized for performance.
Wall-Mounted Rod Rack Design
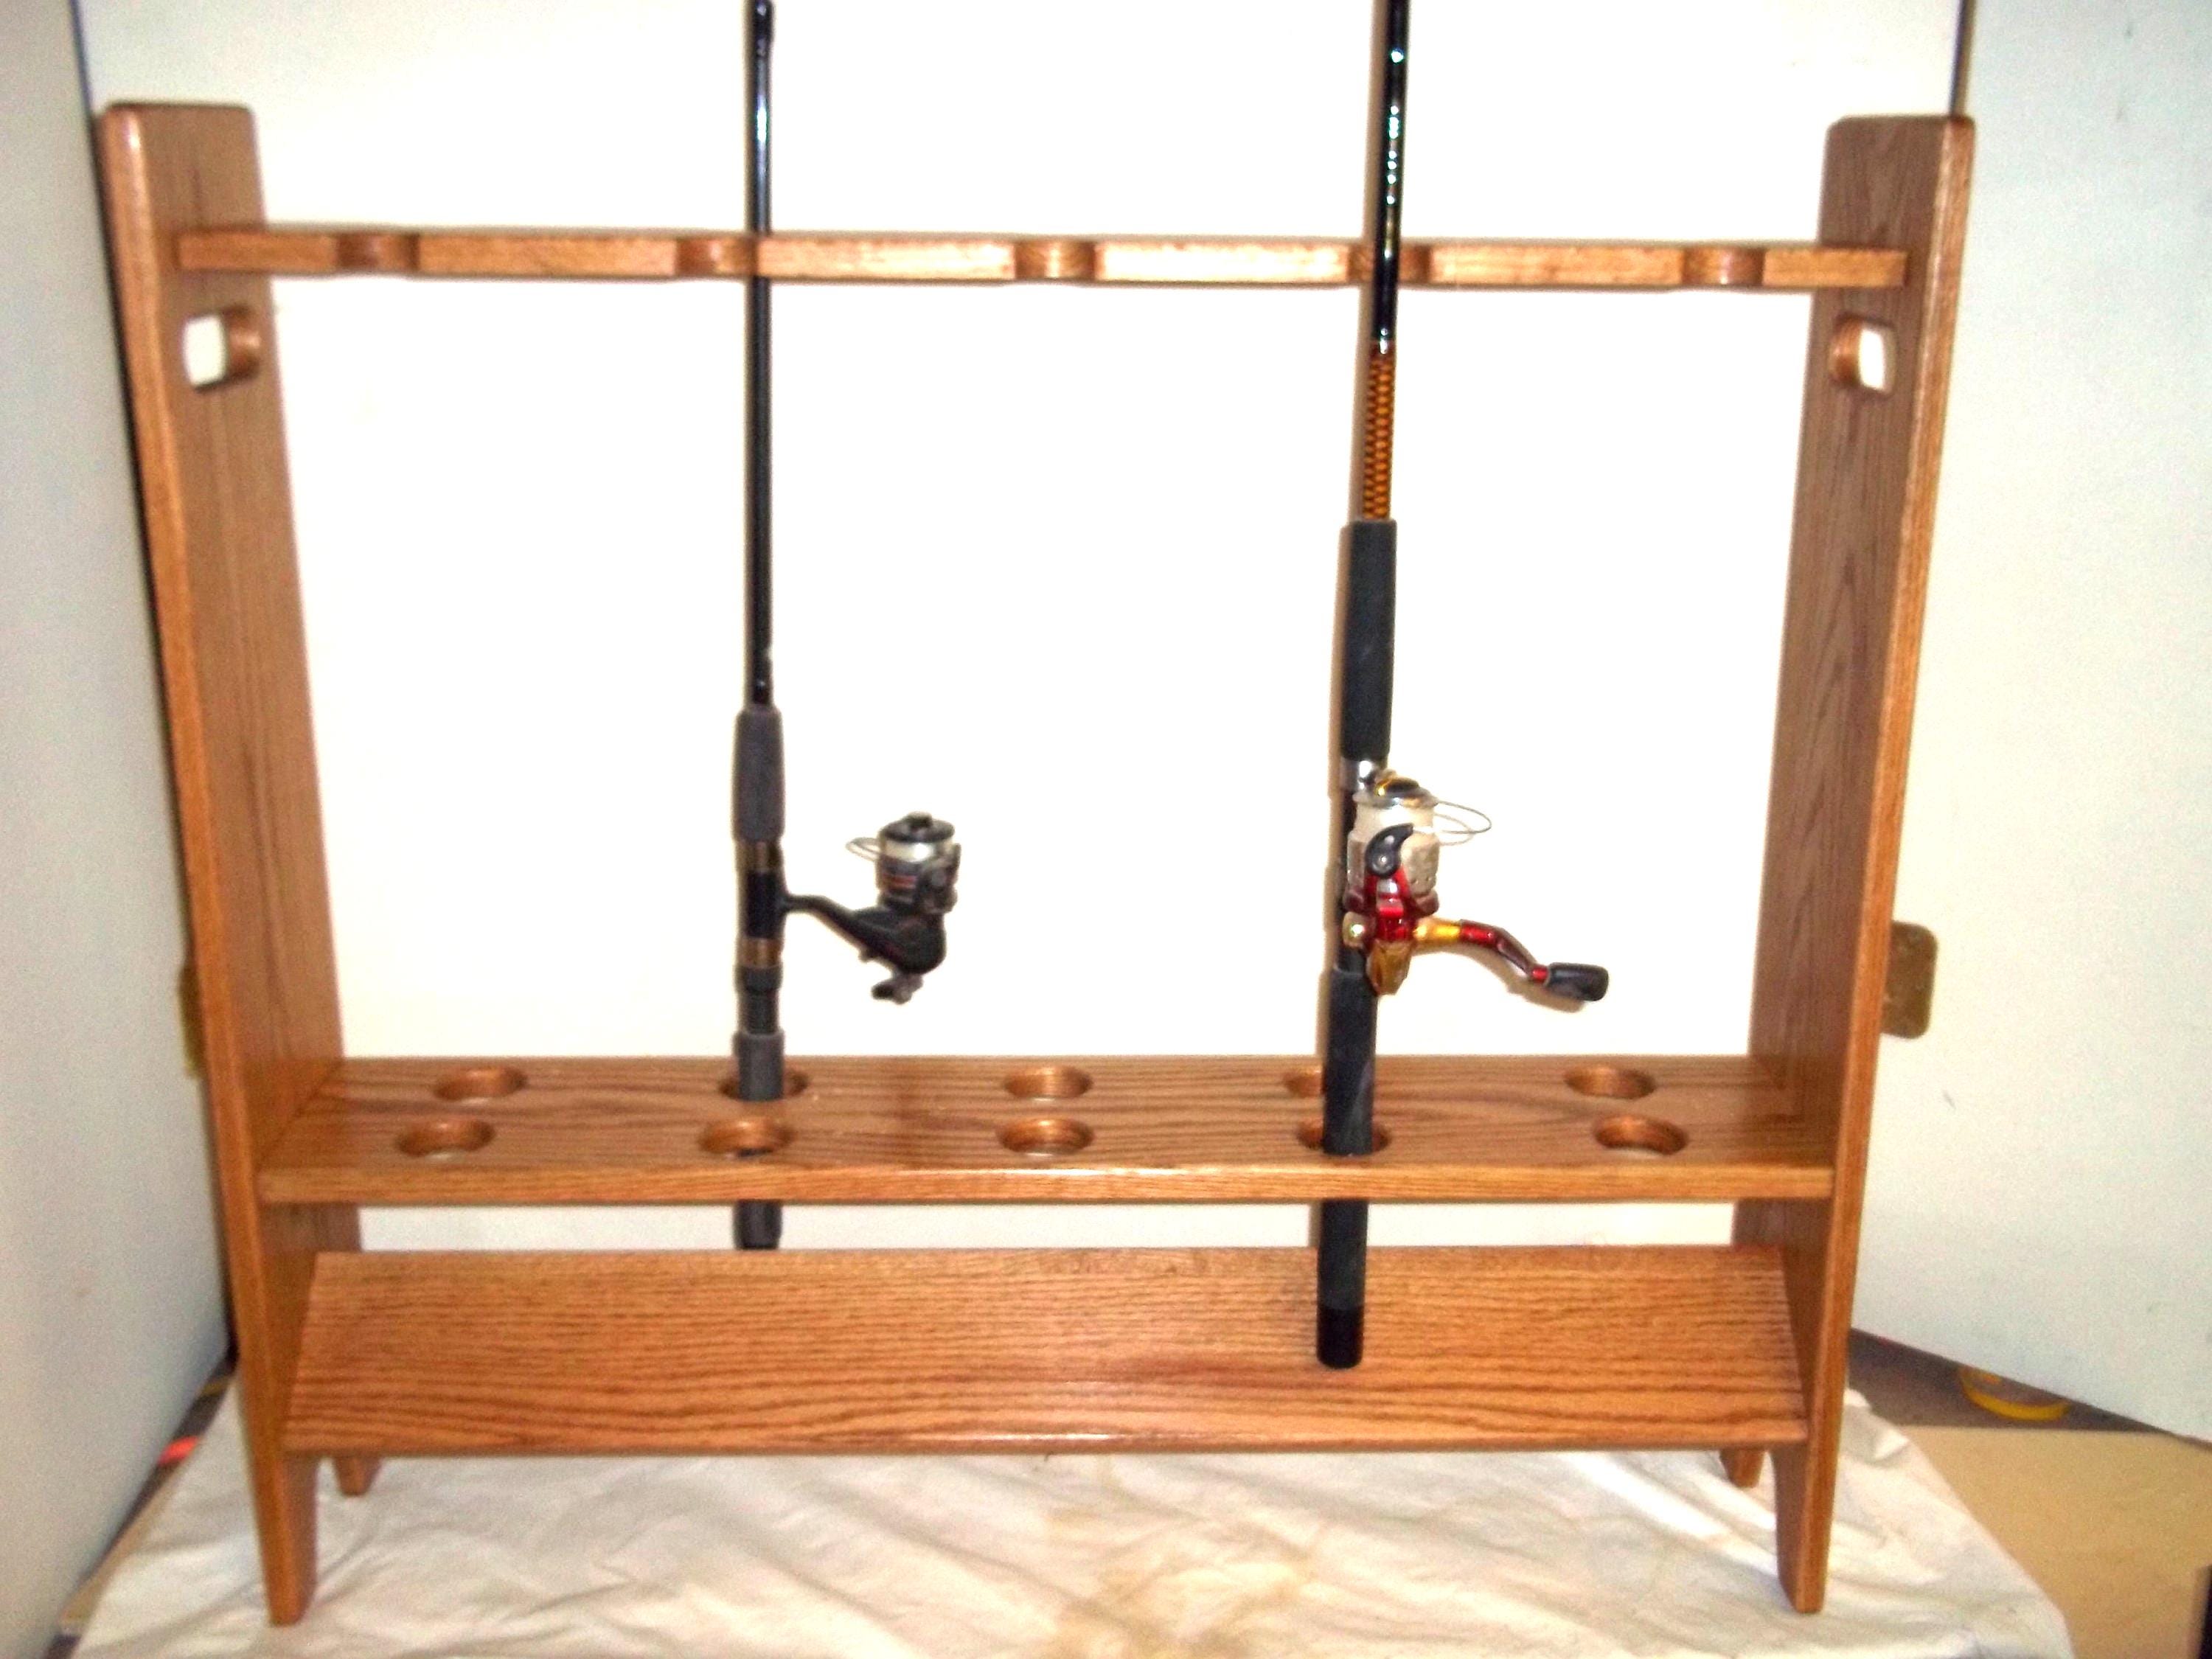
This horizontal storage system is ideal for garages and workshops. It securely holds rods with a top hole and bottom recess, preventing slippage and damage. The sandwich-style construction creates a professional-looking rack that supports up to 13 rods on a 6-foot board.
Build a 6-Foot Wooden Rod Rack
Cut three 1×4 pine boards to 6 feet: one for the top, one for the bottom support rail, and one as the wall-mounted base. Actual width is 3½ inches. Mark the centerline at 1¾” for consistent alignment across all pieces.
Drill Top Rod Holes Every 4 Inches
Start 3 inches from the end and space 2⅛” holes every 4 inches using a hole saw. This spacing prevents reel-to-reel contact and fits most spinning and baitcasting rods. Drill through the top board only.
Create Bottom Rod Recesses
Clamp the bottom board beneath the top board and transfer hole locations. Use a router or spade bit to carve a shallow, curved recess under each mark. This cradle supports the rod butt and stops it from sliding out.
Assemble with Glue and Screws
Apply wood glue between the top board and base, then the bottom board and base. Clamp and drill pilot holes every 5 to 6 inches. Secure with #6, 2¼” wood screws. Avoid screwing into hole centers. Begin at the ends and middle for even pressure.
Mount Securely into Wall Studs
Use a stud finder to locate framing. Pre-drill the base board and fasten with #6, 3⅛” screws driven into studs. Start with one end, then the opposite, then the middle. Drywall anchors won’t support the leverage. Always mount into studs.
Limitations and Upgrades
This design supports rods up to 8 feet. Taller ceilings allow longer boards. For larger collections, build a second rack above or extend the length. Add foam padding inside top holes to protect rod finishes.
Freestanding Frame Rod Rack
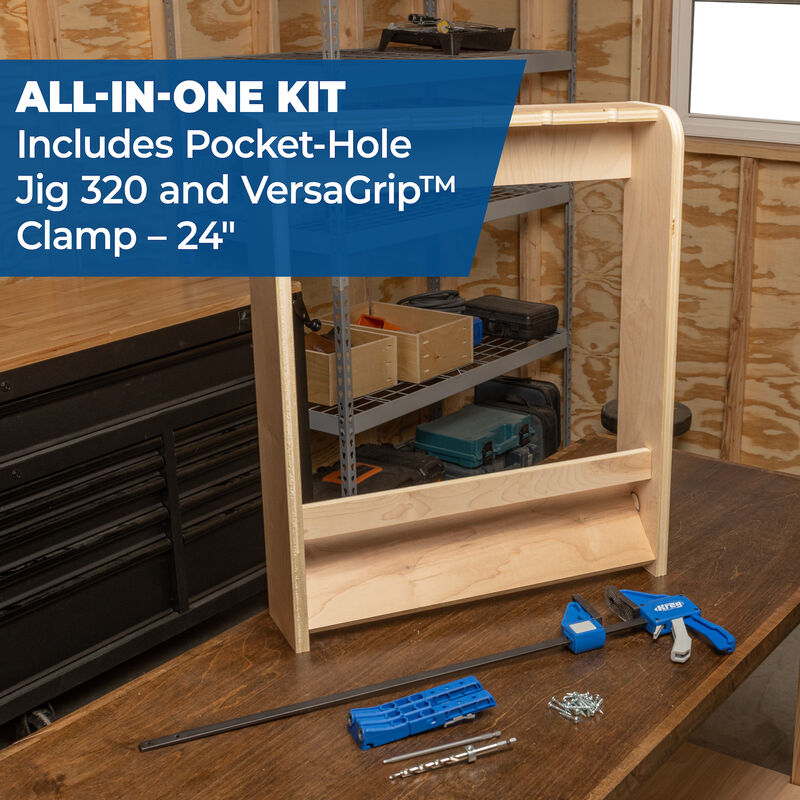
A portable, display-style rack perfect for cabins, living areas, or mobile use. It offers clean lines and strong joints using pocket-hole joinery. This design holds up to 10 rods and can be finished beautifully for indoor display.
Cut Poplar Boards to Size
Use poplar for its balance of cost, strength, and finish quality. Cut the following pieces:
- Two 1×3 at 30 inches for side supports
- Four 1×3 at 13¼ inches for top and bottom braces
- Two 1×4 at 30 inches for side extensions
- One 1×5 at 30 inches for center brace
- Two 1×8 at 34 inches for base
- One 1×8 at 30 inches for top
Drill Top and Bottom Rod Holes
Use a ¾-inch Forstner bit for the top brace. This holds the narrow part of the rod above the reel. Use a 1¾-inch hole saw for the bottom brace to allow reel seats and handles to pass through. Remove the core after each cut for cleaner holes.
Sand All Pieces Before Assembly
Smooth all edges and surfaces with 120 to 220 grit sandpaper. This ensures a clean finish if staining or sealing. Deburr hole interiors to prevent line snags.
Assemble with Pocket-Hole Screws
Use a pocket-hole jig to join side supports to braces. Attach cross supports and base pieces with #2¼-inch pocket screws. This method creates strong, invisible joints without marring visible faces.
Add Casters for Mobility
Attach locking casters to the base for easy movement between garage, truck, or dock. This makes the rack ideal for mobile anglers or seasonal storage. Keep it stationary by omitting wheels.
Customize for Display
Stain or paint the rack to match your space. Add brass barrel bolts at the bottom holes to prevent rods from slipping out. Label rods with engraved tags or colored caps for quick identification.
Ceiling-Mounted J-Hook System
Maximize unused overhead space with a high-capacity J-hook rack. Ideal for large collections and long rods, it’s the top choice for serious anglers. This system supports 24 or more rods and accommodates 11-foot surf rods.
Use 2×3 SPF Studs and PVC J-Hooks
Cut two 8-foot 2×3 SPF studs to serve as mounting rails. Mark every 8 inches on the 3-inch face using a speed square. This spacing supports large reels and allows easy access.
Modify PVC J-Hooks for Wood Mounting
Remove factory nails from 1½-inch PVC J-hooks. Cut off the top 3½ inches of each hook with a fine-toothed saw. For 2×4 studs, cut only 2½ inches. This creates a flat back for secure screw attachment.
Install Hooks Back-to-Back
Mount the first hook flush with the end, left-aligned. Install middle hooks at each 8-inch mark, facing inward in pairs. Repeat for the second rail. Use 1½-inch nails or screws through pilot holes.
Add Cushioning to One Rail
Cut 24 strips of ¾-inch foam weather stripping or sticky-back Velcro loop side. Sand the inside curve of J-hooks on one rail and apply padding. This supports rod blanks without scratching. Leave the handle-side rail unpadded.
Mount Rails to Ceiling Joists
Locate joists or rafters. Drill ¼-inch pilot holes through both rails, aligned with joists. Use 4-inch wood screws. Ensure at least 1½ inches of screw engages the wood. Space rails 44 inches apart to support 11-foot rods without sag.
Scale for Outdoor or Heavy-Duty Use
For under-deck or shed storage, use pressure-treated 2×3s and stainless steel fasteners. Apply Flex Seal Liquid or marine polyurethane to resist moisture, UV, and salt. This system holds 24 plus rods and can be extended indefinitely.
Material Selection Guide
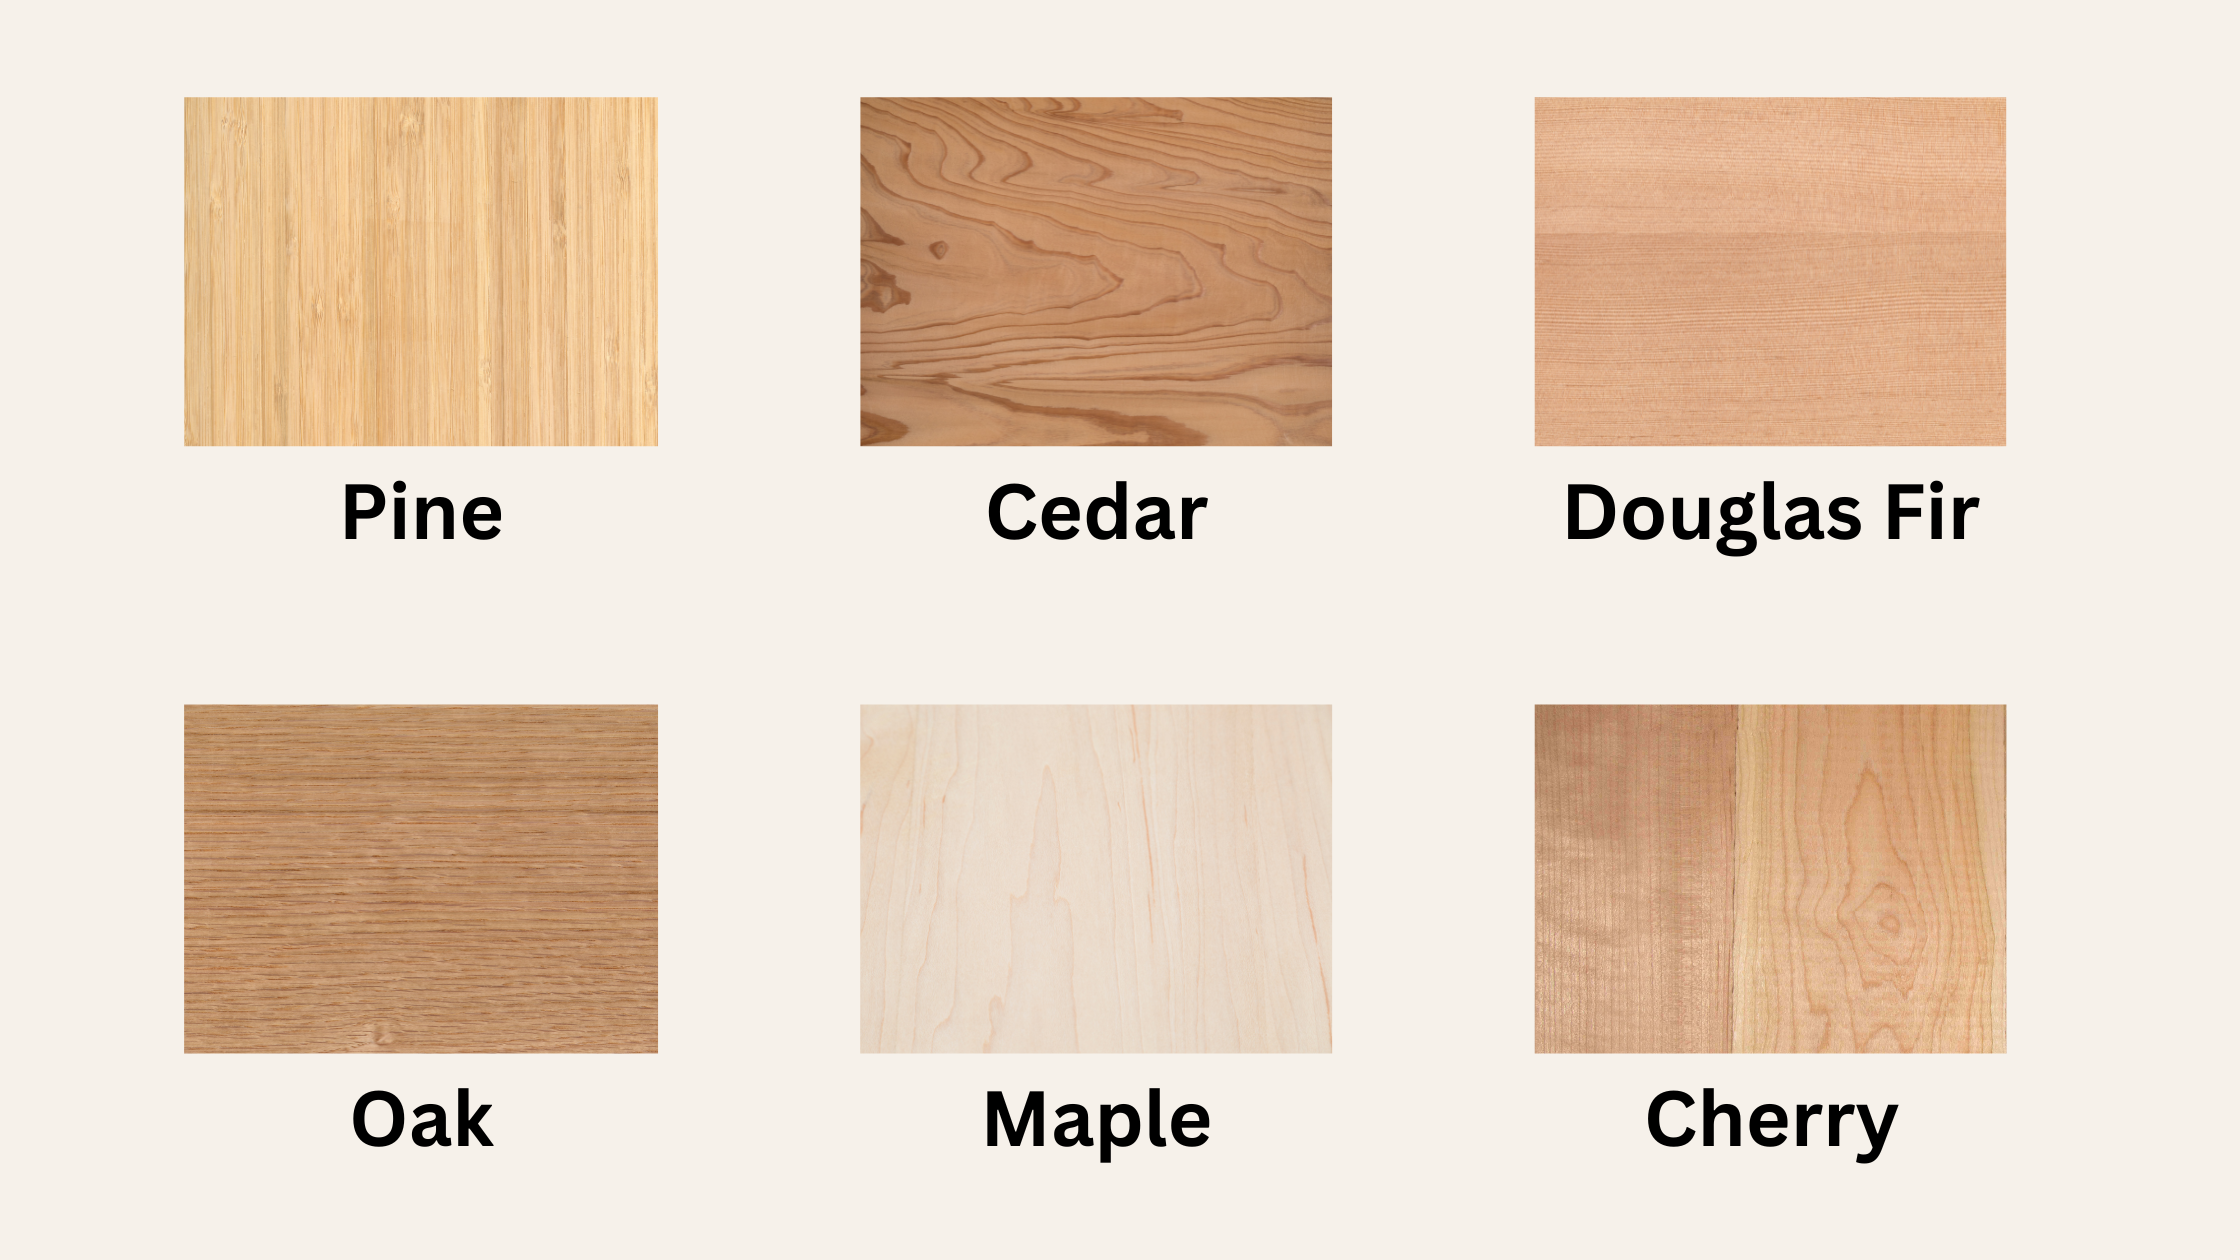
Choosing the right wood and hardware ensures durability, especially in humid or outdoor environments. The material you choose directly impacts how long your rack lasts and how well it protects your rods.
Match Lumber to Your Needs
Different wood types serve different purposes. Consider your environment and priorities when selecting materials.
- Poplar works best for indoor display racks. It offers a smooth finish, affordable pricing, and minimal warping.
- Pine or SPF is ideal for basic wall or ceiling racks. It’s cheap, easy to cut, and strong when mounted properly.
- Pressure-treated pine is essential for outdoor or coastal storage. It resists rot and moisture effectively.
- Marine plywood or teak serves as a premium option for boat or high-end display. Both offer excellent water resistance.
Use Durable Fasteners
Always use #6 wood screws 2¼ inches or longer for assembly. For wall or ceiling mounting, use 3⅛-inch to 4-inch screws into studs or joists. In wet areas, upgrade to stainless steel to prevent rust and corrosion.
Tool Requirements
You don’t need a full workshop. Just the essentials get the job done right. Most anglers already own many of these tools.
Must-Have Tools
Having the right tools makes any building project smoother and safer.
- Tape measure and speed square for accurate measurements
- Pencil and clamps for marking and holding pieces steady
- Drill with 2⅛-inch, ¾-inch, 1-inch, and 1½-inch bits
- Hole saw and Forstner bits for clean hole cutting
- Miter or table saw for straight cuts
- Orbital sander or sandpaper ranging from 120 to 220 grit
Helpful Upgrades
These tools improve results but aren’t strictly necessary for a functional rack.
- Pocket-hole jig creates clean, strong joints
- Router with rounding-over bit smooths edges beautifully
- Drill press ensures perfectly vertical holes
- Woodburning tool allows for personalization and labeling
Design Principles for All Racks
Follow these rules to ensure safety, function, and longevity. These principles apply regardless of which design you choose.
Space Rods Properly
Proper spacing prevents damage and makes retrieval easier.
- Wall racks need 4 inches between rods to prevent reel contact.
- Ceiling J-hook systems need 8 inches to allow large reel clearance.
- Adjust for rod type. Fly rods can be closer together. Surf rods need more space.
Support the Rod Blank
Never let rods rest directly on bare wood or metal. Use padded J-hooks, foam-lined holes, or recessed cradles to protect the sensitive blank. The blank is the thin, vulnerable section of the rod below the handle.
Mount into Structural Framing
Never rely on drywall anchors. The leverage from long rods can pull anchors out. Always secure racks to wall studs or ceiling joists for safety and stability.
Allow Room to Grow
Build with 1 to 2 extra rod slots. Collections expand. It’s easier to add space now than rebuild later.
Customization and Adaptability
Tailor your rack to your space, rods, and lifestyle. One size doesn’t fit all when it comes to rod storage.
Adjust for Rod Length
Different designs support different lengths effectively.
- Wall or frame rack works for rods up to 8 feet.
- Ceiling J-hook system accommodates rods up to 11 feet.
- For longer rods, increase rail spacing or use angled mounts.
Choose the Right Mounting Location
Each location has advantages depending on your space and needs.
- Wall mounting works best for garages and sheds. It uses vertical space efficiently.
- Ceiling mounting is ideal for basements or workshops. It frees floor area for other uses.
- Floor standing works perfectly for display or mobility. Add casters for versatility.
Protect Against the Elements
In humid or outdoor areas, extra protection matters.
- Use pressure-treated or marine-grade wood specifically designed for moisture exposure.
- Seal with Flex Seal Liquid or marine polyurethane for a waterproof barrier.
- Add a roof or cover if the rack is exposed to direct rain.
Cost Comparison and Value

DIY racks cost a fraction of store-bought models while offering better durability and customization.
| Design | Cost | Commercial Equivalent |
|---|---|---|
| Wall-Mounted Rack | $40 | $150 to $300 |
| Poplar Frame | $60 to $80 | $200 to $400 |
| J-Hook Ceiling System | $35 to $50 | $250 plus |
You save 60 to 90 percent and get a stronger, better-fitting rack. Even with premium finishes, DIY wins on price and performance.
Pro Tips for Best Results
Follow these expert suggestions for a smoother building process and better final results.
- Test-fit rods before final mounting. Check clearance for your longest rod.
- Build in pairs for symmetrical ceiling systems. This looks more professional.
- Label rods for quick access. Engraved tags or colored caps work great.
- Add retention bolts if kids or pets are around. This prevents accidents.
- Finish beautifully. Your rods deserve a worthy display.
- Use leftover wood for tags or protective caps. Nothing goes to waste.
Frequently Asked Questions About Making a Fishing Pole Rack
What is the cheapest way to make a fishing pole rack?
The ceiling-mounted J-hook system is the most affordable option at $35 to $50. It uses inexpensive 2×3 studs and standard PVC hooks, both available at any hardware store. This design also maximizes overhead space that typically goes unused.
How much weight can a wall-mounted rod rack hold?
A properly mounted wall rack supports significant weight because it anchors into wall studs. Each stud connection easily handles 50 pounds or more. The key is using 3⅛-inch screws driven directly into studs, not relying on drywall anchors.
Can I use PVC pipes instead of J-hooks for ceiling storage?
Yes, but J-hooks provide better support for rod blanks. PVC pipes work for handle storage only. If using PVC, cut 2-inch sections and mount them horizontally. For proper blank support, the J-hook curve cradles the rod better than a straight pipe.
How do I protect my rods from scratching in the rack?
Add foam padding to any surface that contacts the rod blank. Use ¾-inch foam weather stripping on J-hooks or glue felt lining inside wall rack holes. This simple addition prevents finish damage and extends the life of your rod coatings.
What spacing do I need for surf fishing rods?
Surf rods and other long rods need 8-inch spacing minimum. This allows room for large reel seats and ensures rods don’t touch when stored. The ceiling J-hook system is specifically designed for this, with 44-inch rack spacing accommodating 11-foot rods.
Final Thoughts on Building Your Own Fishing Pole Rack
Making a fishing pole rack is a simple project with big rewards. Whether you choose a wall-mounted board, a freestanding poplar frame, or a high-capacity ceiling system, you gain organization, protection, and pride in a job well done. The three main designs each serve different needs. Wall racks suit garages with limited space. Freestanding frames work beautifully for indoor display. Ceiling systems handle large collections and long rods best.
With the right materials, tools, and techniques, you can build a rack that lasts decades. Customize it to your rods, your space, and your lifestyle. Start with a simple design if you’re new to building. Think ahead by leaving room for expansion. Your fishing gear deserves proper storage, and you’ll fish with confidence knowing your rods are protected and ready for your next adventure.