

If you have ever lost a trophy tuna or marlin because your leader failed at the knot, you are not alone. For anglers targeting heavy-duty game fish like blue marlin, wahoo, giant trevally, and sharks, crimping is the proven method to create strong, low-profile connections that hold when it matters most. Unlike traditional knots, which can weaken under 100-pound test lines and create bulky snags, crimps offer a streamlined, reliable alternative, especially with fluorocarbon, monofilament, and stainless steel wire leaders.
Using a crimping tool correctly is not just about squeezing metal. It is about understanding sleeve materials, tool compatibility, and precise technique. Done right, a crimped connection can outperform even the strongest knot. Done wrong, it fails silently and costs you the fish of a lifetime. This guide walks you through every step: choosing the right sleeve, matching your crimping tool, and executing flawless crimps for both mono and wire leaders.
Choose the Right Crimping Sleeve for Your Leader

The strength of your crimp starts with selecting the correct sleeve material and geometry. Using the wrong metal can lead to corrosion, slippage, or line damage.
Match Sleeve Material to Leader Type
The interaction between sleeve metal and leader material dictates the longevity and strength of your rig.
- Brass or Copper Sleeves: Best for stainless steel wire and ideal for monofilament or fluorocarbon up to 130-pound test. Brass resists saltwater corrosion better than copper. Copper is softer and gentler on light lines.
- Aluminum Sleeves: Use only for heavy monofilament at 150-pound test and above. They are lightweight, helping lures swim naturally. Never use aluminum with wire. In saltwater, it corrodes rapidly when paired with steel.
- Stainless Steel Sleeves: Avoid for fishing. They require extreme force to compress and often crush nylon or fluorocarbon leaders before fully setting.
Select the Correct Sleeve Shape
Not all crimps are created equal. The geometry affects strength and reliability.
- Double Barrel Sleeves: Preferred by serious anglers. Two chambers prevent line crossing and provide superior grip. Ideal for both wire and heavy mono.
- Oval Sleeves: Common on commercial longlines. Require cup-to-cup crimpers. Strong when sized correctly.
- Round Sleeves: Only for light-duty use. They require point-to-cup tools and produce weak joints. Not recommended for big game.
Size Sleeves Precisely
A poorly sized sleeve is a ticking time bomb. Too small and it will not fit over the line. Too large and it will not compress tightly, allowing slippage. Match the sleeve inside diameter to your leader thickness. For double-barrel sleeves, use the inside diameter of one barrel. Manufacturers like Hi-Seas label sleeves by pound test for easy selection.
Pick the Correct Crimping Tool
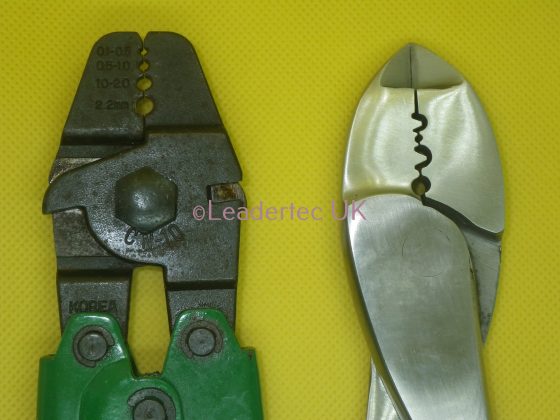
Your tool must match the sleeve type and size. Using improvised tools like pliers, vices, or hammers will damage leader strands and produce unreliable joints.
Use Cup-to-Cup Crimpers for Strength
The right crimper type is essential for creating secure connections.
- Cup-to-Cup Crimpers: Essential for oval and double-barrel sleeves. Both jaws have matching semi-circular dies that evenly compress the sleeve without damaging the line.
- Point-to-Cup Crimpers: Only for round sleeves. They partially flatten the crimp and are not strong enough for heavy leaders or big fish.
- Bench Press Crimpers: High-volume, industrial use. Not practical for most anglers.
Choose Tool by Line Weight
Using the wrong crimper risks under or over-compression.
- Standard Duty Crimper: Handles sleeves up to 2.2 millimeters. Good for leaders up to 400-pound mono or 600-pound wire.
- Heavy Duty Crimper: Built for thick sleeves and heavy leaders over 200-pound mono or 480-pound wire. A must for charter boats and deep-drop rigs.
- Sager Crimpers: Use Small Sager for under 200-pound mono or 480-pound wire. Use Large Sager for heavier lines.
Gather Essential Accessories
You will need more than just a crimper.
- Sharp Mono Cutters: Clean cuts prevent frayed ends that mislead sleeve sizing.
- Lighter: To melt and flatten tag ends on mono or fluoro.
- Chafe Protection: Thimbles or tubing prevent abrasion from fish bills or lure skirts.
- Black Sharpie: For camouflaging aluminum crimps when targeting line-shy fish like tuna.
Crimp Monofilament or Fluorocarbon Leaders
The technique for synthetic lines differs from wire. Follow these steps for reliable connections.
Thread and Form the Loop
- Slide chafe tubing or a thimble onto the leader first if using.
- Pass the line through one end of the sleeve.
- Form your loop, whether for a hook, swivel, or snap, then feed the tag end back through the sleeve in the opposite direction.
- Pull 2 to 4 inches of tag end through the sleeve.
Secure the Tag End
This prevents pull-through during crimping. Hold the tag end with pliers. Use a lighter to melt the tip until it forms a soft blob. Press it flat against a hard surface to create a wide stopper.
Position the Sleeve Correctly
Pull the leader until the melted blob sits snug against the sleeve edge. Adjust loop size now. Once crimped, it is fixed.
Align Crimper Jaws Properly
Use the cup die that matches the sleeve diameter. Place the crimper so the concave cups press against the curved sides of the sleeve, not the flat face or center groove. Critical: leave 1/32 inch to 1/16 inch of sleeve extending beyond the jaws on both ends.
Apply the Crimp
Squeeze the tool firmly. Do not hammer or over-press. For short sleeves, one central crimp is enough. For long sleeves, apply multiple crimps spaced 1/32 inch apart, starting near one end and moving toward the other. Always leave the flare gap at both ends. Some experts recommend crimping once, releasing slightly, then re-crimping the same spot to ensure full metal deformation without crushing the line.
Inspect the Result
A perfect mono or fluoro crimp shows sleeves compressed together with subtle flares at both ends. The metal should roll outward, not cut into the line. There should be no pinching or flattening of the leader inside.
Crimp Stainless Steel Wire Leaders
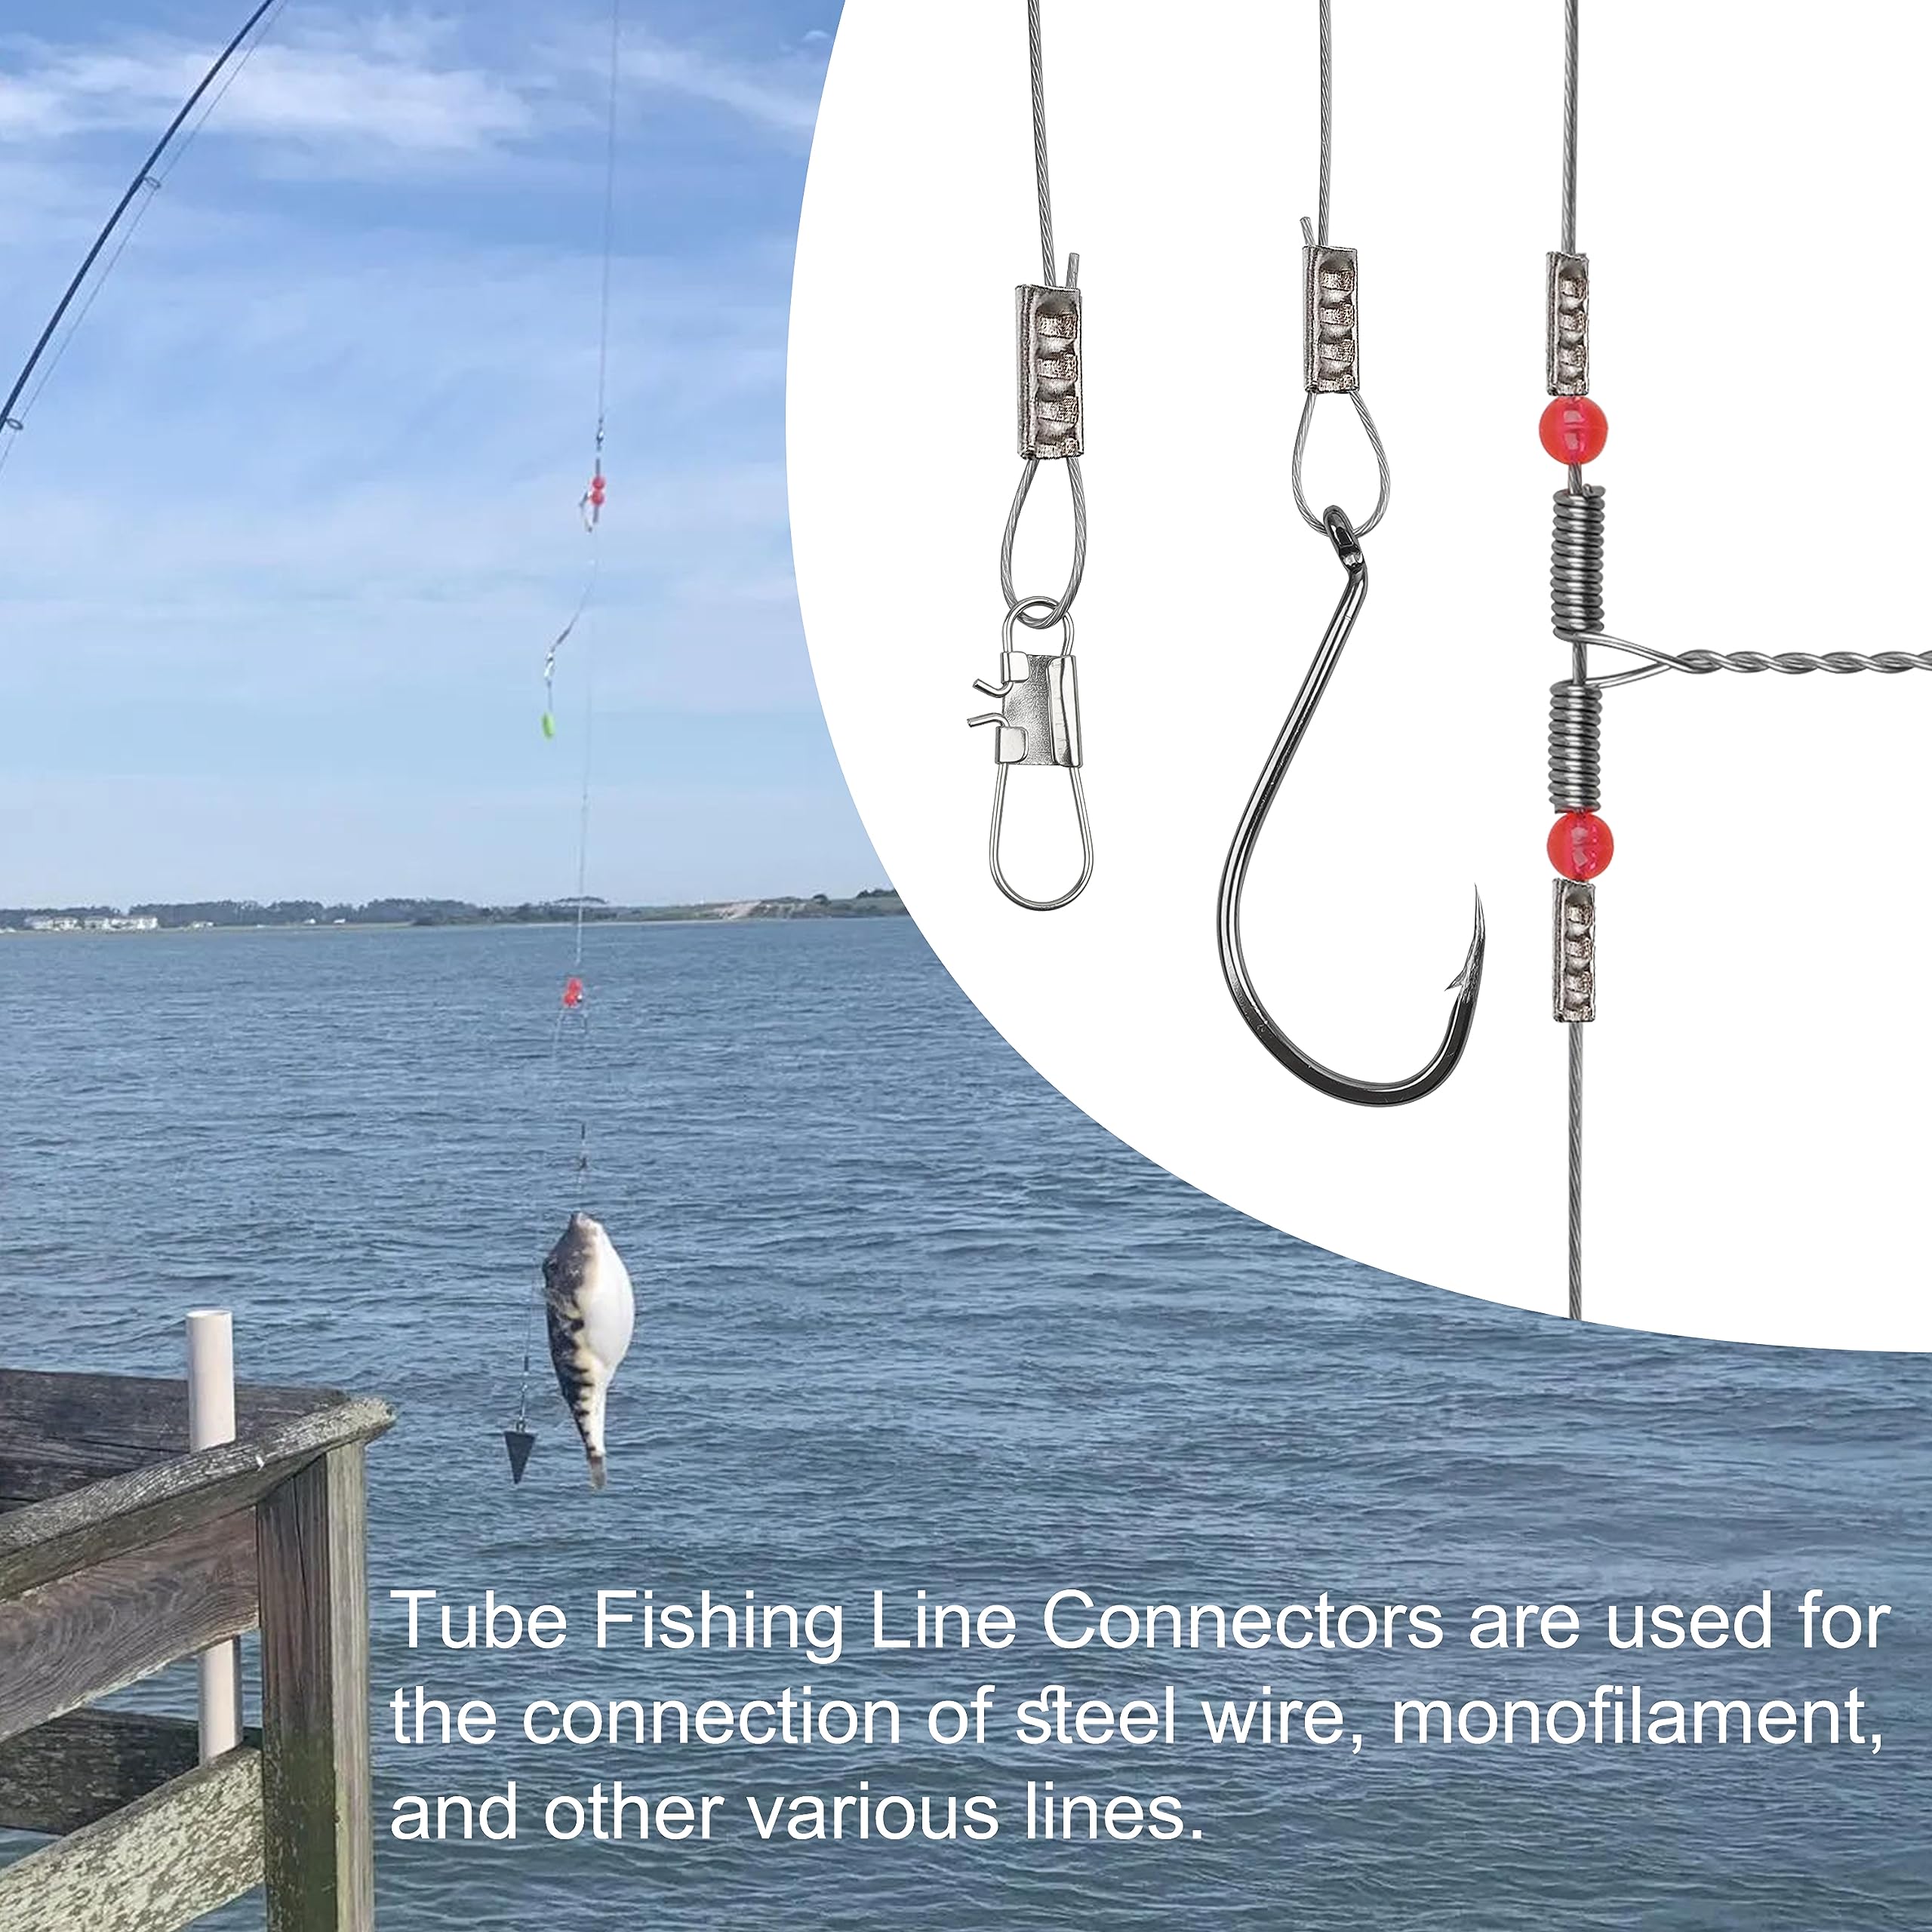
Wire requires different handling due to its hardness and the risk of galvanic corrosion.
Use Only Brass or Copper Sleeves
Never use aluminum with wire. In saltwater, galvanic corrosion will eat through the aluminum, causing sudden failure. Brass or copper are mandatory.
Thread and Loop the Wire
- Pass the wire through the sleeve.
- Form the loop and feed the tag end back through.
- Critical: the tag end must not remain sharp or exposed.
Secure the Wire Tag End
Exposed wire can slice skin during leadering. Option one involves wrapping the tag around the main leader and securing it with a second sleeve. Option two uses a haywire twist to join strands before crimping. Option three ensures the tag is fully enclosed within the crimped area or covered by a second crimp.
Position for Full Compression
Unlike mono, crimp the entire length of the sleeve, edge to edge. No flare is needed. Full compression maximizes grip on the rigid wire.
Apply Firm, Multiple Crimps
Use a heavy-duty cup-to-cup crimper. Apply three crimps along the sleeve length for large diameters. Ensure even pressure with no gaps or bulges.
Inspect the Final Crimp
A proper wire crimp shows full compression along the entire sleeve with no exposed wire strands. The metal should be smooth and oval-shaped with no cracks or splits.
Avoid Common Crimping Mistakes
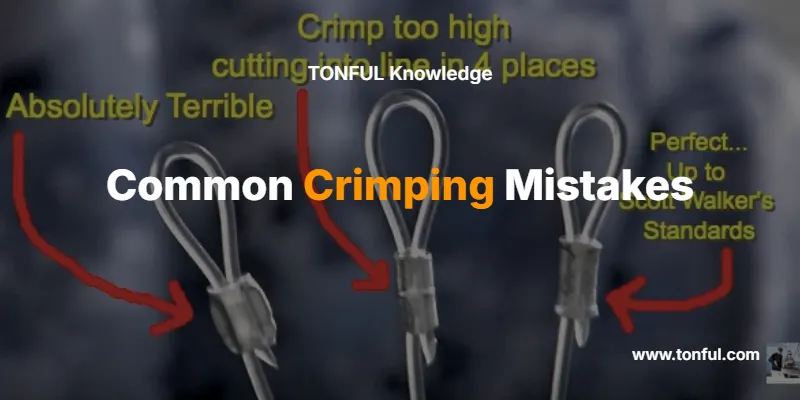
Do Not Crimp to the Edge on Mono
Squeezing the crimper all the way to the sleeve end causes the sharp edge to cut into monofilament, causing failure under load. Always leave 1 to 1.6 millimeter overhang to allow flaring.
Never Mix Aluminum and Steel
Using aluminum sleeves on stainless steel wire causes rapid galvanic corrosion in saltwater. The joint fails within days. Use brass or copper only for wire leaders.
Avoid Incorrect Jaw Placement
Pressing the crimper cups against the flat side or center of the sleeve causes poor deformation that fails to grip the line. Always align cups with the curved barrels of the sleeve.
Prevent Over-Crimping
Using excessive force or a heavy-duty tool on light line crushes fluorocarbon or creates microfractures in mono. Use the right tool and firm, controlled pressure. Deform the sleeve, not the line.
Check Sleeve Fit Before Crimping
Using a sleeve that is too loose or tight causes slippage or inability to thread. The sleeve should slide on with slight resistance, no forcing.
Never Leave Exposed Wire Tags
Sharp wire ends sticking out risk serious cuts during handling. Always cover or wrap the tag end.
Always Test Before Use
Skipping inspection allows undetected weak crimps to fail mid-fight. Pull-test every crimp by hand. It should hold firmly with no slippage.
Maintain and Inspect Crimped Rigs
Even stored rigs degrade over time. Regular inspection prevents failures on the water.
Inspect Before Every Use
Look for corrosion, especially on brass or copper sleeves in saltwater. Check the leader section between crimp and hook or swivel. This area stretches and weakens over time. Ensure swivels and snaps rotate freely. Binding increases stress on the crimp.
Replace Worn Components
Discard any crimp with cracks, bulges, or loose line. Replace chafe tubing if frayed. Swap out old sleeves. Even if they look fine, metal fatigue can occur.
Store Leaders Properly
Keep in a cool, dark place away from UV light, which degrades fluorocarbon and mono. Use leader bags or spools to prevent kinks and tangles.
Upgrade with Pro Techniques
Camouflage Light-Colored Crimps
For species like tuna that spot bright metal, use a black Sharpie to color aluminum sleeves. Alternatively, choose factory-blackened copper sleeves for stealth.
Use Thimbles for Abrasion Protection
When targeting fish with rough mouths like marlin or sailfish, install a stainless steel thimble inside the loop. It prevents the leader from sawing against the fish bill or jaw.
Match Swivels to Leader Strength
Use larger brass swivels instead of small stainless ones. They handle stress better and resist corrosion. Ensure swivels spin freely. Friction weakens the crimp over time.
Frequently Asked Questions About Using Crimping Tools for Fishing
What is the best crimping tool for beginners?
A cup-to-cup crimper with multiple die sizes is best for beginners. It handles both oval and double-barrel sleeves, which cover most fishing applications. Look for a standard duty model that handles sleeves up to 2.2 millimeters.
Can I use a crimping tool for all types of fishing line?
Crimping works best for monofilament, fluorocarbon, and wire leaders at 80-pound test and above. For lighter lines, standard knots are usually sufficient and easier to tie.
How do I know if my crimp is secure?
A secure crimp shows compressed sleeves with subtle flares at both ends for mono or full compression for wire. Pull-test by hand. There should be no movement or slippage between the sleeve and leader.
Why does my crimp keep failing?
Common causes include using the wrong sleeve material, incorrect jaw placement, over-crimping, or leaving no overhang for mono flares. Check for galvanic corrosion if using aluminum with wire. Inspect the sleeve fit before crimping.
How long do crimped connections last?
With proper inspection and storage, crimped leaders can last several seasons. However, always inspect before each use, especially after catching heavy fish or exposure to saltwater.
Key Takeaways for Using Crimping Tools in Fishing
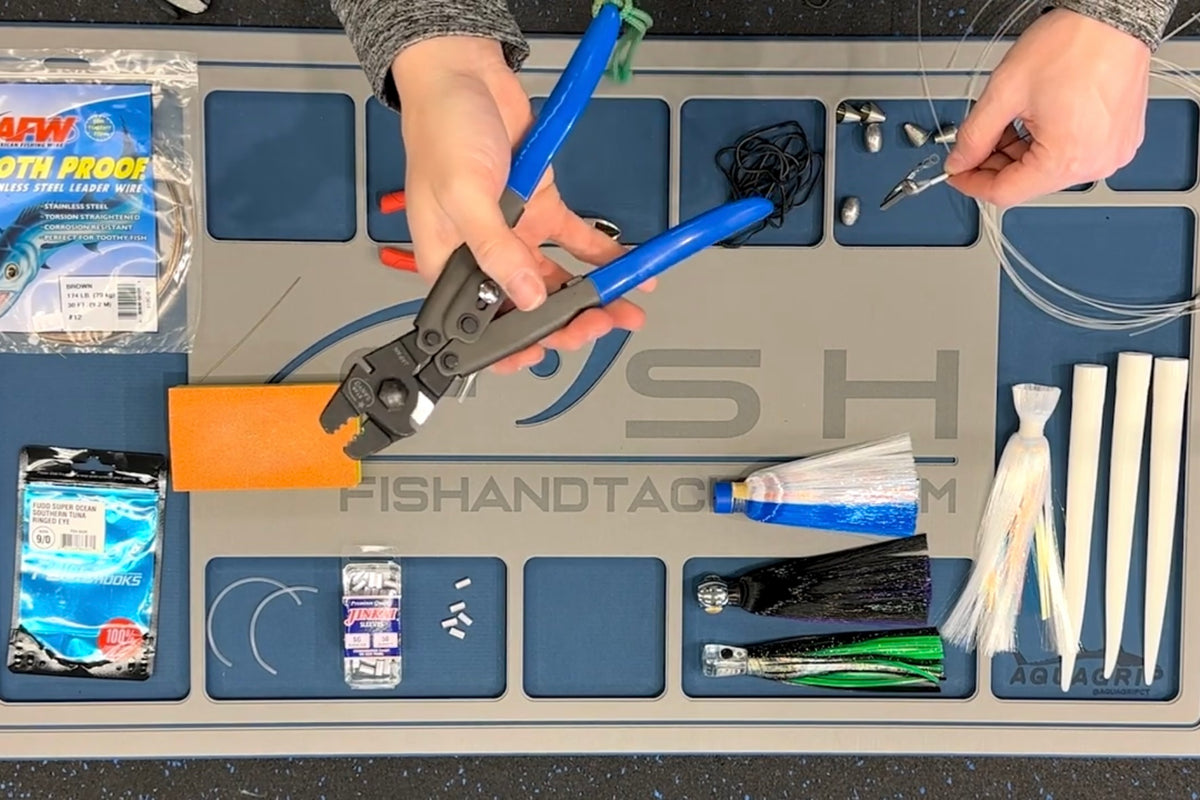
Crimping is a skill that separates casual anglers from serious big-game hunters. With the right sleeve, proper tool, and correct technique, you will build leaders that are stronger, sleeker, and more reliable than any knot. Always match sleeve material to leader type, use cup-to-cup crimpers, and leave the proper overhang for mono flaring. Avoid mixing aluminum with steel, and test every crimp before use. Whether you are chasing marlin in the Pacific or tuna off the coast, mastering how to use a crimping tool for fishing ensures your rig will not be the weak link. Follow this guide, avoid the common pitfalls, and fish with confidence. Your next trophy will not get away on a failed connection.





