Tying a ball sinker to a fishing line is a foundational skill every angler must master. Whether you’re targeting panfish in calm lakes or battling sea bass in strong currents, the way you attach your sinker directly affects bait depth, casting accuracy, and how naturally your lure moves in the water. A poorly secured sinker can slip, snap your line, or scare fish with unnatural movement, costing you bites.
The key is matching the right sinker type and attachment method to your fishing conditions. Some setups fix the weight in place, while others let it slide freely along the line for a more lifelike presentation. This guide breaks down exactly how to tie a ball sinker to a fishing line using proven methods, avoids common mistakes, and helps you choose the best rig for your next trip.
Choose the Right Sinker Type
Split Shot vs. Threaded Ball Sinker
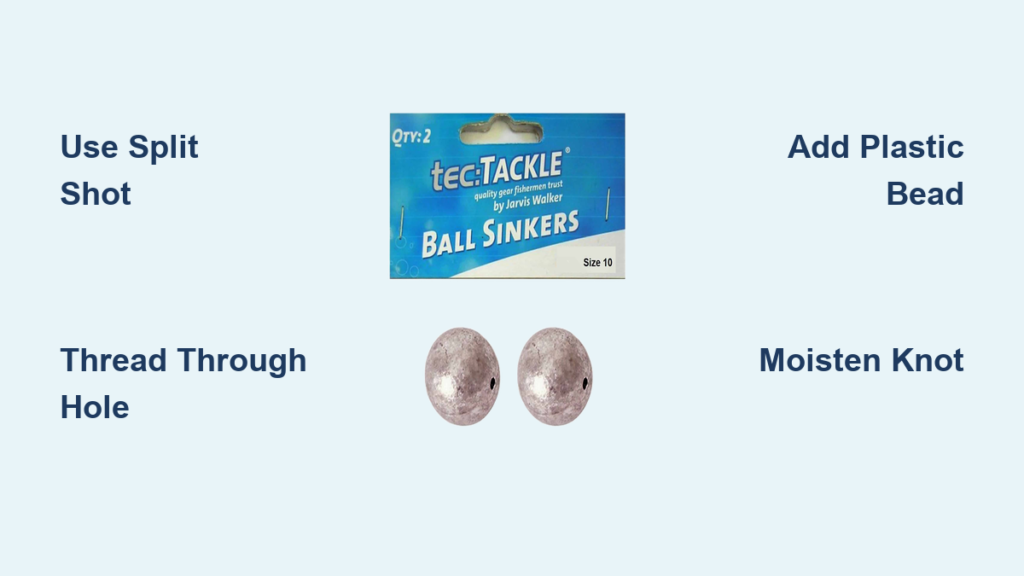
Not all ball sinkers are tied the same way. Your method depends on the sinker design. Split shot sinkers have a pre-cut slit and are pinched onto the line without threading. They work best for light freshwater fishing and bobber rigs where precise, fixed depth control is needed.
Threaded ball sinkers feature a central hole and must be threaded onto the line before securing with a knot or stopper. These are used when you need a heavier, more durable setup common in surf fishing, deep water, or sliding rigs like the Carolina rig.
Using the wrong type for your setup leads to failure. Never use a split shot in a sliding rig because it won’t slide properly and can damage your line. Always match the sinker style to your rig’s requirements.
Secure Split Shot Sinkers Correctly

Position the Weight Properly
Place the split shot 6 to 12 inches above the hook. This distance keeps your bait off the bottom while allowing natural movement. Too close, and the weight restricts action. Too far, and tangles become likely during casting.
Avoid stacking multiple split shots tightly together. Instead, space them slightly apart to distribute stress on the line and reduce the risk of weak points.
Pinch with Pliers, Not Fingers
Use needle-nose pliers to close the slit firmly around the line. Squeeze the sides evenly without crushing the line itself. Over-squeezing can nick or weaken the fishing line, creating a break point under pressure.
After pinching, tug the sinker gently. If it slides, re-crimp it. If it holds but the line feels frayed, cut and retie because damaged line won’t survive a strong fish or snag.
Thread and Knot a Ball Sinker in Place
Use the Smart Knot for Fixed Weight
When using a solid ball sinker with a hole, the Smart Knot creates a secure stopper that locks the weight in position without tools. This knot grips tightly and won’t slip, even under heavy load. It’s ideal for shore fishing or any situation where you need a fixed, reliable weight.
Step-by-step execution:
- Thread the main line through the sinker’s hole
- Leave a 6 to 8 inch tag end
- Form a small loop 3 to 4 inches below the sinker
- Wrap the tag end around both the standing line and the loop 5 to 6 times
- Pass the tag end through the initial loop
- Moisten the knot with saliva or water, then pull the tag and standing line to tighten
- Trim excess line close to the knot
Prevent Line Damage from Heavy Sinkers
Add a Bead in Sliding Rigs
In rigs like the Carolina setup, where the sinker slides freely, the weight can slam into the knot and wear through the line over time. Prevent this by adding a plastic bead between the sinker and the swivel.
The bead acts as a bumper, absorbing impact and extending the life of your knot and leader. Always include one when using heavy weights in sliding configurations.
Build Effective Sinker Rigs

Set Up a Basic Bobber Rig
This rig is perfect for beginners and panfish. It suspends bait at a controlled depth.
Steps:
- Tie hook with Improved Clinch Knot
- Pinch 1 to 2 split shots 6 to 10 inches above the hook
- Clip a bobber 2 to 3 feet above the sinker, adjusting for water depth
The sinker pulls the bait down while the bobber stops it at the desired level. Keep the setup light for subtle bites.
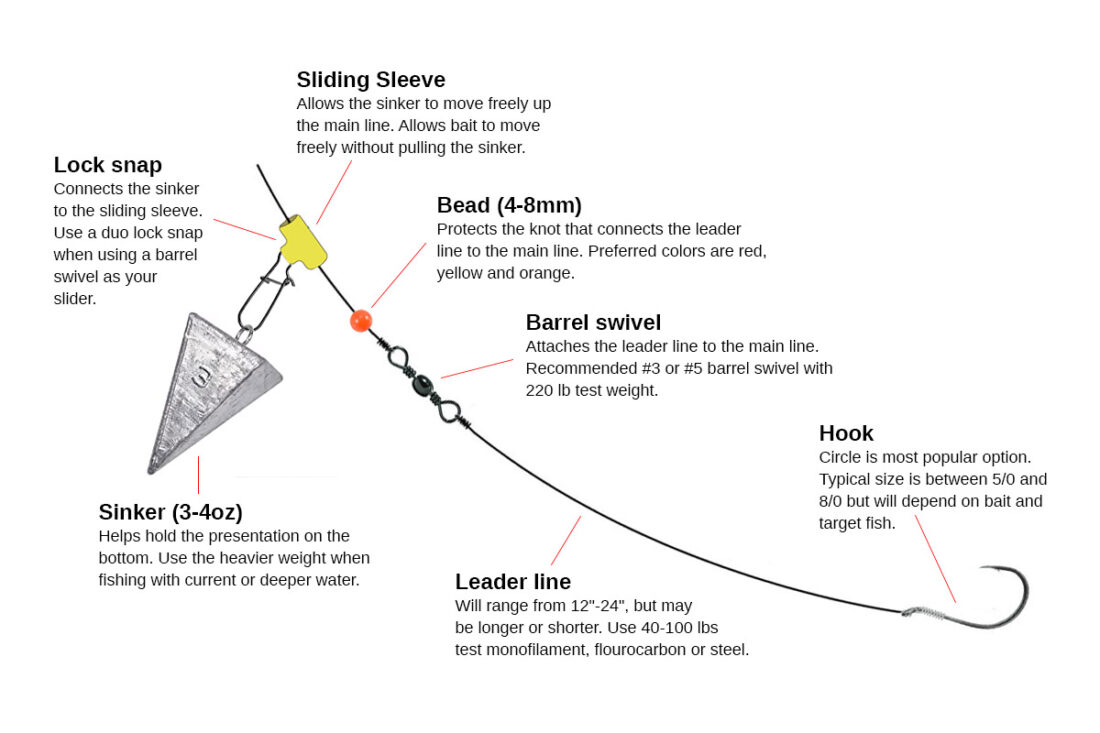
Assemble a Carolina Rig for Bottom Fish
This rig lets fish pick up the bait without feeling the sinker’s weight, ideal for cautious bass or catfish.
Steps:
- Slide an egg or bullet sinker onto the main line
- Add a plastic bead
- Tie a barrel swivel to the end
- Attach a 12 to 24 inch leader with hook
The sinker stays behind the swivel, allowing free movement. Use only sinkers with a central hole, never split shot.
Use a 3-Way Rig in Currents
For river or surf fishing, this rig keeps your bait drifting naturally while the sinker holds position.
Steps:
- Attach main line to top loop of 3-way swivel
- Tie a 12-inch line with pyramid sinker to bottom loop
- Connect a 24 to 36 inch leader with hook to side loop
If the sinker snags, the short line breaks, saving your main rig and fish.
Avoid Common Sinker Mistakes

Do Not Use the Wrong Weight
Too heavy, and your bait sinks into mud. Too light, and it drifts out of the strike zone. Start light with 1/8 oz (3.5 g) for still water and increase only if needed.
Watch your line after casting. If it zips off the reel fast, add weight. If the bait vanishes instantly, go lighter.
Never Skip Lubrication When Tightening Knots
Friction heat from dry knot tightening weakens the line by up to 50 percent. Always wet the knot with saliva or water before pulling it tight. This simple step prevents break-offs.
Maintain Your Sinker Setup
Inspect Line Regularly
Run your fingers along the line near the sinker. Feel for nicks, cuts, or rough spots caused by abrasion. Replace damaged sections immediately.
Split shots and heavy sinkers bang against the line, especially in current. Frequent inspection prevents unexpected failures.
Check for Corrosion
After saltwater use, rinse sinkers and pliers. Corroded split shots lose grip and can weaken the line. Replace any rusted weights before your next trip.
Follow Environmental Rules
Avoid Lead Where Banned
Many states and countries restrict lead sinkers due to toxicity to birds and aquatic life. Use eco-friendly alternatives like tin, steel, bismuth, or tungsten.
Tungsten is denser, meaning a smaller size for the same weight, making it less visible to fish. Though pricier, it’s a smart long-term investment for sensitive fisheries.
Final Checklist Before Casting
Before you head out, verify these items:
- Sinker type matches your rig (split shot for fixed, threaded for sliding)
- Weight is appropriate for depth and current conditions
- Sinker is positioned 6 to 12 inches above the hook unless using a sliding rig
- Bead is in place if using heavy sliding weight
- Knots are moistened and pulled tight
- Line is free of nicks or frays near the sinker
- Sinker material is legal in the waterbody you are fishing
Frequently Asked Questions About Tying a Ball Sinker
What is the best knot for tying a ball sinker to fishing line?
The Smart Knot is highly recommended for securing a ball sinker with a central hole. It creates a fixed stopper that locks the weight in position without slipping. Thread the line through the sinker, form a loop below it, wrap the tag end around both the line and loop 5 to 6 times, then pull tight after moistening.
How far should a sinker be from the hook?
The standard distance is 6 to 12 inches above the hook. This spacing allows natural bait movement while keeping the weight from inhibiting action. Too close, and the bait looks unnatural. Too far, and tangling becomes likely during casting.
Can I use split shot sinkers in a sliding rig?
No. Split shots are designed to be pinched onto the line for fixed positioning. They won’t slide properly in Carolina or other sliding rigs. Use egg sinkers or bullet sinkers with central holes for sliding configurations.
How do I prevent line damage when using heavy sinkers?
Add a plastic bead between the sinker and your knot or swivel. The bead acts as a bumper and absorbs impact from the heavy weight slamming into the connection point. This prevents the line from wearing through over time.
Do I need to moisten knots before tightening?
Yes. Always wet the knot with saliva or water before pulling it tight. Dry tightening creates friction heat that can weaken the line by up to 50 percent, leading to break-offs when fighting fish.
Key Takeaways for Tying Ball Sinkers Successfully
Mastering how to tie a ball sinker to a fishing line isn’t just about security. It’s about presentation, sensitivity, and success on the water. The right sinker type and attachment method directly impact how naturally your bait moves and whether fish will bite.
Choosing between split shot and threaded ball sinkers depends on your rig type. Split shots work for fixed setups like bobber rigs. Threaded sinkers with the Smart Knot are better for shore fishing and heavy-duty applications. Always position weights 6 to 12 inches above the hook, add beads in sliding rigs, and moisten knots before tightening.
Practice these techniques at home before your next fishing trip. Building muscle memory ensures you can rig quickly and confidently when you’re on the water, leading to more fish in the net.