
Have you ever wanted to build a device that magically picks up metal objects with the push of a button? While it won’t catch bass or trout, a DIY electric fishing rod is a fun and educational project that demonstrates the power of electromagnetism. This simple device uses a battery-powered electromagnet to attract small metal items like paper clips and staples, perfect for science fairs, STEM classrooms, or curious minds at home.
The term electric fishing rod can be misleading. Unlike motorized reels used in deep-sea fishing, this version isn’t for real angling. Instead, it’s a hands-on tool that teaches how electricity creates magnetism. When you complete the circuit, the nail at the end becomes a powerful temporary magnet, like a fishing hook that pulls in metal fish. This guide walks you through every step, from assembling the wooden base to testing your electromagnet.
Build the Wooden Base
The wooden base serves as the structural foundation for mounting all components. You’ll need a 12-inch long piece of wood, half an inch wide and three-quarters of an inch high. This simple frame holds the battery, the electromagnet, and the switch mechanism in place during operation.
Drill and Position Mounting Holes
Start by drilling a hole half an inch from one end of the wooden piece. Make this hole large enough to thread two insulated wires through. This hole will guide the wires from the electromagnet to the battery circuit.
Next, insert two screws into the wood at these positions:
- The first screw goes 3 inches from the non-drilled end
- The second screw is placed 4 inches from that same end
- Leave about one-quarter inch of each screw protruding
These exposed screw portions will act as connection points for the circuit.
Secure the Battery
Place a AA or D-cell battery on the base so its positive terminal faces toward the screws. Use electrical tape to firmly attach the battery to the wood. This keeps it stable during use and prevents loose connections.
Make sure the tape doesn’t cover the terminals completely. You will need access to connect wires. Positioning the positive end toward the screws ensures correct current flow when wiring the electromagnet coil.
Wind the Electromagnetic Coil

The electromagnet is the heart of your electric fishing rod. This component transforms electrical energy into magnetic force, allowing the device to attract metal objects. The coil wraps around a ferromagnetic core, creating a magnetic field when current flows through the wire.
Prepare the Nail Core
Use a two-and-a-half-inch iron nail as the core of your electromagnet. Iron works best because it amplifies magnetic fields when current flows through the wire. Avoid aluminum or coated nails because they won’t magnetize effectively.
Ensure the nail is clean and dry. Any rust or grease can reduce conductivity and weaken the magnetic effect.
Wrap the Copper Wire
Take a 41-inch length of insulated copper wire. Leave 7 inches unwound at one end with 2 inches of insulation stripped. Begin wrapping the wire tightly around the nail, starting from the head.
Wrap in a single layer, keeping coils close together without overlapping. Aim for uniform spacing because this maximizes magnetic efficiency. Stop when about 13 inches of wire remain at the other end, which should have only half an inch stripped.
More turns create a stronger magnet, but don’t sacrifice neatness. Loose or crossed wires increase resistance and reduce performance.
Wire the Circuit Correctly
Proper wiring ensures the electrical current flows through the coil to activate the magnetic field. The circuit connects the battery to the electromagnet through a manual switch mechanism.
Connect Negative Terminal
Thread the 7-inch end of the wire through the drilled hole in the base. Wrap the bare portion around the negative terminal of the battery and secure it with electrical tape. This creates a permanent connection to complete one side of the circuit.
Avoid letting the bare wire touch any metal parts besides the terminal. A short circuit could drain the battery quickly or cause overheating.
Attach Bottom Screw Connection
Now thread the 13-inch end of the wire through the same hole. Wrap the bare end around the bottom screw twice, starting where the insulation ends.
This screw acts as the ground connection point. The loop formed at the end of this wire will serve as your manual switch. Touching it to the top screw activates the magnet.
Create the Manual On/Off Switch
The switch mechanism controls when electricity flows through the circuit. This manual design gives you complete control over the magnetic field, allowing you to activate or deactivate it instantly.
Form the Activation Loop
Bend the free end of the wire attached to the bottom screw into a small U-shaped loop. This loop should easily make contact with the top screw when pressed down. It functions as your on button. Pressing it completes the circuit.
Ensure the loop is flexible but firm. If it’s too loose, it may not maintain contact. If it’s too tight, it won’t release easily.
Connect Top Screw Wire
Take the short 2-inch stripped end of the wire connected to the negative terminal and wrap it around the top screw twice. Then tape the other end of this wire to the battery near the positive side.
This setup creates an open circuit by default. Only when the loop touches the top screw does current flow through the coiled wire, energizing the nail.
Test the Electromagnet Function
Testing confirms your electric fishing rod works correctly. This verification step ensures all components are properly connected before you begin the fishing activity.
Activate the Magnetic Field
To test your electric fishing rod, press and hold the loop against the top screw. This closes the circuit, allowing current to flow from the battery, through the coil, and back via the screws.
Within seconds, the nail should become magnetized. Try picking up paper clips or staples. If successful, you have created a working electromagnet.
If nothing happens, check these common issues:
- Verify all wire connections are secure
- Ensure stripped ends are touching metal surfaces
- Confirm the battery is charged and properly oriented
Deactivate Safely
Release the loop to break the circuit. The magnetic field collapses instantly, dropping any attached metal objects. Never leave the circuit closed for more than 30 seconds because this prevents overheating and conserves battery life.
Let the device cool between uses. Prolonged activation can melt insulation or damage the battery.
Conduct the Fishing Activity
Now comes the fun part. Use your electric fishing rod to collect metal objects just like fishing for real fish. This activity reinforces cause-and-effect thinking and introduces concepts like magnetic strength and material properties.
Scatter Metal Fish
Lay out small ferromagnetic objects on a flat surface. Good options include:
- Paper clips
- Staples
- Steel washers
- Small nails
- Metal bottle caps
Avoid non-ferrous metals like aluminum cans or copper coins because they won’t be attracted. Use a tray or cardboard box to contain the items and simulate a fishing pond.
Try Magnetic Retrieval
Hold the electric fishing rod by the wooden base. Press the loop to activate the magnet and lower the nail toward a target object. Lift gently once contact is made.
Experiment with how many items you can pick up at once. Test whether stacking paper clips works. Discover if you can lift heavier objects like screws.
Explore STEM Concepts Behind the Rod
Building an electric fishing rod teaches fundamental physics principles that apply to real-world technology. Understanding these concepts transforms a simple project into meaningful learning.
Understand Electromagnetism Basics
This project demonstrates electromagnetism, the principle that electric current generates a magnetic field. When electrons flow through the coiled wire, they create a magnetic field around the nail.
The iron core enhances this field because its atomic domains align with the current, turning the nail into a strong temporary magnet. Turn off the current, and the domains randomize again. No more magnetism exists.
This same principle powers doorbells, speakers, and even maglev trains.
Learn About Circuit Design
Your electric fishing rod uses a simple series circuit containing four main components:
- Power source (battery)
- Conductor (copper wire)
- Load (electromagnet coil)
- Switch (manual loop)
Breaking any part stops the current. This teaches foundational electronics including continuity, polarity, and control mechanisms. Try drawing your circuit diagram to visualize the path of electricity.
Modify for Stronger Performance

Once your basic electric fishing rod works, experiment with modifications to increase magnetic strength. These changes help you understand how variables affect electromagnetic performance.
Increase Coil Turns
More wire turns around the nail generally mean a stronger magnetic field. Try using a longer nail or wrapping more layers if space allows.
But beware. Too many turns increase resistance, which can reduce current unless voltage is also increased. Test different winding densities and record how many paper clips each configuration lifts.
Add a Second Battery
Connect two batteries in series to double the voltage. This boosts current flow and strengthens the electromagnet.
To do this, tape two AA batteries end to end. Connect the free negative terminal to the original negative wire. Connect the free positive terminal to the top screw.
Caution. Higher voltage increases heat. Monitor temperature and limit activation time to 10 to 15 seconds.
Upgrade the Switch
Replace the manual loop with a push-button switch or toggle switch for safer, more reliable operation.
Mount the switch between the top screw and the battery. Now pressing a real button completes the circuit with no exposed wires needed. This upgrade improves durability and reduces risk of accidental shorts.
Identify What Won’t Work
Understanding limitations helps prevent frustration and teaches important science lessons about material properties.
Avoid Non-Ferrous Metals
Your electric fishing rod only attracts ferromagnetic materials containing iron, nickel, or cobalt. Common items that won’t stick include:
- Aluminum foil
- Copper wire
- Brass screws
- Gold or silver jewelry
- Plastic-coated metals
Use this as a teaching moment. Not all metals respond to magnets, even if they look similar.
Do Not Use in Water
Despite the name, this device cannot be used for real fishing. Submerging it risks short circuits, battery leakage, corrosion of metal parts, and electric shock hazard. Even freshwater conducts electricity enough to disrupt the circuit. Keep it dry and safe.
Follow Safety Best Practices
Safety should always be your top priority when building and using electrical projects. These guidelines ensure safe operation while learning valuable precautions.
Use Low-Voltage Power Only
Stick to AA, AAA, or D-cell batteries. These provide safe, low-current power ideal for learning projects.
Never use lithium-ion packs, car batteries, or wall outlets because these deliver dangerous levels of current that can cause fires or burns. If the wire feels warm, disconnect immediately and let it cool.
Supervise Young Builders
Children in grades 3 through 8 can build this project with adult supervision. Help them strip wires safely, handle screws and drills, avoid loose connections, and limit activation time.
Teach them to always disconnect the circuit when not in use.
Prevent Overheating
Never leave the electromagnet activated for more than 20 to 30 seconds. Extended use causes rapid battery drain, heat buildup in the coil, and potential insulation melt.
Make it a rule. One fish at a time, one second per try.
Connect to Real-World Tech
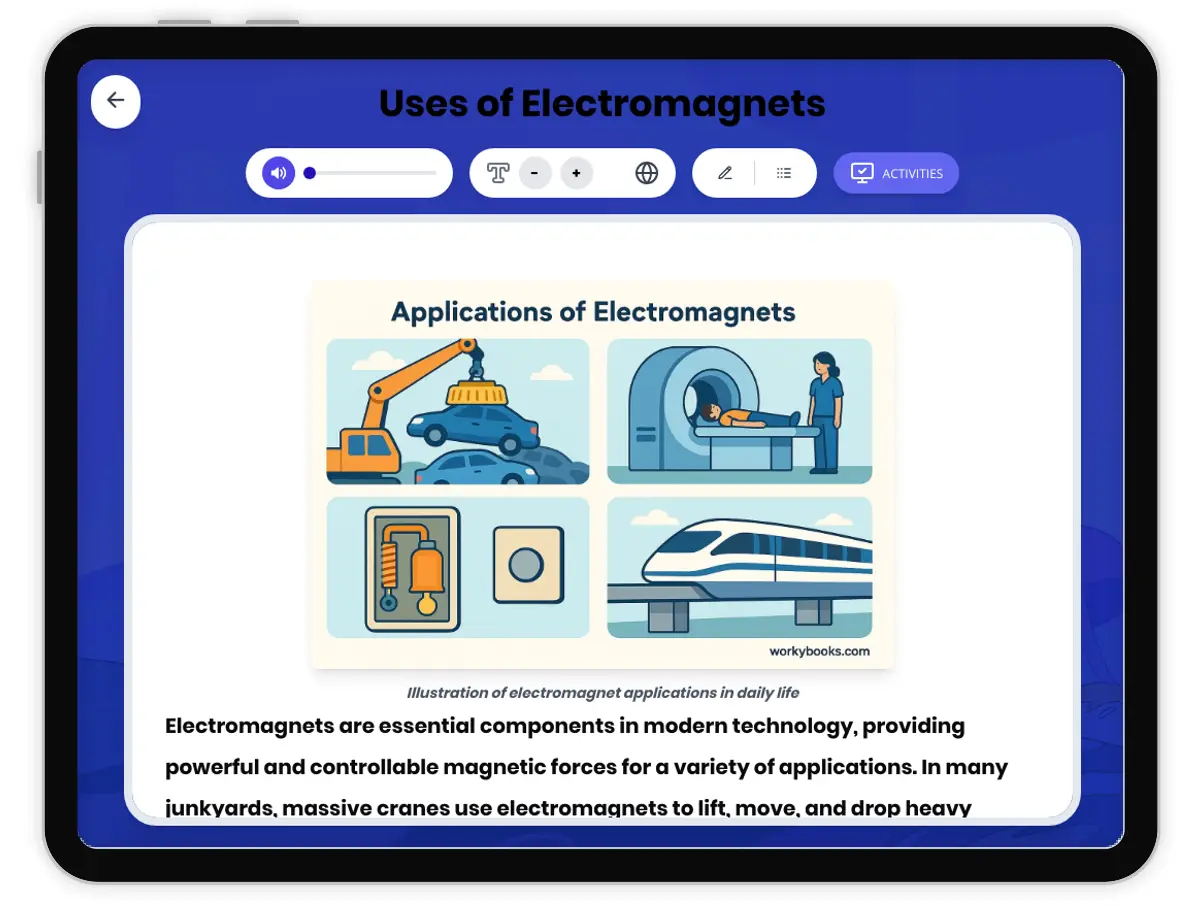
The same science behind your electric fishing rod powers countless real-world devices. Understanding this connection transforms a simple project into appreciation for everyday technology.
See Electromagnets in Action
Each of these devices relies on controllable magnetism just like your DIY rod:
- Scrapyard cranes lift entire cars
- MRI machines scan human tissue
- Electric motors power fans and drills
- Speakers convert electrical signals to sound
Explore Advanced Projects
Once you master the basics, try building a fingerprint-activated electromagnet like Thors Hammer from Marvel movies. Or create a magnetic lock for a secret box or a homemade relay switch. These take the same principles further, integrating sensors, microcontrollers, or security systems.
Troubleshoot Common Issues
Even well-built projects can experience problems. These troubleshooting tips help you identify and fix common issues quickly.
No Magnetic Response
If the nail doesn’t attract anything, check these items:
- Verify battery charge
- Confirm all connections are metal-to-metal
- Ensure the coil is continuous with no broken wire
- Confirm the nail is iron-based
Use a multimeter if available to test continuity.
Weak Attraction
If the magnet picks up only one paper clip, try these solutions:
- Add more coil turns
- Use two batteries in series
- Switch to a thicker iron core like a steel bolt
Also check for loose screws or frayed wires.
Switch Does Not Stay Closed
If the loop slips off the top screw, try these fixes:
- Tighten the screw slightly
- Bend the loop into a firmer shape
- Replace with a real push-button switch
A stable connection ensures consistent performance.
Frequently Asked Questions About Making an Electric Fishing Rod
How long does it take to build an electric fishing rod?
Most builders complete the project in 1 to 2 hours. The time depends on your experience with basic tools and your attention to detail when winding the coil.
What battery should I use for the best results?
A fresh AA or D-cell battery works well for this project. D-cell batteries last longer and provide slightly more power, while AA batteries are more compact and widely available.
Can I use a different metal instead of an iron nail?
Iron and steel work best because they have high magnetic permeability. Using aluminum or copper will result in little to no magnetic attraction. Stick with an iron nail for optimal performance.
Why does my electromagnet get warm?
Heat indicates excessive current flow or too many coil turns creating high resistance. Reduce activation time, use fewer turns, or try a lower voltage battery. Always disconnect immediately if the wire feels hot.
Can I use this electric fishing rod to pick up coins?
Most coins won’t stick because they are made from non-ferrous metals like copper, nickel, or zinc. Only coins containing iron or steel will be attracted. This varies by country and coin type.
What happens if I reverse the battery connections?
Reversing the polarity will still create a magnetic field, but the north and south poles will swap positions. The electromagnet will still work, just with reversed polarity.
Key Takeaways for Building Your Electric Fishing Rod
Building an electric fishing rod is a rewarding STEM project that demonstrates electromagnetism in action. The key components include a wooden base, an iron nail core, insulated copper wire, and a battery. Winding the coil correctly and creating a proper switch mechanism are essential for functionality.
Remember to keep activation times short to prevent overheating. Experiment with modifications like additional coil turns or multiple batteries to increase magnetic strength. Always prioritize safety by using low-voltage batteries and supervising younger builders.
This project isn’t for catching real fish, but it catches something equally valuable: curiosity and understanding of the physics that power everyday technology. Now that you have built your electric fishing rod, test different materials, modify the design, and discover the fascinating world of electromagnetism.